“Why pay more?” Or the hemisphere life hack for GoPro
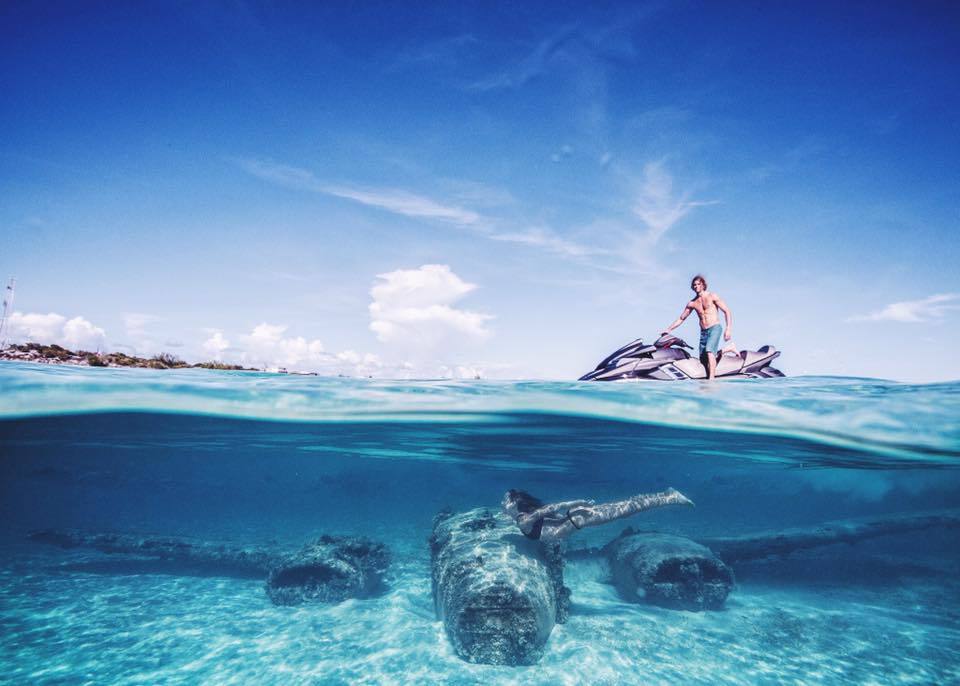
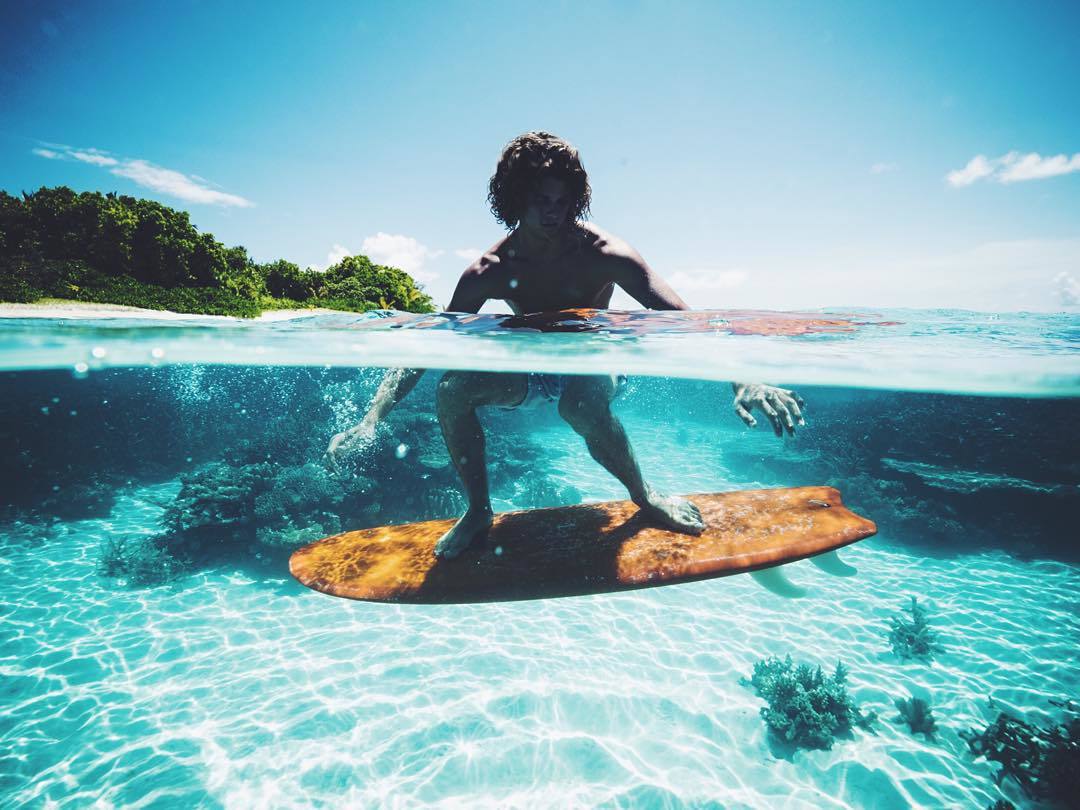
Hello. Today, under the heading “collective farm at home,” we will learn how to make such wonderful photos with Gopro. I think for the first time, when each of us saw such pictures on the Internet, they immediately wanted a GoPro!
However, we raised money, bought a camera, went swimming, but we didn’t get such pictures. “Again, a marketing ploy, probably, and in general this is not GoPro,” we thought. However, if you look into this matter, then everything is quite simple.
When we lower the camera into the “section” of water, then in the picture we see a huge blurred border of this water. And in the end, everything that is above and below simply overlaps this border. In addition, it turns out to be too close to the camera lens, (closer than the focus area of the camera) and therefore looks blurry and “large”. To create “beautiful photos” we just need to move this border away from the lens. In other words, create an “air gap” between the lens and the water.
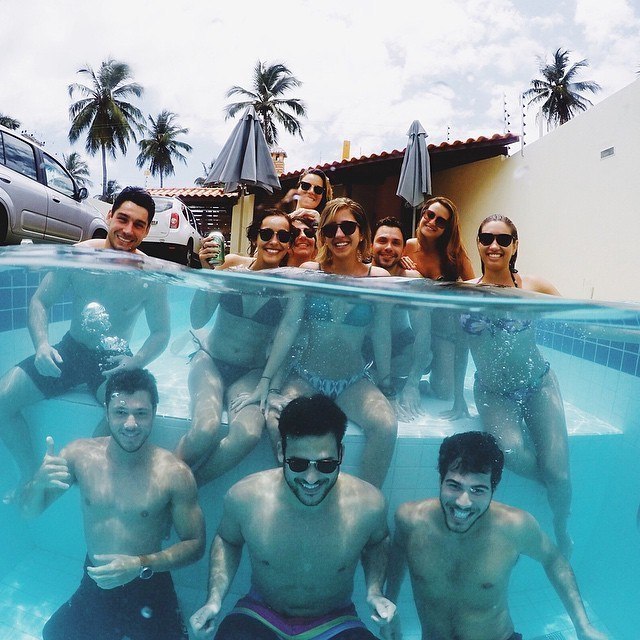
To create such an “effect” they came up with such a “hemisphere”.
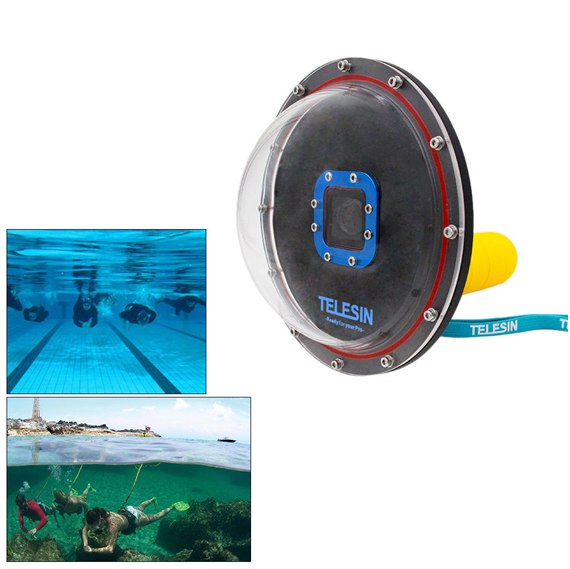
As a result, we see a thin border of water, and all objects above and below the water are clear, as they are in the focus area of the camera.
In essence, here is the solution. However, following the link ( *), we see that the cost of such a “hemisphere” is quite large for a piece of plastic and a pair of screws. And again, wait from China.
Is there a way out of this situation? Well, of course there is. After all, the collective farm has not yet been canceled. :)
And so, here's what we need:
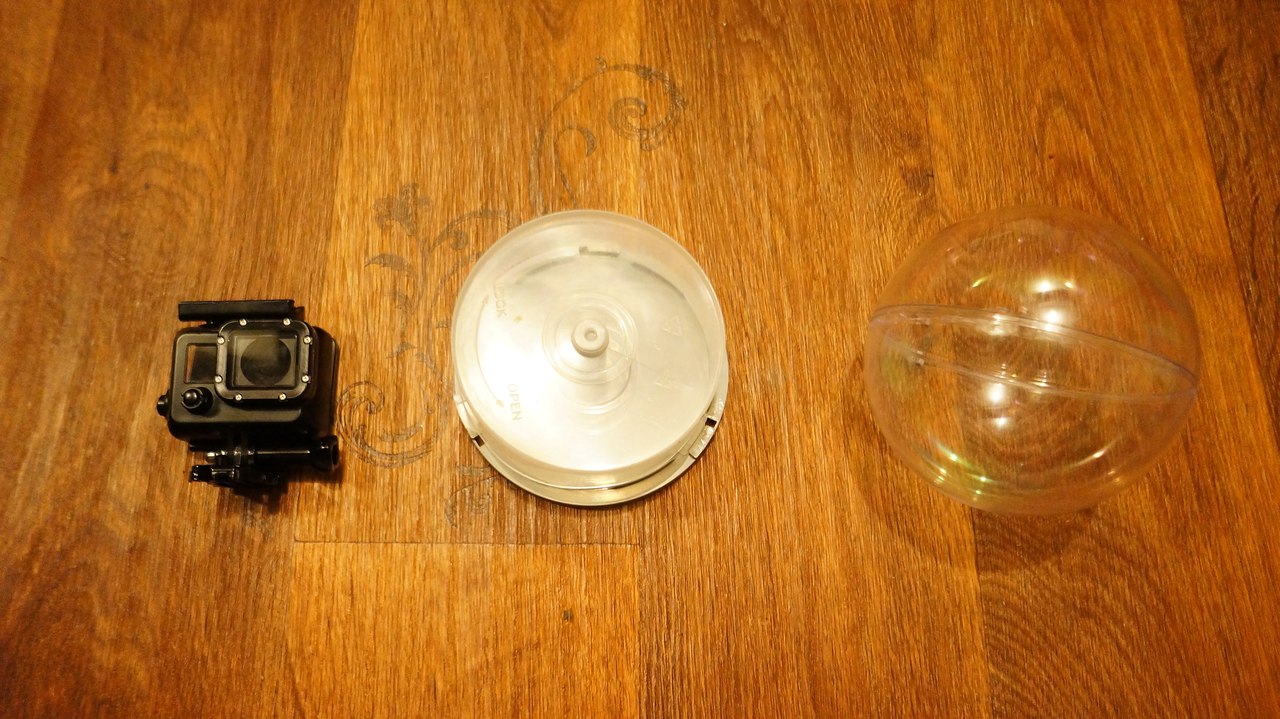
1) Boxing from GoPro itself (for this I bought an additional non-original box ( * ). Black is just a show off). I just decided that I want one. It cost me about 450 rubles (I advise you nevertheless to take a box from the 4th version ( * )).
2) A box from under the disks. More precisely, the base itself from this box (resp. Got it for free when buying drives).
3) Ball for decoupage. This is probably the hardest thing to find. These balls are sold in needlework stores. Well, where all sorts of beads, etc. Absolutely by chance I discovered it and immediately decided to buy it. It consists of two identical halves. The diameter is about 13.5 cm (bought it for 150 rubles).
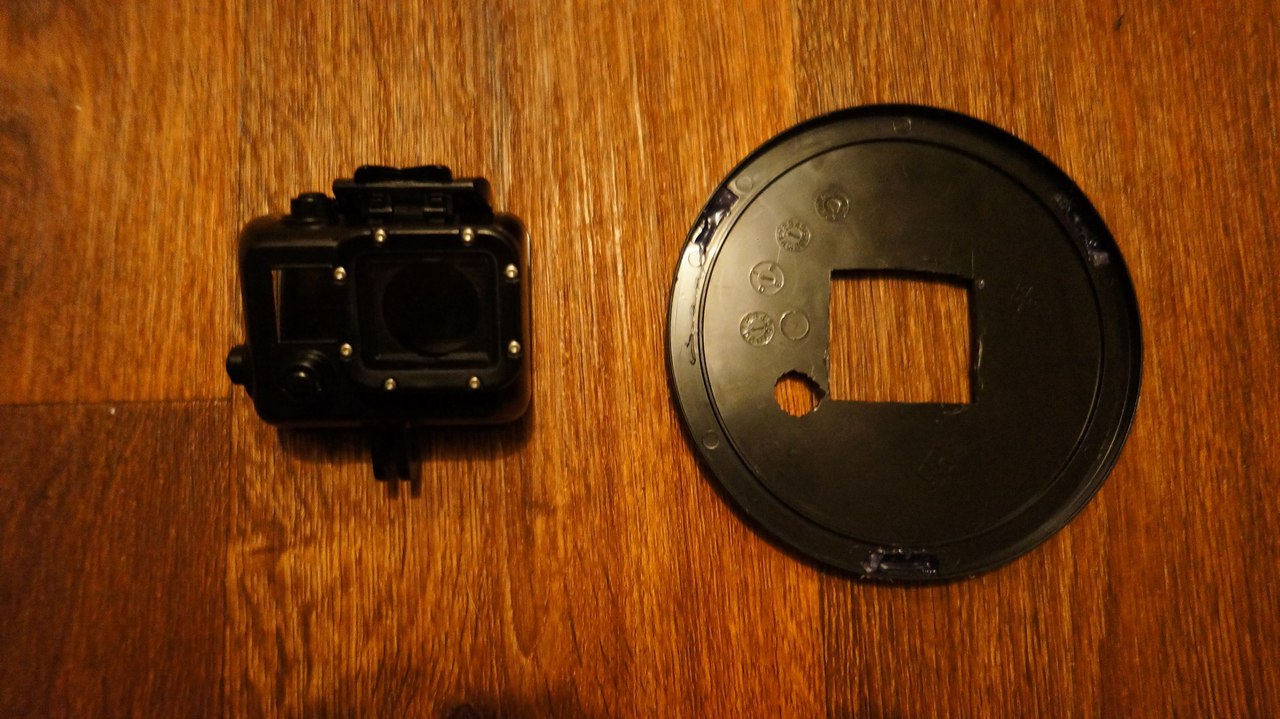
At the base of the box, it is necessary to cut holes for the “box lens housing” and for the button.
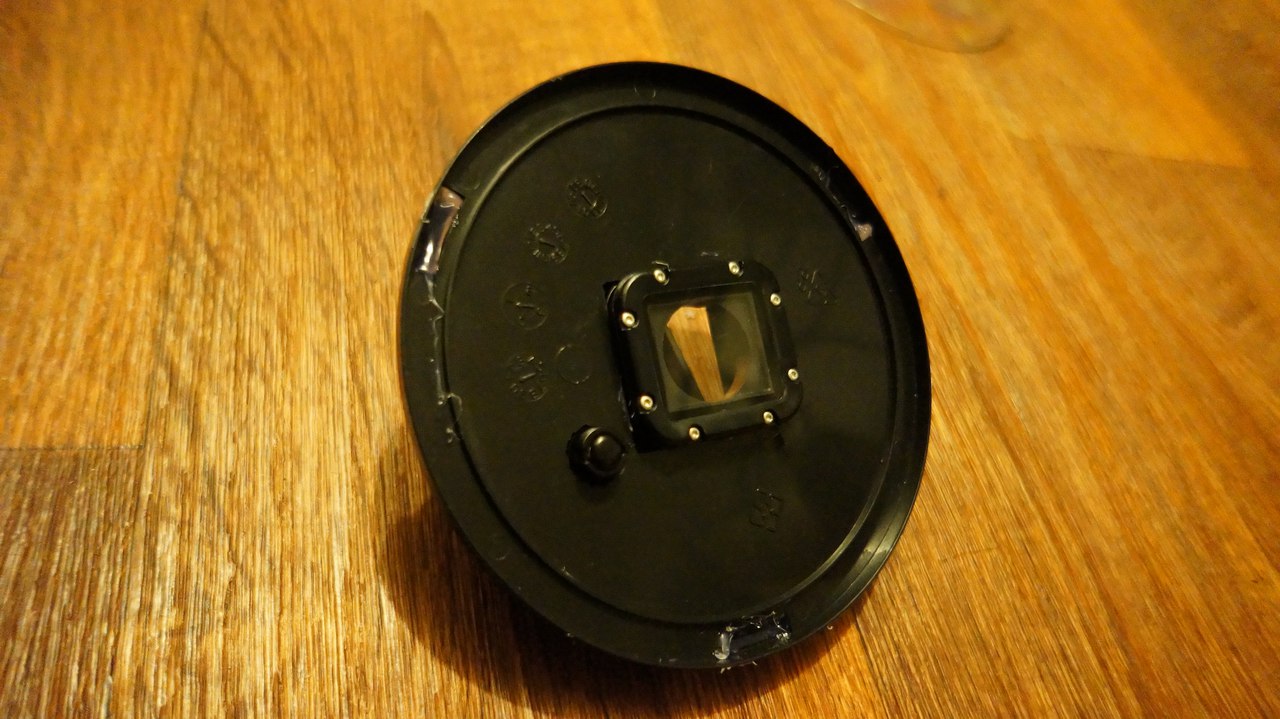
By an absolutely strange set of circumstances, the diameter of the lower part of the base of the box ideally coincides with the diameter of this ball. Gets up like a glove).
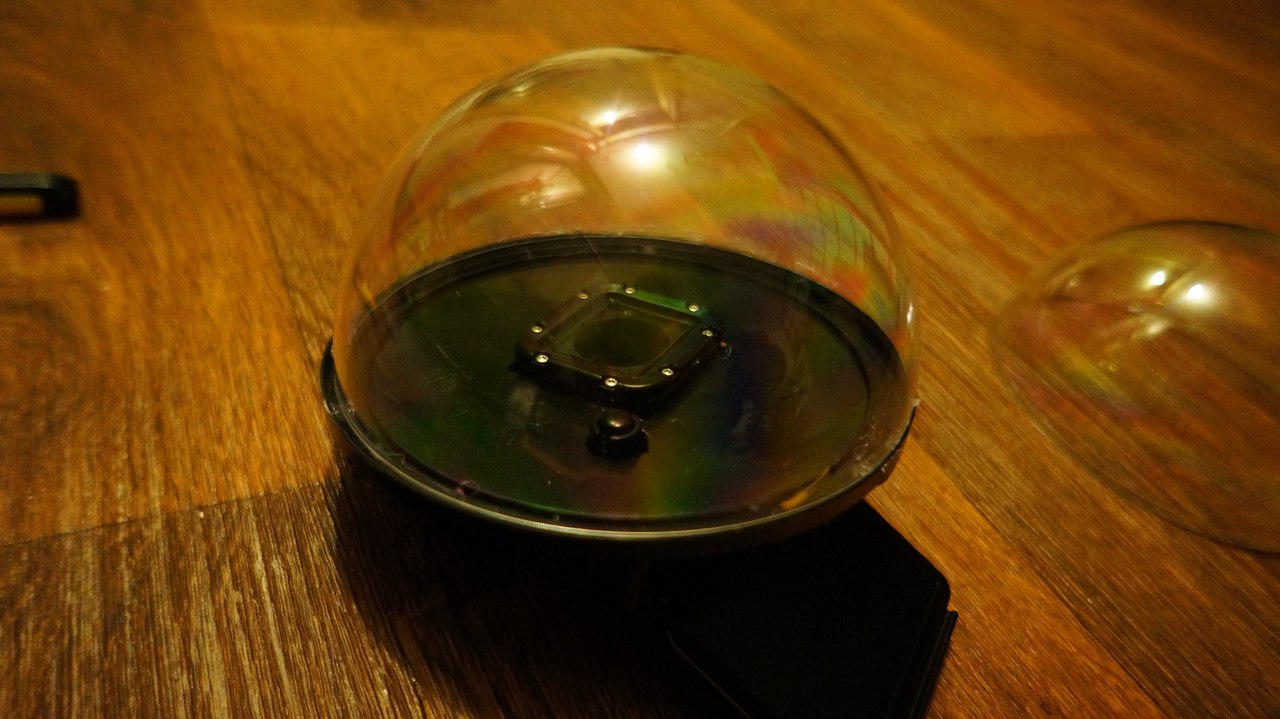
Next, glue to fill all the gaps that are possible.
I did this with a glue gun. By the way, the glue should be flexible. Therefore, super glue will not work.
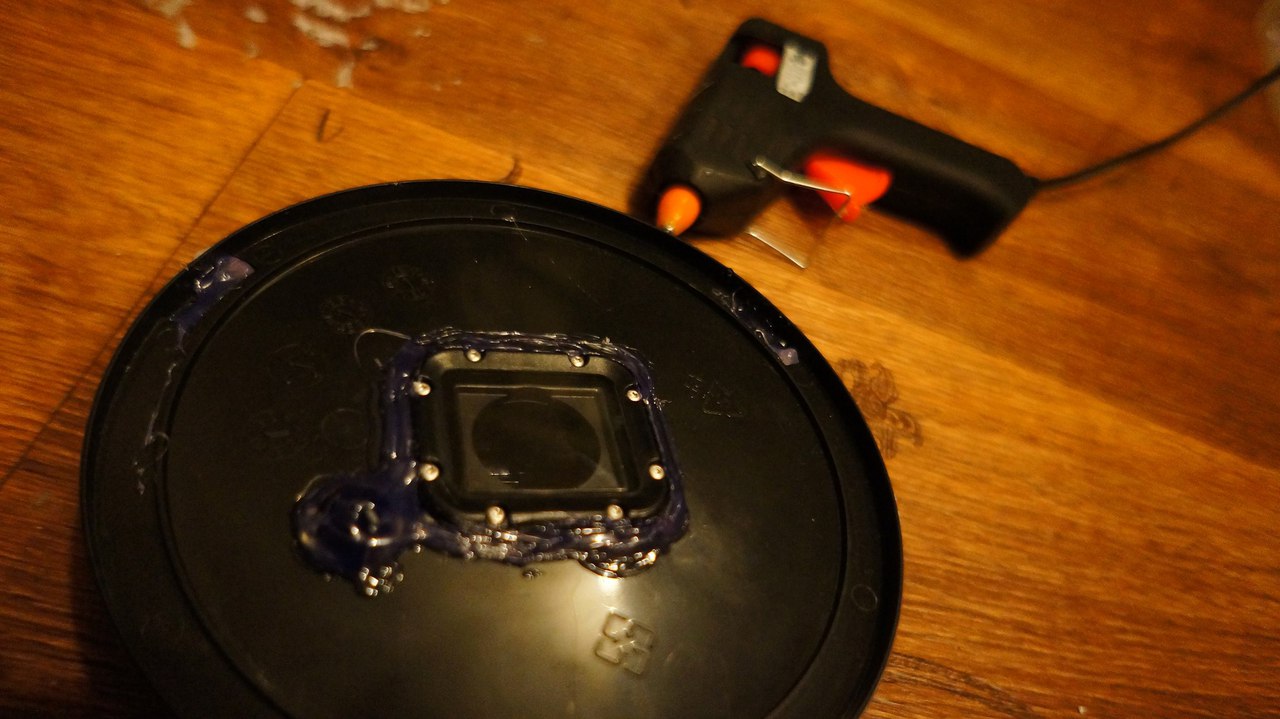
In addition, it is not always possible to glue the box frame on the back side either, so I just filled the entire box around the perimeter.
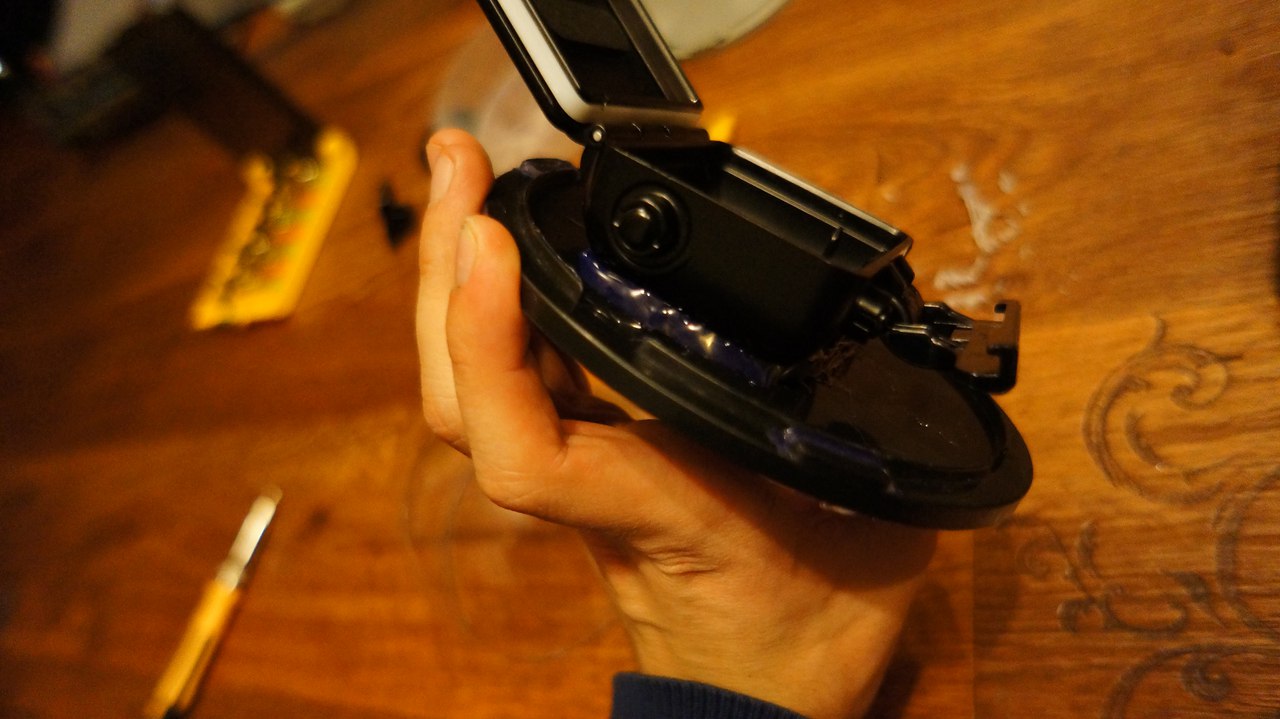
In the same way, put the hemisphere in place and fill it around the perimeter.
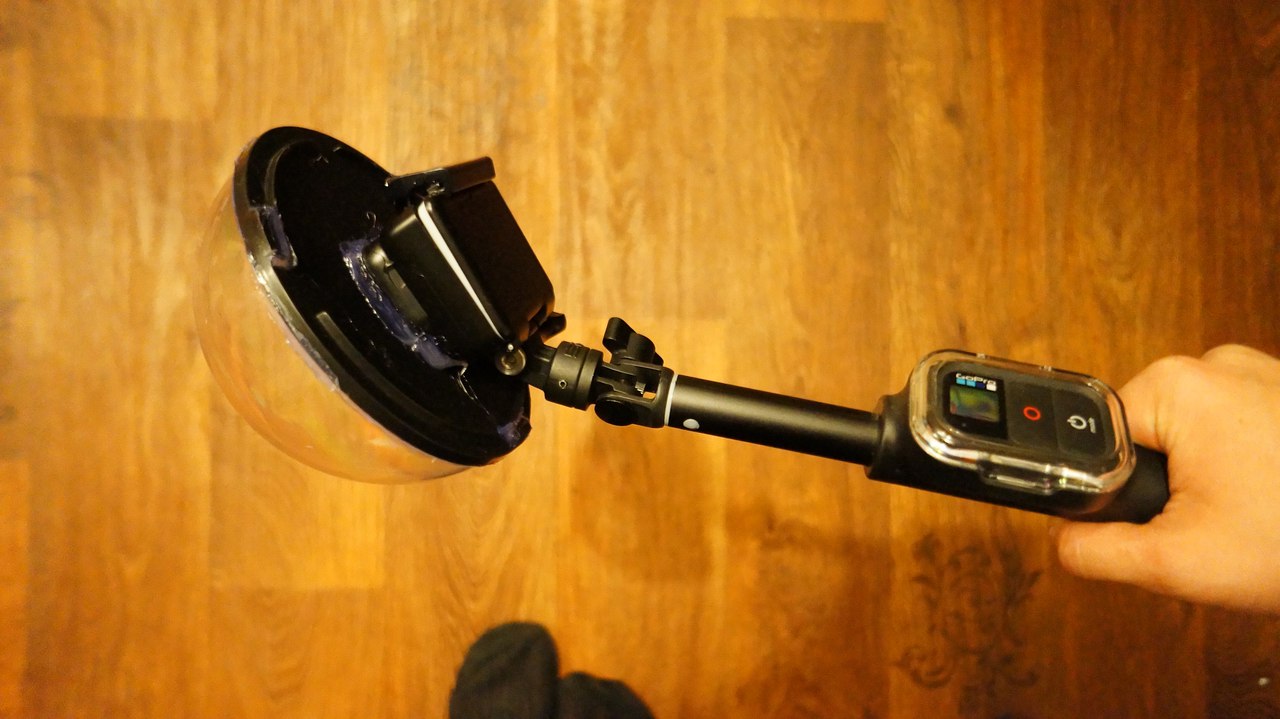
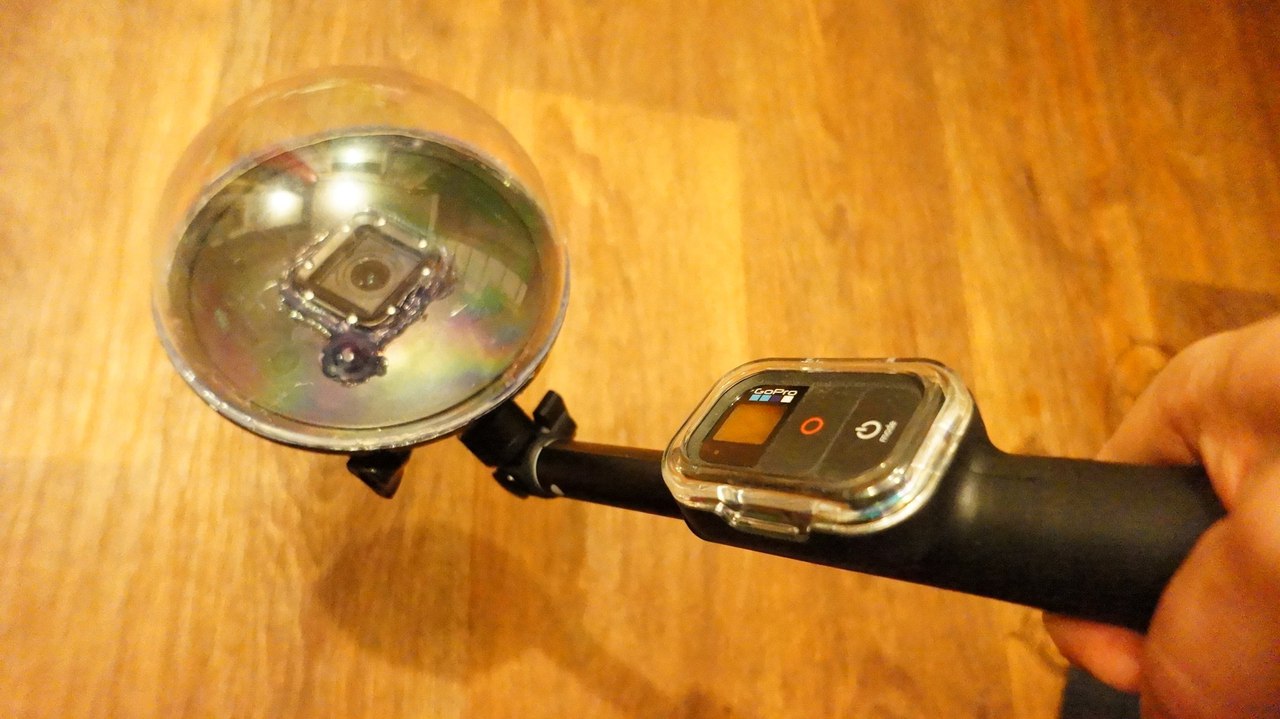
Then connect the camera via wifi and insert it into the box. Voila! All is ready.
And now the most important thing! The first tests! .. Oh yes, it's cold right now, and the swimming season is not soon ... So you have to take my word for it and try to make such a thing yourself. As a result, I paid about 700 rubles for everything. But still not 5-6 thousand rubles. Therefore, good luck and direct hands. :)
That's all, with you there was a simple service for choosing complex Dronk.Ru equipment .
Do not forget to subscribe to our blog , there will be many more interesting things.
ps * ref - you can save extra money by returning the cashback up to 4%. More details at Dronk.ru/cashback/ or you can get 6.5% by purchasing them through the LetyShops cashback service .
Our other publications:

However, we raised money, bought a camera, went swimming, but we didn’t get such pictures. “Again, a marketing ploy, probably, and in general this is not GoPro,” we thought. However, if you look into this matter, then everything is quite simple.

When we lower the camera into the “section” of water, then in the picture we see a huge blurred border of this water. And in the end, everything that is above and below simply overlaps this border. In addition, it turns out to be too close to the camera lens, (closer than the focus area of the camera) and therefore looks blurry and “large”. To create “beautiful photos” we just need to move this border away from the lens. In other words, create an “air gap” between the lens and the water.

To create such an “effect” they came up with such a “hemisphere”.

As a result, we see a thin border of water, and all objects above and below the water are clear, as they are in the focus area of the camera.
In essence, here is the solution. However, following the link ( *), we see that the cost of such a “hemisphere” is quite large for a piece of plastic and a pair of screws. And again, wait from China.
Is there a way out of this situation? Well, of course there is. After all, the collective farm has not yet been canceled. :)
And so, here's what we need:

1) Boxing from GoPro itself (for this I bought an additional non-original box ( * ). Black is just a show off). I just decided that I want one. It cost me about 450 rubles (I advise you nevertheless to take a box from the 4th version ( * )).
2) A box from under the disks. More precisely, the base itself from this box (resp. Got it for free when buying drives).
3) Ball for decoupage. This is probably the hardest thing to find. These balls are sold in needlework stores. Well, where all sorts of beads, etc. Absolutely by chance I discovered it and immediately decided to buy it. It consists of two identical halves. The diameter is about 13.5 cm (bought it for 150 rubles).

At the base of the box, it is necessary to cut holes for the “box lens housing” and for the button.

By an absolutely strange set of circumstances, the diameter of the lower part of the base of the box ideally coincides with the diameter of this ball. Gets up like a glove).

Next, glue to fill all the gaps that are possible.
I did this with a glue gun. By the way, the glue should be flexible. Therefore, super glue will not work.

In addition, it is not always possible to glue the box frame on the back side either, so I just filled the entire box around the perimeter.

In the same way, put the hemisphere in place and fill it around the perimeter.


Then connect the camera via wifi and insert it into the box. Voila! All is ready.
And now the most important thing! The first tests! .. Oh yes, it's cold right now, and the swimming season is not soon ... So you have to take my word for it and try to make such a thing yourself. As a result, I paid about 700 rubles for everything. But still not 5-6 thousand rubles. Therefore, good luck and direct hands. :)

PS Thinking a little, that's what I got. :)

That's all, with you there was a simple service for choosing complex Dronk.Ru equipment .
Do not forget to subscribe to our blog , there will be many more interesting things.
ps * ref - you can save extra money by returning the cashback up to 4%. More details at Dronk.ru/cashback/ or you can get 6.5% by purchasing them through the LetyShops cashback service .
Our other publications:
- Chuwi Ilife V5 - a $ 99 robot vacuum cleaner or how to turn daily cleaning into fun
- Great quadrocopter under $ 60 or a review of the JJRC H8C
- What to give a boom for the New Year in the range of 10-20 $? Part 2
- Our small joys or how to please a geek for the new year within $ 10-20?
- The world's first pocket hexacopter for $ 18 - MJX X901
- Are there real discounts on gadgets or what does AliExpress bring to us?

