VR Platform Compliance Notes

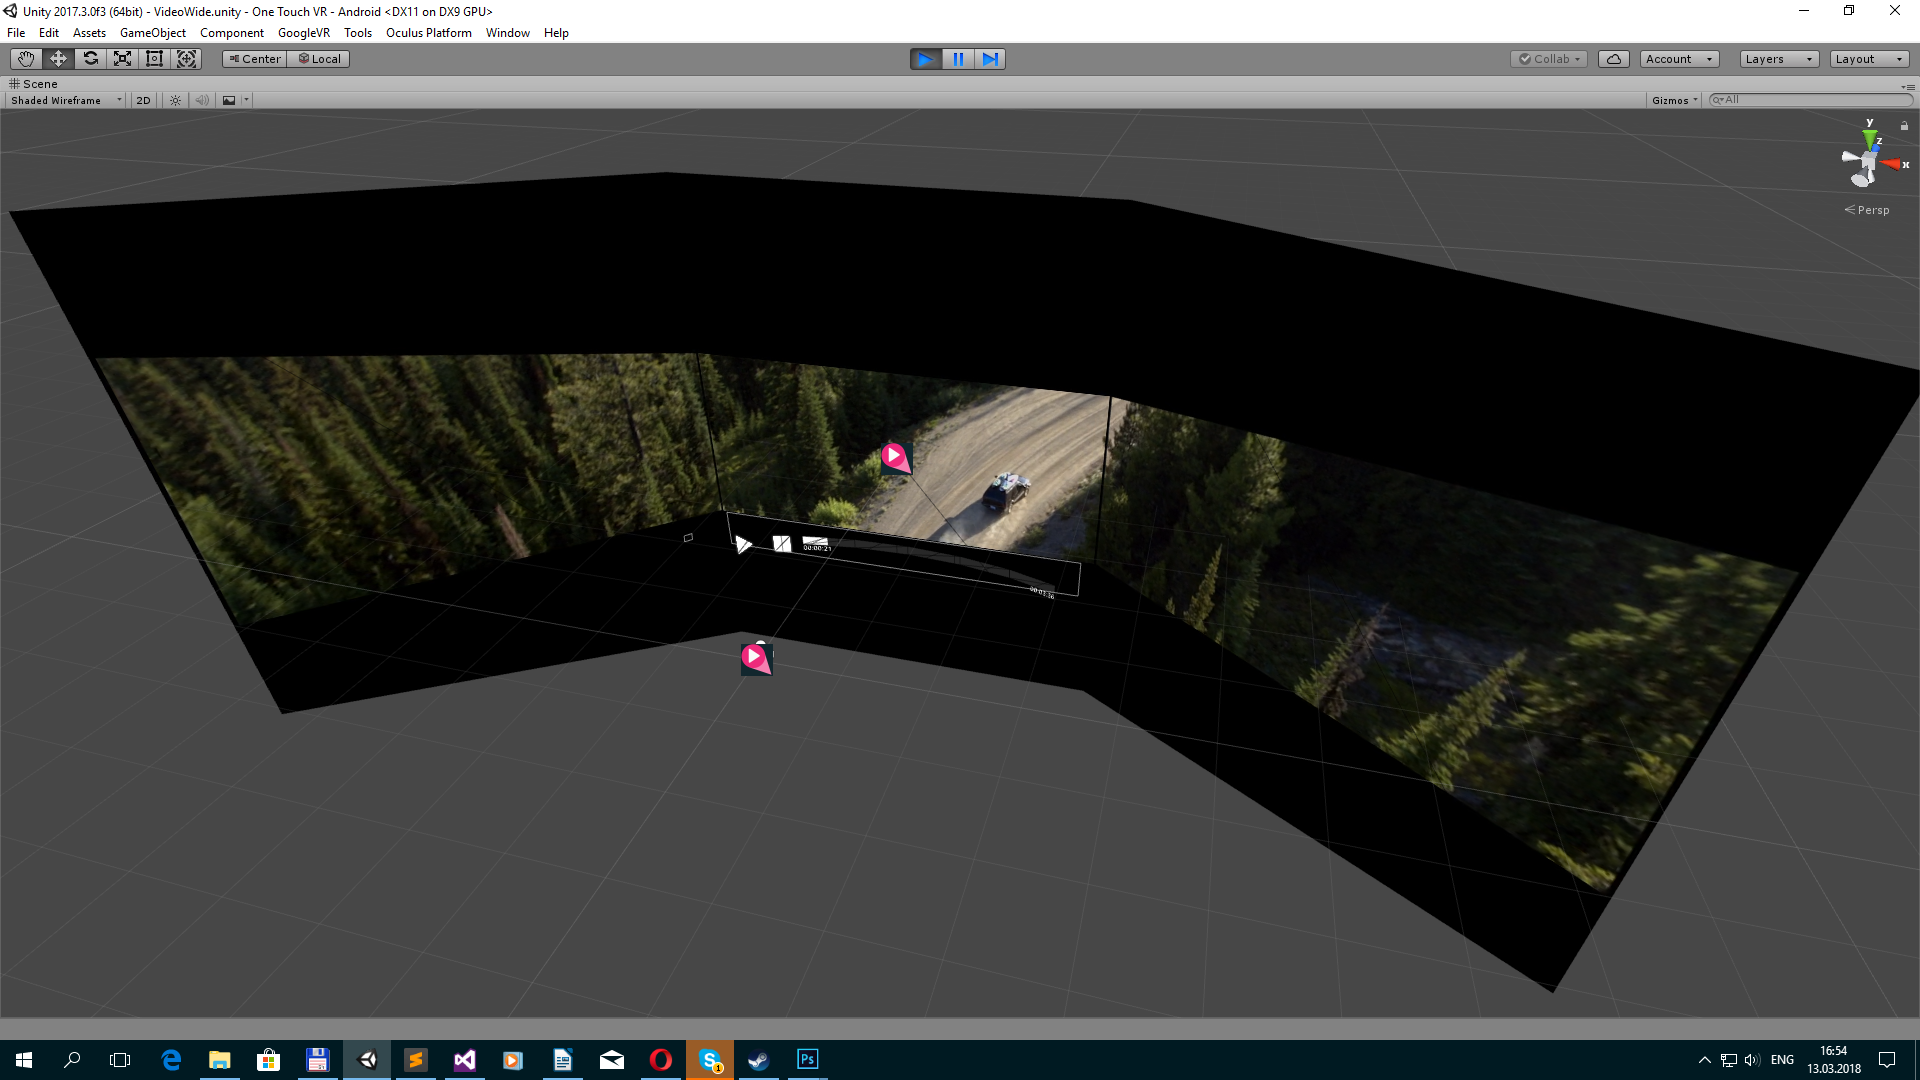
In this article, I would like to share with you small solutions that I used in developing an entertainment application for several VR platforms. The application itself is a video player (360 / 4K, FullHD / 2D, 2K / 3-Screen, streaming a video stream, uploading to a file for offline playback). The application menu is made in stylized 3D scenes for a specific movie. 3-Screen is a Barco Escape format where video consists of three screens.
I needed to develop applications for platforms:
- Oculus rift
- Oculus / Samsung GearVR
- Steam HTC Vive
- Google daydream
- iOS Cardboard
- Viveport HTC Vive
Testing Equipment:
- Samsung S6 (as minimum for GearVR)
- PC-desktop: i5-4590 / 8Gb / nVidia 970 (Oculus Rift / HTC Vive)
- Samsung S8 (for Google Daydream)
- iPhone 7 (for iOS)
Optimization
The requirements are best served by the Rift Virtual Reality Check (VRC) Guidelines and Mobile Virtual Reality Check (VRC) Guidelines - as the most demanding of hardware. If you go through a review in Oculus then you will not have questions about performance on other platforms. The application should work stably for 45 minutes with a performance of 60 fps on GearVR and a performance of 90 fps on Rift. To begin with, you can fasten the self-written frame counter and show under the gun:
Fpscounter
using UnityEngine;
using UnityEngine.UI;
public class FPSCounter : MonoBehaviour
{
    public float updateInterval = 0.5F;
    public string tOut;
    public Text text;
    private float accum = 0f; // FPS accumulated over the interval
    private int frames = 0; // Frames drawn over the interval
    private float timeleft = 0f; // Left time for current interval
    private void Start()
    {
        timeleft = updateInterval;
    }
    private void Update()
    {
        timeleft -= Time.deltaTime;
        accum += Time.timeScale / Time.deltaTime;
        ++frames;
        if (timeleft <= 0.0)
        {
            float fps = accum / frames;
            tOut = string.Format("{0:F0} FPS", fps);
            timeleft = updateInterval;
            accum = 0f;
            frames = 0;
        }
        if (text != null)
        {
            text.text = tOut;
        }
    }
}
But it’s better to use the Oculus Debug Tool , where statistics will be taken and drawn in real time on top of the application on the chart — utilities exist for both mobile devices and desktop (works with HTC Vive): by following

standard rules, we managed to achieve proper performance :
- minimum polygons
- baking light and reflections in textures (camera does not imply movement)
- avoid transparency
- avoid multi-materials
- avoid overloaded shaders
- periodically test on devices right in the process of modeling the scene

When a 2D video is played on the stage, it is "projected" onto the screen, from which a glow is supposed.

To do this, I had to write a special shader. The material has a standard Diffuse texture, one texture of lighting from the "sun", another texture of lighting from the "screen", the lighting mixing parameter and the average color of the screen (reduced texture of the video frame). At the beginning of playback, there is a smooth mixing from daylight to screen, and then each video frame is compressed to one color, which paints the lighting.

Shader colorlightmap
Shader "Onix/Unlit/ColorLightmap"
{
    Properties
    {
        _Diffuse("Diffuse", 2D) = "white" {}
        [HideInInspector] _texcoord( "", 2D ) = "white" {}
        _LightmapWhite("LightmapWhite", 2D) = "white" {}
        [HideInInspector] _texcoord2( "", 2D ) = "white" {}
        _LightmapDark("LightmapDark", 2D) = "white" {}
        _LightColor("LightColor", 2D) = "white" {}
        _LightValue("LightValue", Range( 0 , 1)) = 0
    }
    SubShader
    {
        Tags { "RenderType"="Opaque" "LightMode" = "ForwardBase" }
        LOD 100
        Cull Off
        Pass
        {
            CGPROGRAM
            #pragma target 3.0
            #pragma vertex vert
            #pragma fragment frag
            #include "UnityCG.cginc"
            struct appdata
            {
                float4 vertex : POSITION;
                float4 texcoord : TEXCOORD0;
                float4 texcoord1 : TEXCOORD1;
                UNITY_VERTEX_INPUT_INSTANCE_ID
            };
            struct v2f
            {
                float4 vertex : SV_POSITION;
                float4 texcoord : TEXCOORD0;
                float4 lightColor : COLOR;
                UNITY_VERTEX_OUTPUT_STEREO
            };
            uniform sampler2D _Diffuse;
            uniform float4 _Diffuse_ST;
            uniform sampler2D _LightmapWhite;
            uniform float4 _LightmapWhite_ST;
            uniform sampler2D _LightmapDark;
            uniform float4 _LightmapDark_ST;
            uniform sampler2D _LightColor;
            uniform float _LightValue;
            v2f vert ( appdata v )
            {
                v2f o;
                UNITY_SETUP_INSTANCE_ID(v);
                UNITY_INITIALIZE_VERTEX_OUTPUT_STEREO(o);
                o.texcoord.xy = v.texcoord.xy;
                o.texcoord.zw = v.texcoord1.xy;
                // ase common template code
                o.vertex.xyz +=  float3(0,0,0) ;
                o.vertex = UnityObjectToClipPos(v.vertex);
                o.lightColor = tex2Dlod(_LightColor, float4(0.5, 0.5, 0, 16.0));
                return o;
            }
            fixed4 frag (v2f i ) : SV_Target
            {
                fixed4 myColorVar;
                // ase common template code
                float2 uv_Diffuse = i.texcoord.xy * _Diffuse_ST.xy + _Diffuse_ST.zw;
                float2 uv2_LightmapWhite = i.texcoord.zw * _LightmapWhite_ST.xy + _LightmapWhite_ST.zw;
                float2 uv2_LightmapDark = i.texcoord.zw * _LightmapDark_ST.xy + _LightmapDark_ST.zw;
                float4 lerpResult4 = lerp( tex2D( _LightmapWhite, uv2_LightmapWhite ) , ( tex2D( _LightmapDark, uv2_LightmapDark ) * i.lightColor) , _LightValue);
                float4 blendOpSrc10 = tex2D( _Diffuse, uv_Diffuse );
                float4 blendOpDest10 = lerpResult4;
                myColorVar = ( saturate( ( blendOpDest10 > 0.5 ? ( 1.0 - ( 1.0 - 2.0 * ( blendOpDest10 - 0.5 ) ) * ( 1.0 - blendOpSrc10 ) ) : ( 2.0 * blendOpDest10 * blendOpSrc10 ) ) ));
                return myColorVar;
            }
            ENDCG
        }
    }
    CustomEditor "ASEMaterialInspector"
}
The texture from the frame is the fastest to get and scale using RenderTexture and Graphics.Blit:
Frame scaling
Texture texture = subPlayer.TextureProducer.GetTexture();
if (texture != null)
{
    if (_videoFrame == null)
    {
        _videoFrame = new RenderTexture(32, 32, 0, RenderTextureFormat.ARGB32);
        _videoFrame.useMipMap = true;
        _videoFrame.autoGenerateMips = true;
        _videoFrame.Create();
    }
    _videoFrame.DiscardContents();
    // blit to RT so we can average over some pixels
    Graphics.Blit(texture, _videoFrame);
}
Smoothing
If your picture is still “pixelated” - you need to apply anti-aliasing, enable mipmaps. You can also use ResolutionScale for supported devices:
ResolutionScale
if (OVRPlugin.tiledMultiResSupported)
{
    UnityEngine.XR.XRSettings.eyeTextureResolutionScale = 1.2f;
    OVRPlugin.tiledMultiResLevel = OVRPlugin.TiledMultiResLevel.LMSMedium;
}
else
{
    UnityEngine.XR.XRSettings.eyeTextureResolutionScale = 1.1f;
}
For antialiasing on a font in the UI, you can use a shader:
Shader AAFont
Shader "UI/AAFont"
{
    Properties
    {
        [PerRendererData] _MainTex("Sprite Texture", 2D) = "white" {}
    _Color("Tint", Color) = (1,1,1,1)
        _StencilComp("Stencil Comparison", Float) = 8
        _Stencil("Stencil ID", Float) = 0
        _StencilOp("Stencil Operation", Float) = 0
        _StencilWriteMask("Stencil Write Mask", Float) = 255
        _StencilReadMask("Stencil Read Mask", Float) = 255
        _ColorMask("Color Mask", Float) = 15
        [Toggle(UNITY_UI_ALPHACLIP)] _UseUIAlphaClip("Use Alpha Clip", Float) = 0
    }
        SubShader
    {
        Tags
    {
        "Queue" = "Transparent"
        "IgnoreProjector" = "True"
        "RenderType" = "Transparent"
        "PreviewType" = "Plane"
        "CanUseSpriteAtlas" = "True"
    }
        Stencil
    {
        Ref[_Stencil]
        Comp[_StencilComp]
        Pass[_StencilOp]
        ReadMask[_StencilReadMask]
        WriteMask[_StencilWriteMask]
    }
        Cull Off
        Lighting Off
        ZWrite Off
        ZTest[unity_GUIZTestMode]
        Blend SrcAlpha OneMinusSrcAlpha
        ColorMask[_ColorMask]
        Pass
    {
        Name "Default"
        CGPROGRAM
#pragma vertex vert
#pragma fragment frag
#pragma target 2.0
#include "UnityCG.cginc"
#include "UnityUI.cginc"
#pragma multi_compile __ UNITY_UI_CLIP_RECT
#pragma multi_compile __ UNITY_UI_ALPHACLIP
        struct appdata_t
    {
        float4 vertex   : POSITION;
        float4 color    : COLOR;
        float2 texcoord : TEXCOORD0;
        UNITY_VERTEX_INPUT_INSTANCE_ID
    };
    struct v2f
    {
        float4 vertex   : SV_POSITION;
        fixed4 color : COLOR;
        float2 texcoord  : TEXCOORD0;
        float4 worldPosition : TEXCOORD1;
        UNITY_VERTEX_OUTPUT_STEREO
    };
    fixed4 _Color;
    fixed4 _TextureSampleAdd;
    float4 _ClipRect;
    v2f vert(appdata_t v)
    {
        v2f OUT;
        UNITY_SETUP_INSTANCE_ID(v);
        UNITY_INITIALIZE_VERTEX_OUTPUT_STEREO(OUT);
        OUT.worldPosition = v.vertex;
        OUT.vertex = UnityObjectToClipPos(OUT.worldPosition);
        OUT.texcoord = v.texcoord;
        OUT.color = v.color * _Color;
        return OUT;
    }
    sampler2D _MainTex;
    fixed4 frag(v2f IN) : SV_Target
    {
        float2 dx = ddx(IN.texcoord) * 0.25;
        float2 dy = ddy(IN.texcoord) * 0.25;
        float4 tex0 = tex2D(_MainTex, IN.texcoord + dx + dy);
        float4 tex1 = tex2D(_MainTex, IN.texcoord + dx - dy);
        float4 tex2 = tex2D(_MainTex, IN.texcoord - dx + dy);
        float4 tex3 = tex2D(_MainTex, IN.texcoord - dx - dy);
        float4 tex = (tex0 + tex1 + tex2 + tex3) * 0.25;
        half4 color = (tex + _TextureSampleAdd) * IN.color;
#ifdef UNITY_UI_CLIP_RECT
        color.a *= UnityGet2DClipping(IN.worldPosition.xy, _ClipRect);
#endif
#ifdef UNITY_UI_ALPHACLIP
        clip(color.a - 0.001);
#endif
        return color;
    }
        ENDCG
    }
    }
}
User interface
The CurvedUI plugin does an excellent job of quickly switching input methods on different VR platforms, and also allows you to bend the canvas to a more curved shape for VR (it's a pity that it breaks Dynamic batching).

Playing video
Not so long ago, Unity improved and fixed many of the shortcomings of its Video Player. Although its ease of use, compatibility with different platforms and performance have improved, it’s not enough to use it in the current application (due to problems with large file support, performance, codec support, video streaming). After trying many different solutions, I settled on AVProVideo . He is the only one who could ensure proper performance, both on mobile devices and on desktop solutions.
Before publishing, be sure to install Hardware Decoding. To build Oculus Rift, you must install Use Unity Audio and add the Audio Output component - this way the user will hear the audio in the VR headset, and not in the default Windows device (some users may have non-standard configurations).

360 videos are played on a sphere around the user, 3-Screen on a 3-plane mesh.
Upload files
You can upload files using WebClient and, in practice, standard methods.
Download file
private void DownloadFile()
{
    ServicePointManager.ServerCertificateValidationCallback = MyRemoteCertificateValidationCallback;
    _webClient = new WebClient();
    _webClient.DownloadFileCompleted += new System.ComponentModel.AsyncCompletedEventHandler(AsyncCallDownloadComplete);
    _webClient.DownloadProgressChanged += new DownloadProgressChangedEventHandler(AsyncCallDownloadProgress);
    _webClient.DownloadFileAsync(new Uri(videoData.path), _lclPath);
    _isDownloading = true;
}
private void AsyncCallDownloadComplete(object sender, System.ComponentModel.AsyncCompletedEventArgs e)
{
    _isDownloading = false;
    if (e.Error == null)
    {
        _dwnloadProgress = 1f;
    }
    else
    {
        _dwnloadProgress = 0f;
        File.Delete(_lclPath);
        Debug.Log(e.Error.Message);
    }
}
private void AsyncCallDownloadProgress(object sender, DownloadProgressChangedEventArgs e)
{
    _dwnloadProgress = (float)e.ProgressPercentage / 100f;
    if (e.ProgressPercentage == 100)
    {
        _isDownloading = false;
        _dwnloadProgress = 1f;
    }
}
Additionally, you may need to verify the certificate:
Remote Certificate Validation
using System.Net;
using System.Net.Security;
using System.Security.Cryptography.X509Certificates;
//To validate SSL certificates
public static bool MyRemoteCertificateValidationCallback(System.Object sender, X509Certificate certificate, X509Chain chain, SslPolicyErrors sslPolicyErrors)
{
    bool isOk = true;
    // If there are errors in the certificate chain, look at each error to determine the cause.
    if (sslPolicyErrors != SslPolicyErrors.None)
    {
        for (int i = 0; i < chain.ChainStatus.Length; i++)
        {
            if (chain.ChainStatus[i].Status != X509ChainStatusFlags.RevocationStatusUnknown)
            {
                chain.ChainPolicy.RevocationFlag = X509RevocationFlag.EntireChain;
                chain.ChainPolicy.RevocationMode = X509RevocationMode.Online;
                chain.ChainPolicy.UrlRetrievalTimeout = new TimeSpan(0, 1, 0);
                chain.ChainPolicy.VerificationFlags = X509VerificationFlags.AllFlags;
                bool chainIsValid = chain.Build((X509Certificate2)certificate);
                if (!chainIsValid)
                {
                    isOk = false;
                }
            }
        }
    }
    return isOk;
}
You can save along the path:
Data path
_lclPath = Application.persistentDataPath + filename;
Notes
And now a list of small notes and solutions that may be needed when porting or developing an application on a VR platform. I wanted to use only standard plugins for VR, which are already included in the editor, but as it turned out - this is not possible. To meet the requirements of the platform you will have to integrate the plugins from the platform in order to implement some of the goodies.
Oculus. The application must support the ReCenter function:
Recenter
private void Update()
{
    if (OVRPlugin.shouldRecenter)
    {
        ReCenter();
    }
}
private void ReCenter()
{
    UnityEngine.XR.InputTracking.Recenter();
}
GearVR. The application should offer its menu to exit the application:
Confirm quit
//OVRManager.PlatformUIConfirmQuit();
//or
OVRPlugin.ShowUI(OVRPlugin.PlatformUI.ConfirmQuit);
If you need to disable the positioning of the helmet in space, you can use this script. Attention! It contradicts the requirements of the platform.
VRMoveHack
using UnityEngine;
public class VRMoveHack : MonoBehaviour
{
    public Transform vrroot;
    private Transform mTransform;
    private Vector3 initialPosition;
    private void Awake()
    {
        mTransform = GetComponent();
        initialPosition = mTransform.position;
        //Disabling position breaks the head model on Gear VR, and is against the Rift store guidelines.
        //I would recommend instead of disabling positional tracking, to give a bubble on rift of ~1m that if the player leaves the screen fades to black.
        //If you have to disable positional tracking, at least add back in the head model, which consists of a position shift of  0.075f * camera up + 0.0805f * camera forward.
        initialPosition += (mTransform.up * 0.075f) + (mTransform.forward * 0.0805f);
    }
    private void LateUpdate()
    {
        Vector3 vrpos;
        vrpos = mTransform.TransformPoint(vrroot.localPosition);
        vrpos = mTransform.InverseTransformPoint(vrpos);
        mTransform.position = initialPosition - vrpos;
    }
}
Daydream For the Daydream platform, clicking on the back icon should exit the application, here is a script that can help with the back button on all platforms:
Escape / Back
using UnityEngine;
public class EscapeScene : MonoBehaviour
{
    public static System.Action OnEscape;
    private void Update()
    {
#if MYGOOGLEVR
        if (Input.GetKeyDown(KeyCode.Escape))
            Application.Quit();
        if (GvrControllerInput.AppButtonDown)
#else
        if (Input.GetKeyDown(KeyCode.Escape) || Input.GetButtonDown("Cancel") || Input.GetKeyDown(KeyCode.JoystickButton2))
#endif
        {
            if (OnEscape != null)
                OnEscape.Invoke();
        }
    }
}
GearVR. Your application will not be tested on the latest versions of the OS and may be rejected. Build with Mininum API Level: Android 5.0 (API level 21), otherwise write in the comments to the review that you need to test the application on devices with the latest version of the OS.
GearVR / Rift. In order not to get an incomprehensible failure due to VRC.Mobile.Security, upload the assembly to the ALPHA and RC channels, as well as STORE before release.
iOS Do not forget to attach a document / contract regarding the use of third-party content, if you use one. I was lucky to get to the “experienced” reviewer, whom I described with text and screenshots how to use the cardboard system, where to go to test in-apps and the application.
Viveport. It is advisable for the platform to integrate the SDK in order to enable DRM. You can use automatic Wrapper-based DRM, but only if you are not using implemented with .Net framework. I did if the application does not pass the test - it closes.
Steam The store does not contain a section for entertainment applications, so it is better to publish video content separately in the Video section, or in the Software section. This is probably why the Maski application is located in the Software / Video Production section.
Feature If you make a site request for “featured”. Your application will be examined in more detail. They may be asked to remove help (Google), add additional icons to the buttons of the user interface (Google), they will ask for more smoothing (Oculus), they will be asked to make some environmental elements dynamic, for example, waves on the water (Oculus).
Oculus: Review my project / code. At Oculus is possible request for review of your project engineers. You provide source codes, and in a couple of days you get a project with changes, optimization tips and improvements. Some of them may be general, and some will be specific, which can only be implemented on the Oculus platform.
If necessary, you need to check whether there is Internet access and display a message to the user. It is necessary to display any information about the error or when loading the scene or content for a long time (”Loading”, ”Buffering”, ”Check your internet connection and try again.”, Etc.). Otherwise, the application will be considered faulty.
Internet Reachability
if (Application.internetReachability == NetworkReachability.NotReachable)
When removing the VR-helmet, the application should be paused. To catch this event, you can use the standard method:
Application pause
private void OnApplicationPause(bool pause)
{
//do pause
}