Cisco Meeting Server 2.4.1. Integration with Cisco Unified Communications Manager 11.5
- From the sandbox
- Tutorial
I work in one large integrator, and it’s time for me to understand what a CMS (Cisco Meeting Server) is and how to integrate it with CUCM (Cisco Unified Communications Manager).

This post assumes that CMS and CUCM are already deployed on virtual machines.
Before setting up, it is recommended to do the following:
In DNS, an entry should be created for the CMS server IP address using alias, which we want end users to use, for example:
XMPP domain name. This is the domain name the user will use to sign in to the Cisco Meeting App. In our case, after importing from Active Directory, this will be the user's sAMAccountName .
To support Cisco Meeting App users, a DNS SRV record for the XMPP domain name must be added to the DNS server. SRV records for _xmpp-client._tcp. <
Xmpp domain> for TCP needs port 5222.
Note: you do not need to do this if you only use the desktop application.
SIP domain for meeting server.
It is proposed to use a subdomain, such as meet.example.com for example.
The first thing we do is set the IP address of our service we need
(there are several interfaces on the CMS server, select the first one - “a”)

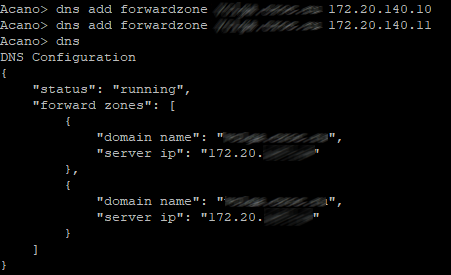
Set the DNS server (s) of our domain zone (if needed), use the “dns” command to check
our hostname CMS and reboot.

For security reasons, it is recommended that you create your own administrator accounts as a user name.
"Admin" is not very secure. In addition, it is recommended that you use two administrator accounts in case you lose the password for one account. If you do, you can still log in with another account
and reset the lost password.
Here is the “root” username, the “admin” role.

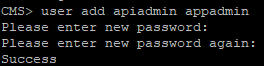
Looking ahead we will create another user with the role of " appadmin ", we will need it in order for CUCM to perform CMS configuration at the application level through the Web Admin interface. Simply put, to register Conference Bridge.
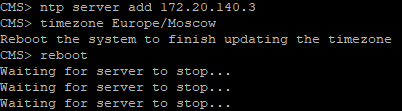
Next we set our NTP server and time zone (in our case, Europe / Moscow and reboot
Now we need to generate a request for issuing a certificate for our CMS server.
Cisco Meeting Server uses x.509 certificates to configure secure (TLS) connections in its services and for some authentication tasks. In our case, a certificate is required for Call Bridge, XMPP, Web Bridge and Web Admin services. Certificates can be self-signed or signed by internal or external certification authorities.
Using a self-signed certificate is possible, but not recommended, as this will lead to errors on web pages and prevent registration of the so-called Conference Bridge of our CMS server on CUCM (Cisco Unified Communications Manager).
So, we form the request:
Because in our case, we use the same certificate for all services in AltName and write the “names” of these services.

We download, install and run WinSCP in order to receive the file of our request, and at the same time upload the license file to our CMS server, without which nothing will work for us.
To get this license (for example, a 90-day demo license), you need to contact some Cisco partner (for example, the integrator I work for) and tearfully ask for a demo license for the purpose of teaching or demonstrating to someone to sell it later. Well, either buy a full license and attach the MAC address of the interface to the tear letter.
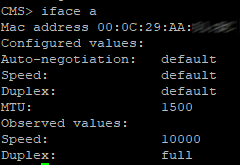
To view the MAC address, enter the command " iface a "
So let's imagine that we were lucky and we were sent a file with this very license with the .lic extension. Rename this file as " cms.lic "
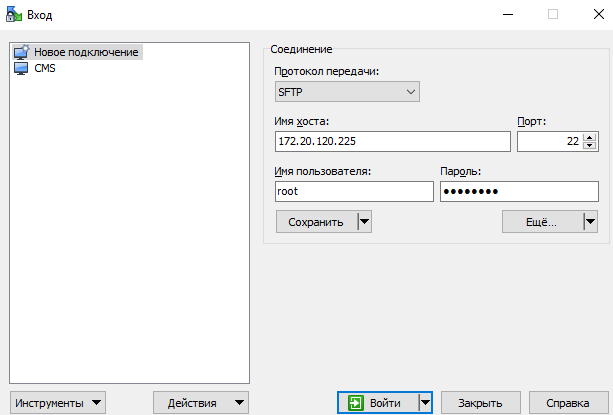
So, we launched WinSCP. Create a connection to the CMS.
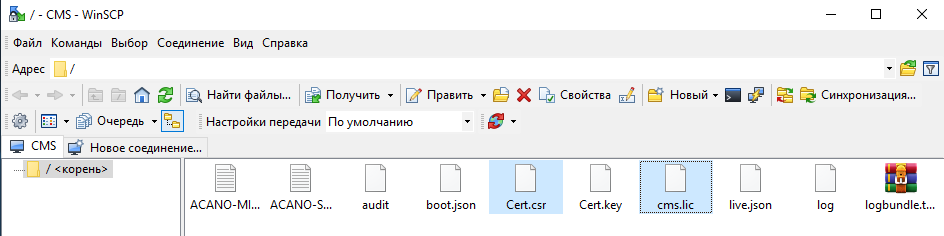
We go:

and copy the file Cert.csr for ourselves, and on the CMS we copy the file cms.lic and certificate, which we received.
Because in my case, to create a certificate chain file that our CMS server will accept (it will not accept a file with p7b extension), do the following:
Using the command line:
a. In the UNIX operating system: cat “broker certificate 1” “broker certificate 2” “broker certificate 3” “root certificate”> ca-bundle
b. In Windows / DOS: copy “certificate of intermediary 1” + “certificate of intermediary 2” + “certificate of intermediary 3” + “root certificate” ca-bundle
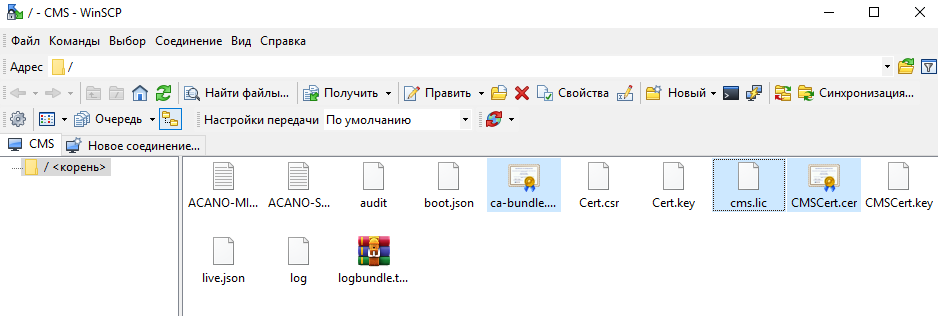
And load it and received certificate for CMS server from certification center also through WinSCP to CMS server
Reboot check licenses

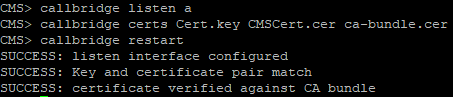
Configure Call Bridge on a interface with the command
We configure Call Bridge to use a certificate, key and certificate chain with a command like this:
Restart callbridge:
Enable the web admin service:
Port 445 is selected because port 443 is used for user access to the web client. We
configure the Web Admin service with certificate files with a command like this:
And we include the Web Admin command:
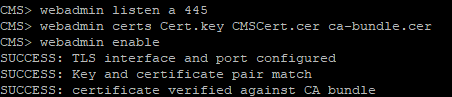
If everything is good, then we will get the SUCCESS strings, which indicate that the Web Admin is correctly configured for the network and the certificate. We check the service via the web browser and enter the web administrator address, for example: cms.example.com : 445

Enable XMPP service
We configure the XMPP service with certificate files with a command like this:
Define an XMPP domain for deployment using a command like this:
Turn on the service
Check CMS and CUCM.

Add Call Bridge to XMPP server with a command like this:
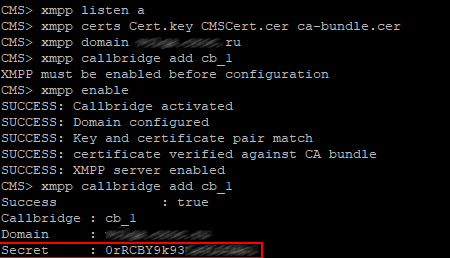
Copy the Secret and paste it here, fill in the rest as well (see figure below)

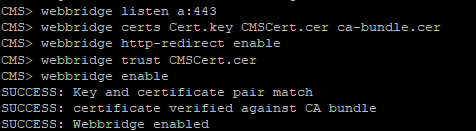
Enable the Web Bridge service
Configure the Web Bridge service with certificate files with a command like this:
Web Bridge supports HTTPS. It will redirect HTTP to HTTPS if configured to use httpredirect.
To enable HTTP redirection, use the following command:
To make Call Bridge make it clear that Web Bridge can trust connections from Call Bridge, use the command
Go to Configuration> Callsettings and set the values as shown below.

Go to Configuration> Incoming calls and set the values as shown below.

Here it is determined how the CMS handles incoming SIP calls. Any call routed to the CMS server will have a verified alias, the rules in the call matching table determine where the CMS should look for potential matches. Each rule can be set to match any combination of users, IVR or MicrosoftSkype / Lync. Cisco Meeting Server matches incoming calls by checking the value after the “@” symbol with the values in the domain column.
Go to Configuration> Outbound calls.
Domain name : Leave blank. Please note that this allows us to match all domains.
SIP Proxy to use : enter the full domain name of our CUCM'a (you can use the IP address, but the FQDN is recommended)
Local contact domain : Leave empty, here you only need to configure SIP Trunk for Skype for Business
Local from domain : Enter Cisco Meeting Server SIP Domain (for example: cms.example.com)
Trunk type : Standard SIP
Behavior : Continue
Priority : 1
Encryption : Auto or Unencrypted
Click Add New to save the changes.

Space is the space where users will be stored.
Go to Configuration> Spaces.

For the secondary URI, use the E.164 value that will be compatible with your dial-plan, which will be routed to the CMS server. For CallID, the value can be any number that is not yet used; in this example, for simplicity, the same value as the secondary URI is set.
To enable guest access to the Web Bridge, you must configure the Call Bridge to determine the address of the Web Bridge.
Go to Configuration> General.
Set the URL of the HTTPS CMS server for the guest account. For example:
meetingserver.example.com
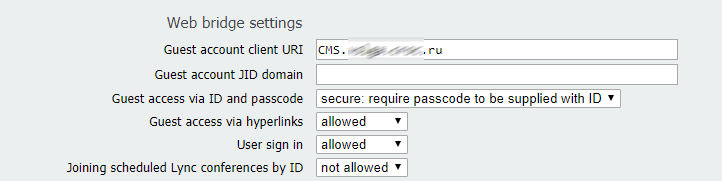
The External Access field is used if you decide to add a Cisco Expressway web proxy. This is the address that is used in invitations for external users.
We also run a request from CUCM for Tomcat services (this is the CUCM web server) and CallManager.
We go through Cisco Unified OS Administration - Security-Certificate Management Management and click on Generate CSR.
First select Tomcat for the Web server. This is so that the error does not occur in the browser.
Click Generate
Then CallManager, this is so that CMS and CUCM check each other’s certificates for registration of the Conference Bridge.
Click Generate
Next, load the request files for the certification authority.

Next, we load the root and intermediate certificates into Tomcat trust and CallManager trust, either in one file, as I wrote above, or first in turn, root, then intermediate
And click Upload
We also load the received certificates from the certification center, which he formed on the basis of our request.
Next, we are going to restart the Cisco Tomcat, Cisco CallManager and Cisco TFTP services. The Cisco Tomcat
service is restarted from the console.
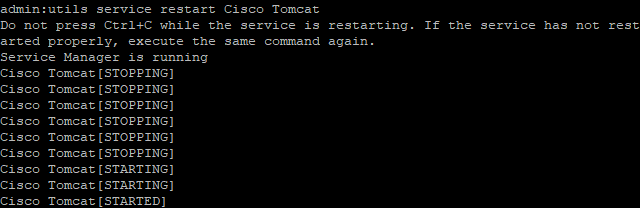
The rest can be through the Web-interface.
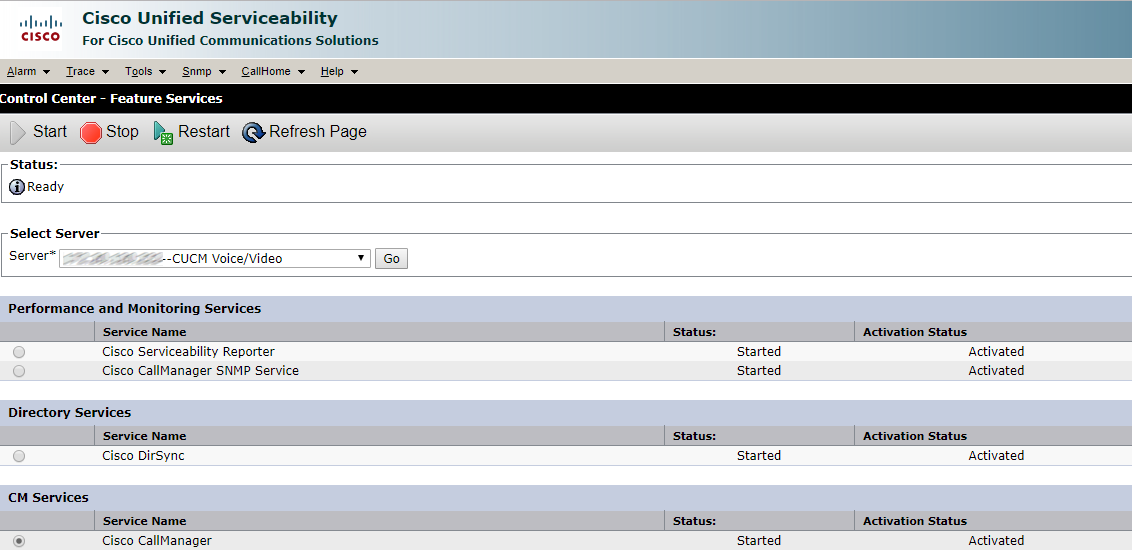
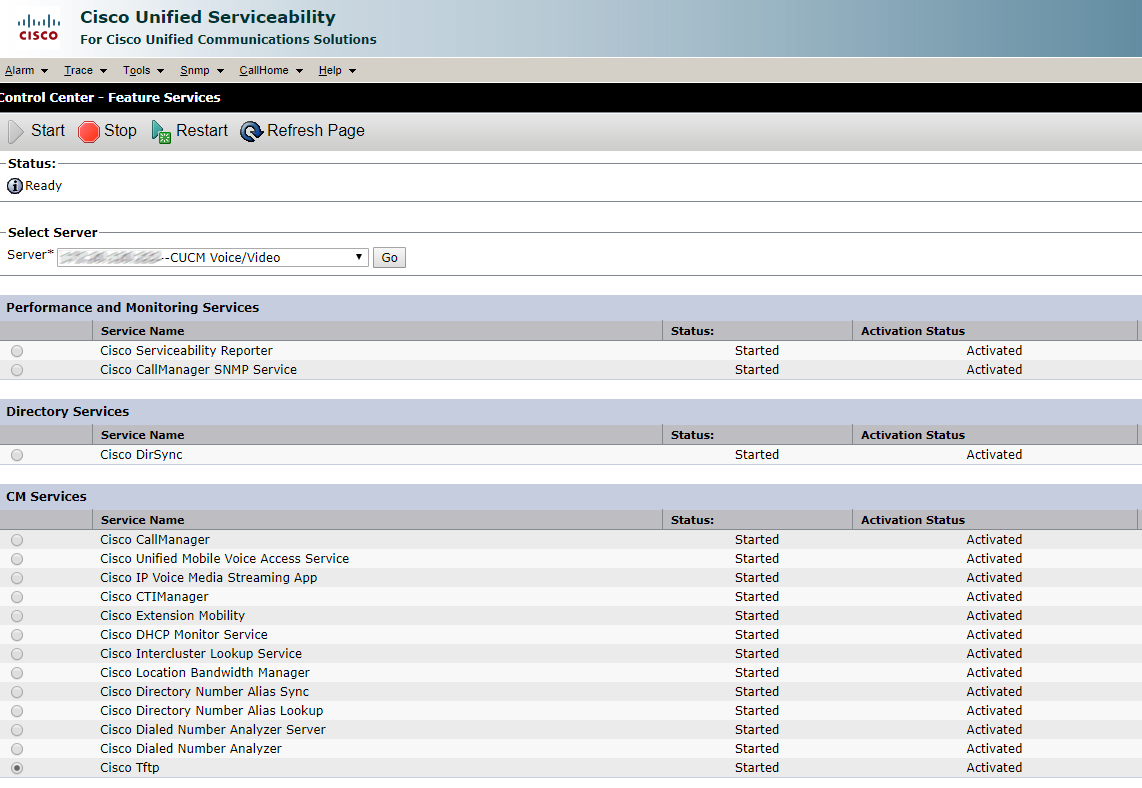
Click Restart and wait.
Now we create a SIP trunk security profile.
In our case, the calls will be unencrypted, so we select the values that are listed below and enter the CN of the Call Bridge certificate. This should be the FQDN of our CMS server.
Opposite Accept Replaces Header , check the box if you are going to use group call bridges.
We create the Conference Bridge, as indicated below, login and password we score the user with the role of appadmin, which we created at the very beginning.

Create a Media Resource Group and add our Conference Bridge to it

Create a Media Resource Group List and add our Media Resource Group to it
Go to Standard SIP Profile For TelePresence Conferencing and check if the checkboxes are opposite: Allow iX Application Media , Use Fully Qualified Domain Name in SIP Requests , and Allow Presentation Sharing use BFCP .

Next, we create a SIP Trunk on a CMS server.
In order for the call from the application or the Web interface of the CMS server to pass, you need to set the required Calling Search Space, otherwise the CMS in the logs will say that you did not find such a number. The phone number and the telephone itself must be in these Calling Search Space'ah.
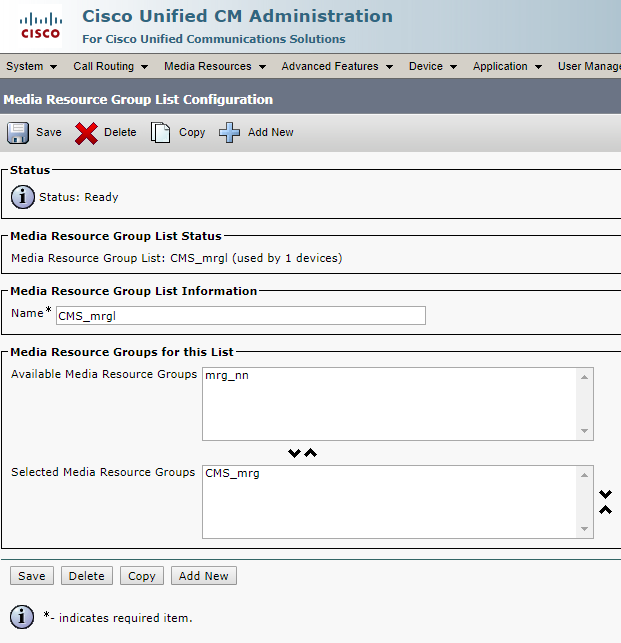
Media Resource Group List - Select what we created earlier.
The SRTP Allowed checkbox allows the passage of encrypted calls, in principle, you can not put it.
SIP Information> Destination address - Specify the FQDN or IP address of our CMS server.
SIP Information> Destination Port - standard SIP port 5060, 5061 - for encrypted calls
SIP Trunk Security Profile - Select the profile we created earlier.
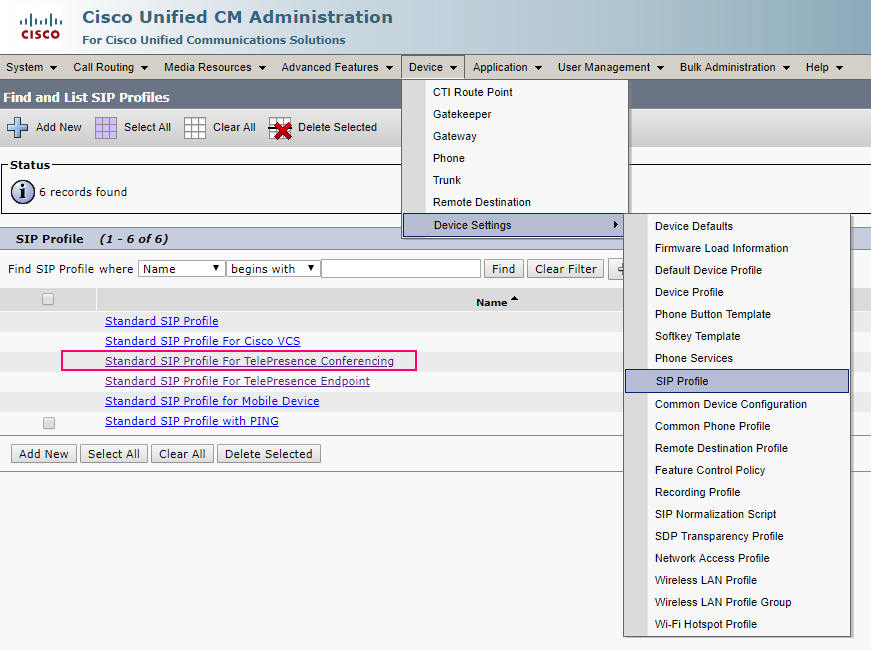
SIP Profile - Select Standard SIP Profile For TelePresence Conferencing
Normalization Script - Do not select anything. The script is not needed in unencrypted calls. We select cisco-telepresence-conductor-interop only in the case of encryption.
The settings highlighted in green must also be selected wisely / For a full understanding, look at what Calling Search Space is .
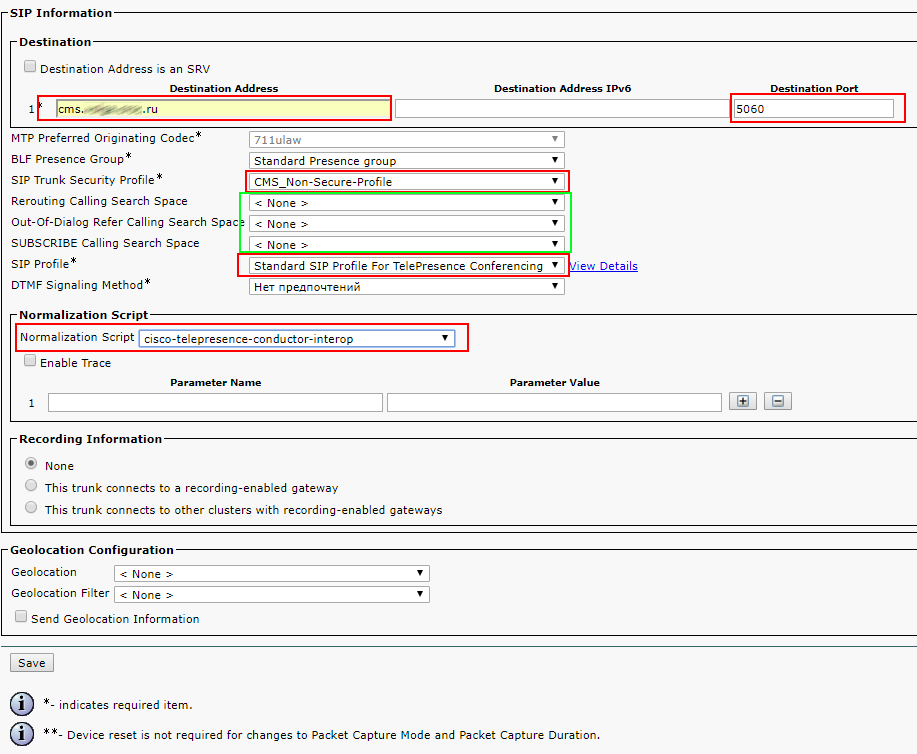
Everything else is left by default.
Create a SIP route pattern to make calls to sip addresses like zhopin.n@example.com
Check CMS and CUCM

Trunk up

But Conference Bridge hasn’t. This is because the TLS versions on CUCM and CMS do not match. This problem is solved by installing the minimum version of TLS 1.0 on the CMS server with the commands:
Checking the Conference Bridge

Our configuration was performed on trunks without a Media Termination Point (MTP).
Disable MTP if it does not adversely affect the operation of services.
Disabling MTP can have a negative effect if you use telephones that use the SCCP protocol and you need to send DTMF to a CMS server.
If the above matters to your services, you may need to increase MTP capacity on Cisco Unified Communications Manager depending on the number of simultaneous calls.
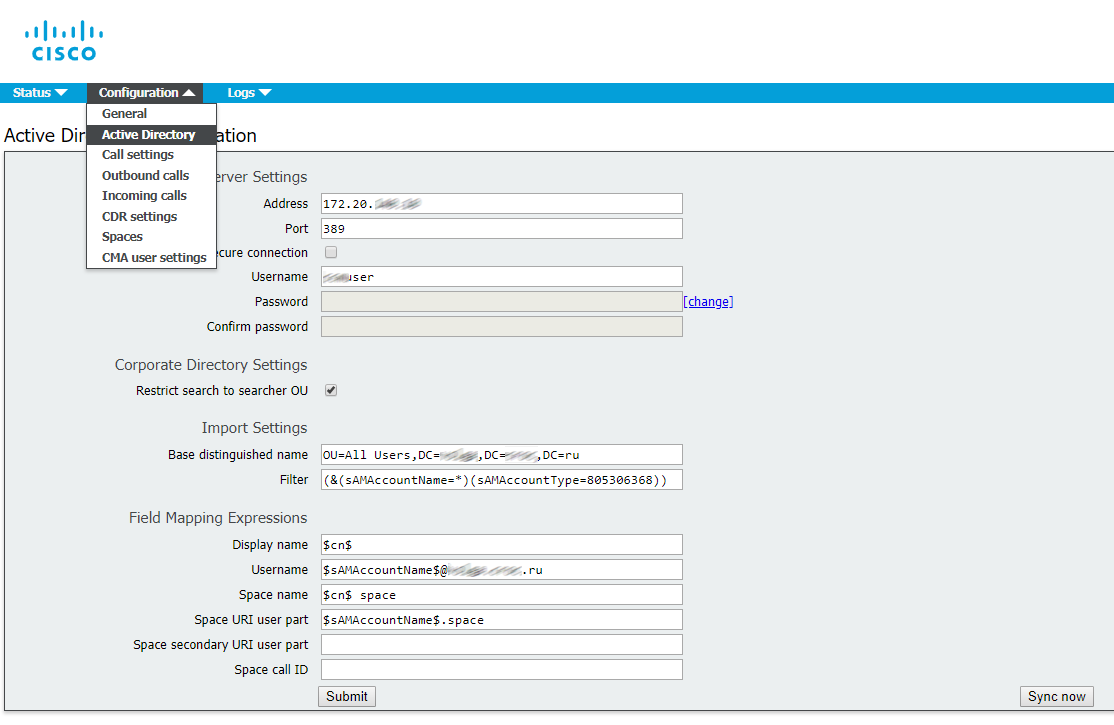
Now import users from Active Directory.
We go as in the figure below, score values.
The filter is very important, set the same as mine, or those that please your soul.
Check the logs

All is well.
We go into users
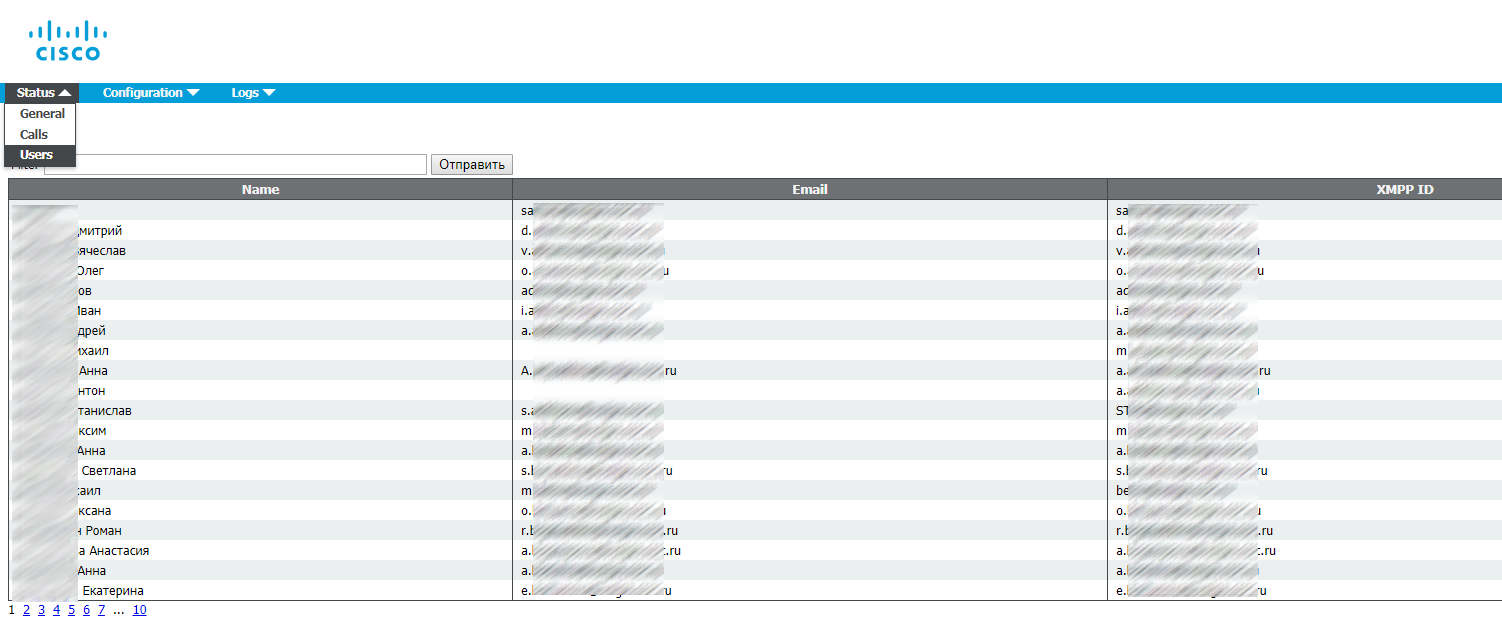
Everything is great imported.
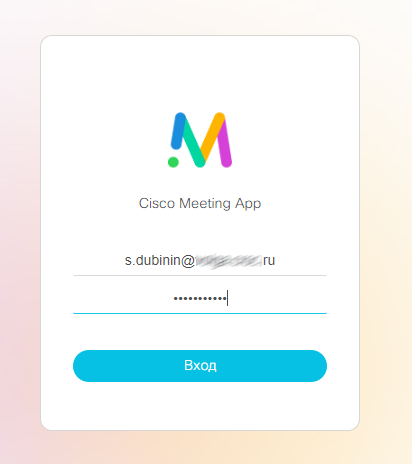
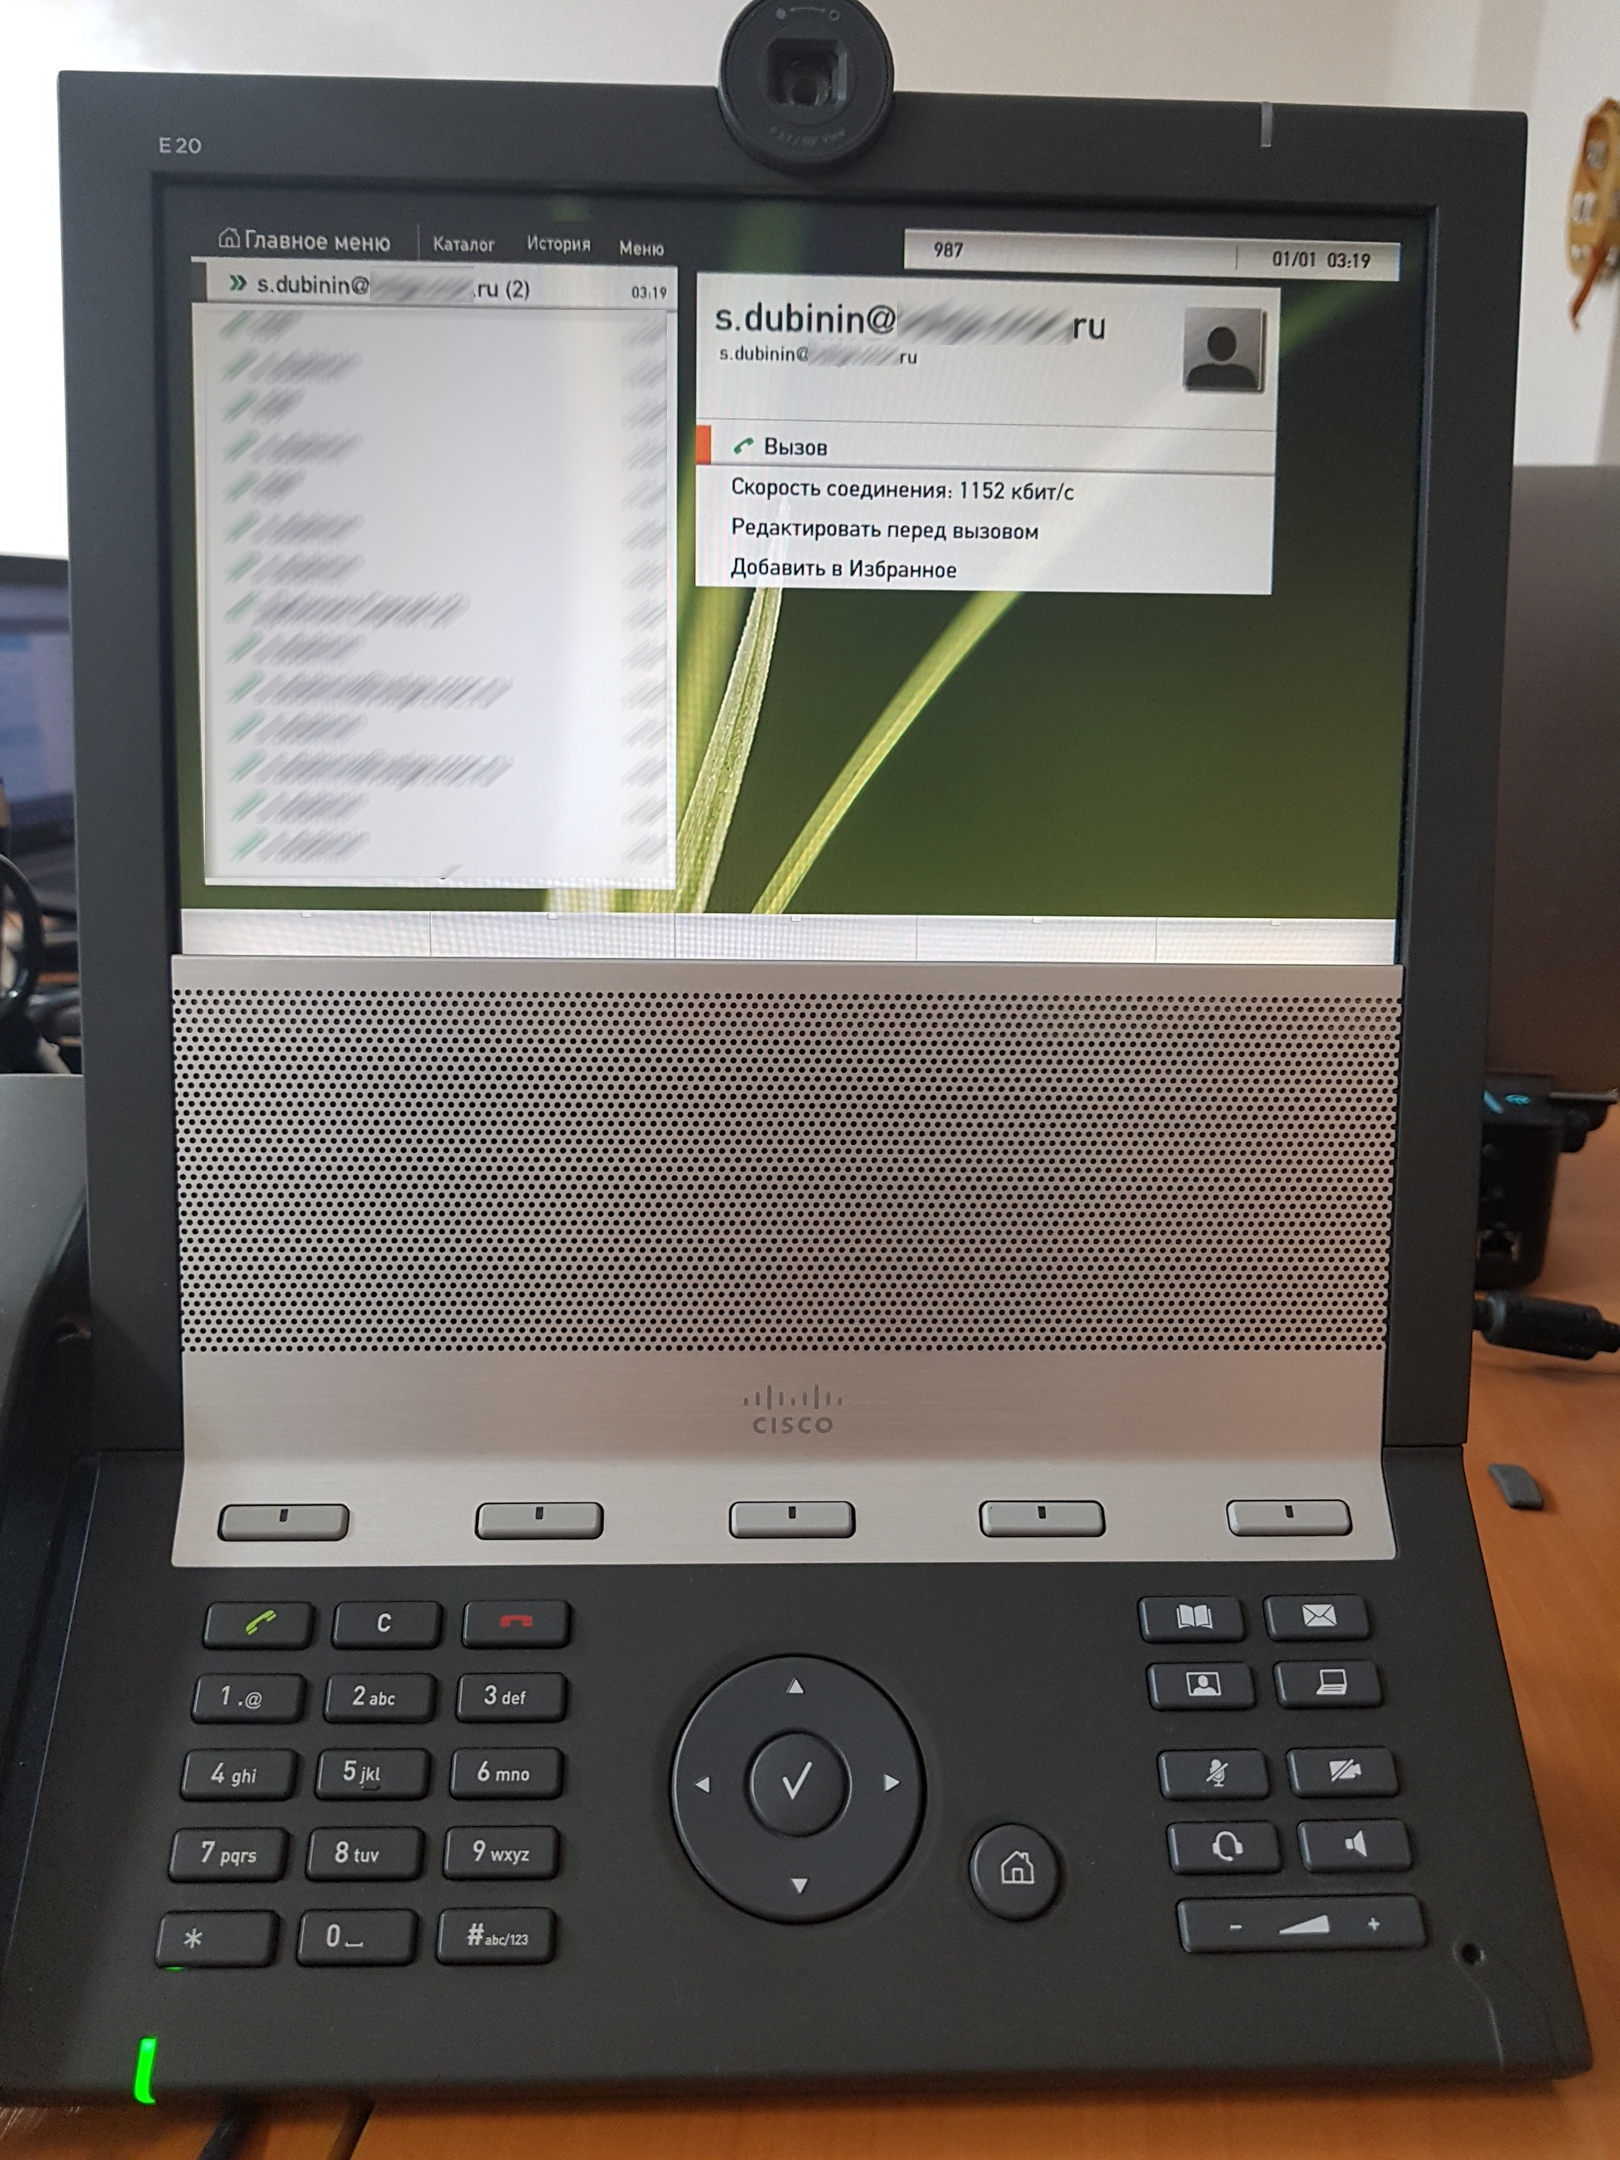
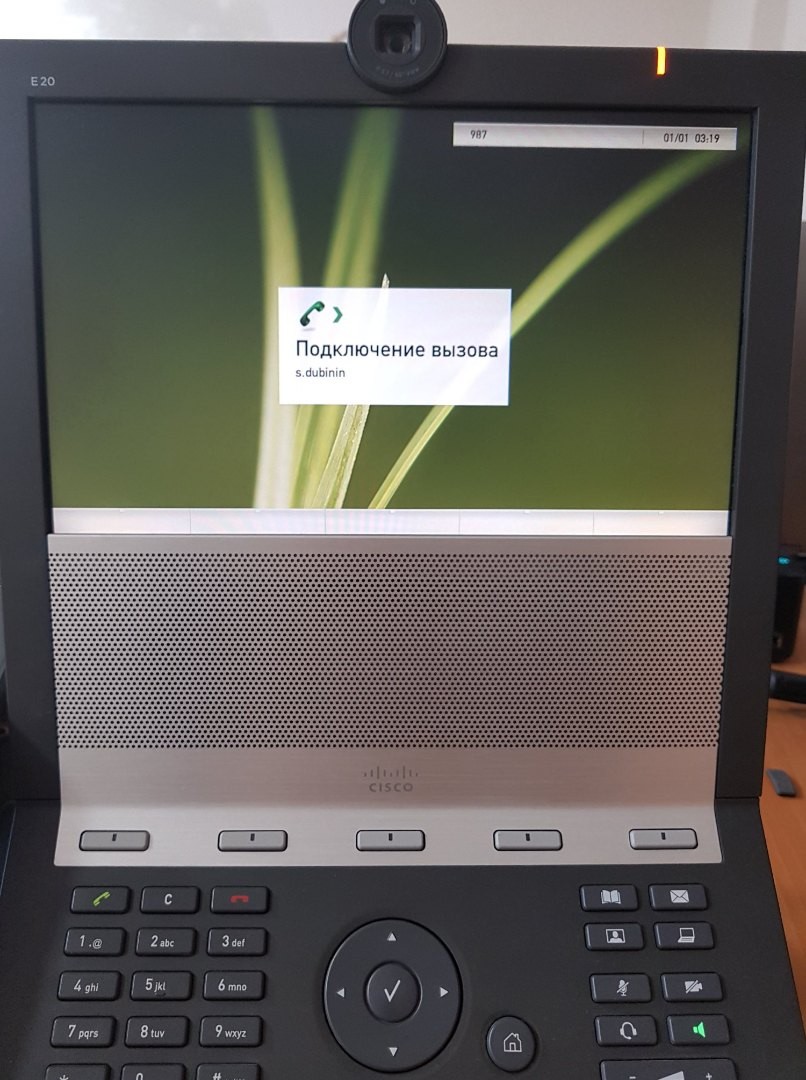
Now the sweetest. We go to the web-interface to call, at cms.example.com.
We enter the username / password of the user from Active Directory.
We
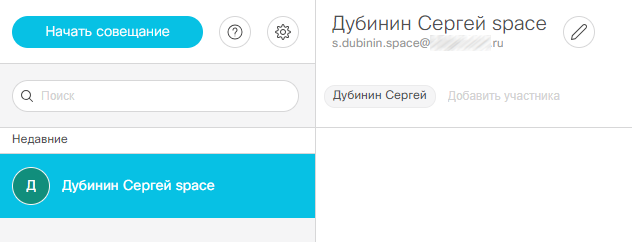
checked the video call from the IP background (I have a Cisco E20) on our account.
I’m running both a Web and a desktop version of a Cisco Meeting client, and both are calling.

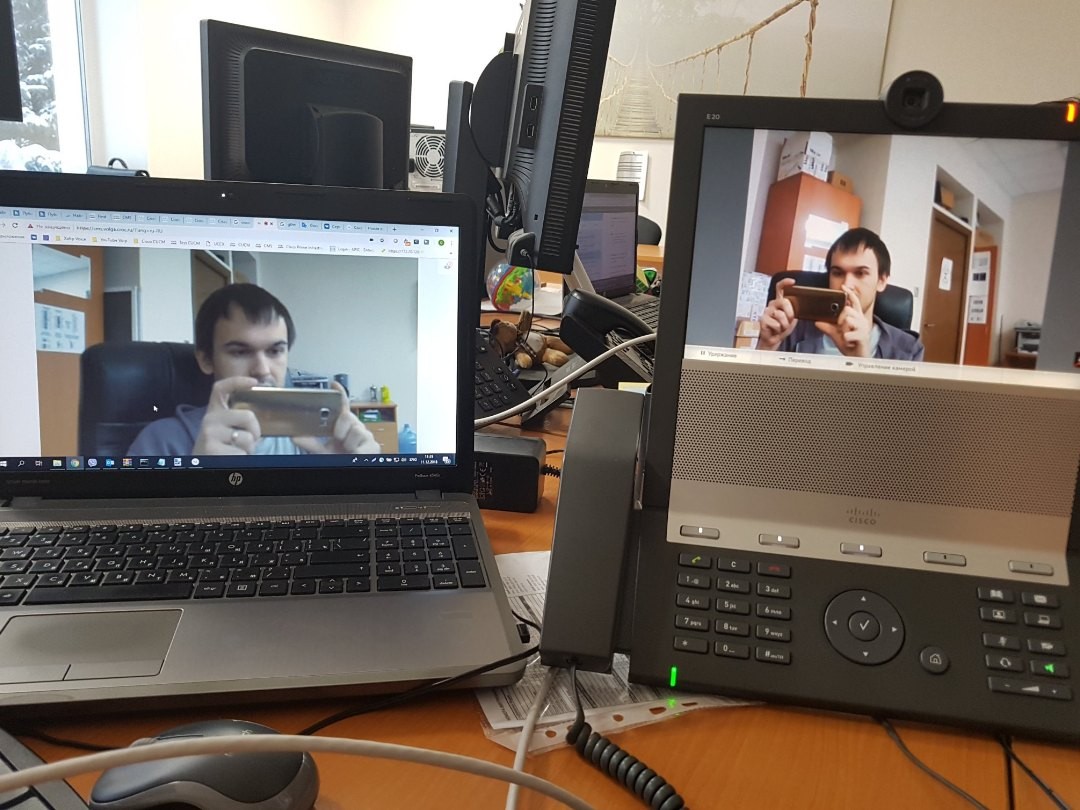
Let's check the video call from our account to the IP background.

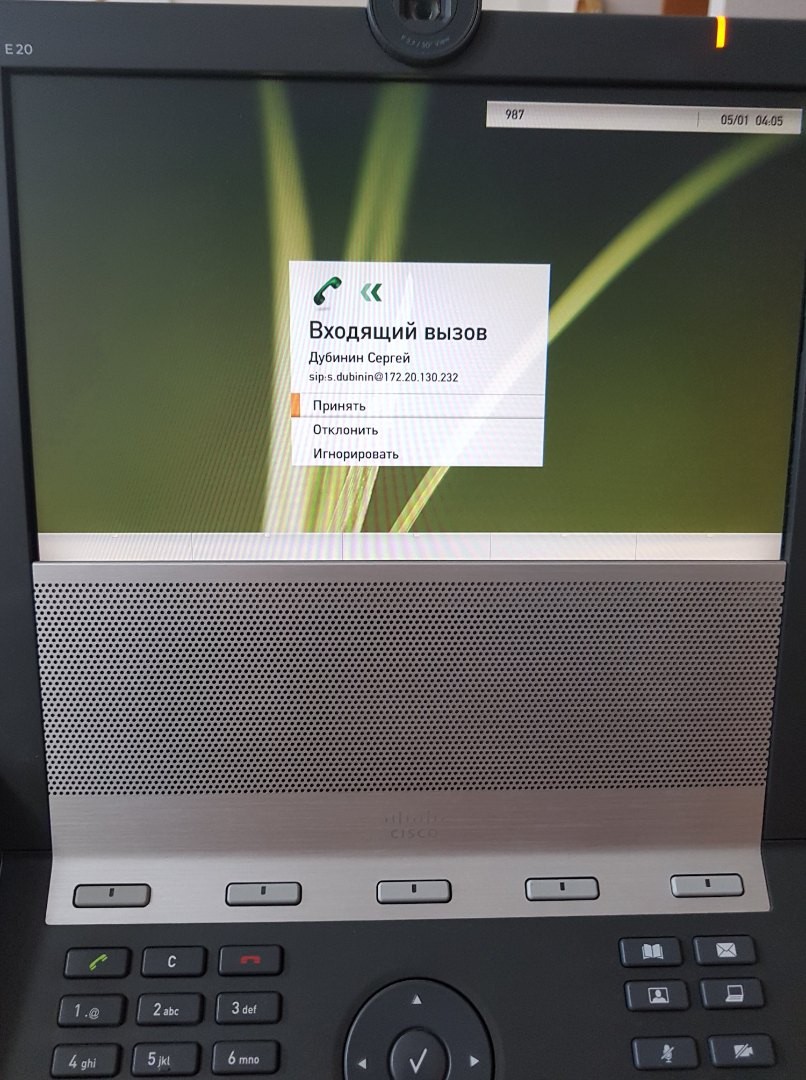
Everything is great, the video call in both directions is over.
With encrypted calls a little more difficult, but more on that some other time.
Links to materials:
This post assumes that CMS and CUCM are already deployed on virtual machines.
Before setting up, it is recommended to do the following:
In DNS, an entry should be created for the CMS server IP address using alias, which we want end users to use, for example:
meetingserver.example.comXMPP domain name. This is the domain name the user will use to sign in to the Cisco Meeting App. In our case, after importing from Active Directory, this will be the user's sAMAccountName .
To support Cisco Meeting App users, a DNS SRV record for the XMPP domain name must be added to the DNS server. SRV records for _xmpp-client._tcp. <
Xmpp domain> for TCP needs port 5222.
Note: you do not need to do this if you only use the desktop application.
SIP domain for meeting server.
It is proposed to use a subdomain, such as meet.example.com for example.
IP address, mask, gateway, DNS, NTP, new user
The first thing we do is set the IP address of our service we need
(there are several interfaces on the CMS server, select the first one - “a”)
Set the DNS server (s) of our domain zone (if needed), use the “dns” command to check
our hostname CMS and reboot.
For security reasons, it is recommended that you create your own administrator accounts as a user name.
"Admin" is not very secure. In addition, it is recommended that you use two administrator accounts in case you lose the password for one account. If you do, you can still log in with another account
and reset the lost password.
Here is the “root” username, the “admin” role.
Looking ahead we will create another user with the role of " appadmin ", we will need it in order for CUCM to perform CMS configuration at the application level through the Web Admin interface. Simply put, to register Conference Bridge.
Next we set our NTP server and time zone (in our case, Europe / Moscow and reboot
Certificates and CMS license
Now we need to generate a request for issuing a certificate for our CMS server.
Cisco Meeting Server uses x.509 certificates to configure secure (TLS) connections in its services and for some authentication tasks. In our case, a certificate is required for Call Bridge, XMPP, Web Bridge and Web Admin services. Certificates can be self-signed or signed by internal or external certification authorities.
Using a self-signed certificate is possible, but not recommended, as this will lead to errors on web pages and prevent registration of the so-called Conference Bridge of our CMS server on CUCM (Cisco Unified Communications Manager).
So, we form the request:
pki csr Cert CN:example.com subjectAltName:callbridge.example.com,xmpp.example.com,webbridge.example.comBecause in our case, we use the same certificate for all services in AltName and write the “names” of these services.
We download, install and run WinSCP in order to receive the file of our request, and at the same time upload the license file to our CMS server, without which nothing will work for us.
To get this license (for example, a 90-day demo license), you need to contact some Cisco partner (for example, the integrator I work for) and tearfully ask for a demo license for the purpose of teaching or demonstrating to someone to sell it later. Well, either buy a full license and attach the MAC address of the interface to the tear letter.
To view the MAC address, enter the command " iface a "
So let's imagine that we were lucky and we were sent a file with this very license with the .lic extension. Rename this file as " cms.lic "
So, we launched WinSCP. Create a connection to the CMS.
We go:
and copy the file Cert.csr for ourselves, and on the CMS we copy the file cms.lic and certificate, which we received.
Because in my case, to create a certificate chain file that our CMS server will accept (it will not accept a file with p7b extension), do the following:
Using the command line:
a. In the UNIX operating system: cat “broker certificate 1” “broker certificate 2” “broker certificate 3” “root certificate”> ca-bundle
b. In Windows / DOS: copy “certificate of intermediary 1” + “certificate of intermediary 2” + “certificate of intermediary 3” + “root certificate” ca-bundle
And load it and received certificate for CMS server from certification center also through WinSCP to CMS server
Reboot check licenses
Call Bridge, Web admin, XMPP, Web Bridge
Call bridge
Configure Call Bridge on a interface with the command
callbridge listen aWe configure Call Bridge to use a certificate, key and certificate chain with a command like this:
callbridge certs <keyfile> <certificatefile> <ca bundle>Restart callbridge:
callbridge restartWeb admin
Enable the web admin service:
webadmin listen a 445Port 445 is selected because port 443 is used for user access to the web client. We
configure the Web Admin service with certificate files with a command like this:
webadmin certs <keyfile> <certificatefile> <ca bundle>And we include the Web Admin command:
webadmin enableIf everything is good, then we will get the SUCCESS strings, which indicate that the Web Admin is correctly configured for the network and the certificate. We check the service via the web browser and enter the web administrator address, for example: cms.example.com : 445
XMPP
Enable XMPP service
xmpp listen aWe configure the XMPP service with certificate files with a command like this:
xmpp certs <keyfile> <certificatefile> <ca bundle>Define an XMPP domain for deployment using a command like this:
xmpp domain <domain name>Turn on the service
xmpp enableCheck CMS and CUCM.
Add Call Bridge to XMPP server with a command like this:
xmpp callbridge addCopy the Secret and paste it here, fill in the rest as well (see figure below)
Web bridge
Enable the Web Bridge service
webbridge listen a:443Configure the Web Bridge service with certificate files with a command like this:
webbridge certs <keyfile> <certificatefile> <ca bundle>Web Bridge supports HTTPS. It will redirect HTTP to HTTPS if configured to use httpredirect.
To enable HTTP redirection, use the following command:
webbridge http-redirect enableTo make Call Bridge make it clear that Web Bridge can trust connections from Call Bridge, use the command
webbridge trust <certfile>Setting basic call parameters
Go to Configuration> Callsettings and set the values as shown below.
Configure incoming call rules
Go to Configuration> Incoming calls and set the values as shown below.
Here it is determined how the CMS handles incoming SIP calls. Any call routed to the CMS server will have a verified alias, the rules in the call matching table determine where the CMS should look for potential matches. Each rule can be set to match any combination of users, IVR or MicrosoftSkype / Lync. Cisco Meeting Server matches incoming calls by checking the value after the “@” symbol with the values in the domain column.
Setting up outgoing call rules
Go to Configuration> Outbound calls.
Domain name : Leave blank. Please note that this allows us to match all domains.
SIP Proxy to use : enter the full domain name of our CUCM'a (you can use the IP address, but the FQDN is recommended)
Local contact domain : Leave empty, here you only need to configure SIP Trunk for Skype for Business
Local from domain : Enter Cisco Meeting Server SIP Domain (for example: cms.example.com)
Trunk type : Standard SIP
Behavior : Continue
Priority : 1
Encryption : Auto or Unencrypted
Click Add New to save the changes.
Create Space
Space is the space where users will be stored.
Go to Configuration> Spaces.
For the secondary URI, use the E.164 value that will be compatible with your dial-plan, which will be routed to the CMS server. For CallID, the value can be any number that is not yet used; in this example, for simplicity, the same value as the secondary URI is set.
Configure Web Bridge for Call Bridge
To enable guest access to the Web Bridge, you must configure the Call Bridge to determine the address of the Web Bridge.
Go to Configuration> General.
Set the URL of the HTTPS CMS server for the guest account. For example:
meetingserver.example.com
The External Access field is used if you decide to add a Cisco Expressway web proxy. This is the address that is used in invitations for external users.
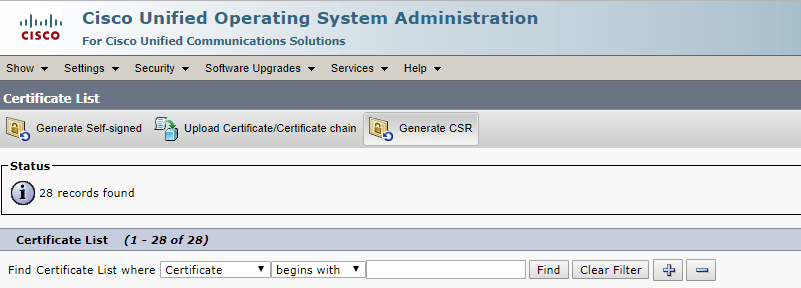
Certificates for CUCM
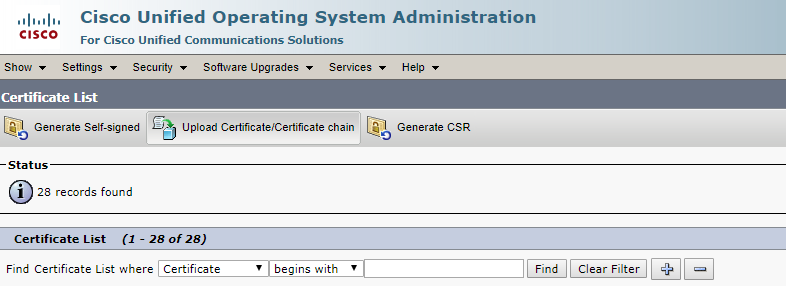
We also run a request from CUCM for Tomcat services (this is the CUCM web server) and CallManager.
We go through Cisco Unified OS Administration - Security-Certificate Management Management and click on Generate CSR.
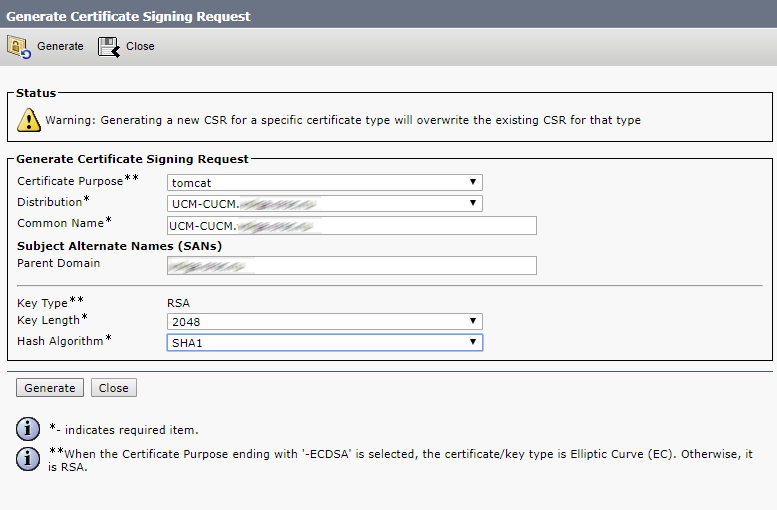
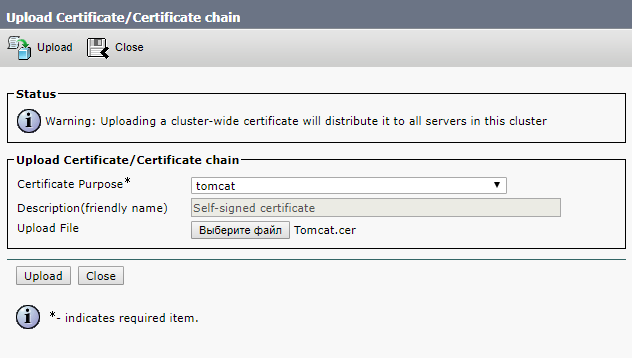
First select Tomcat for the Web server. This is so that the error does not occur in the browser.
Click Generate
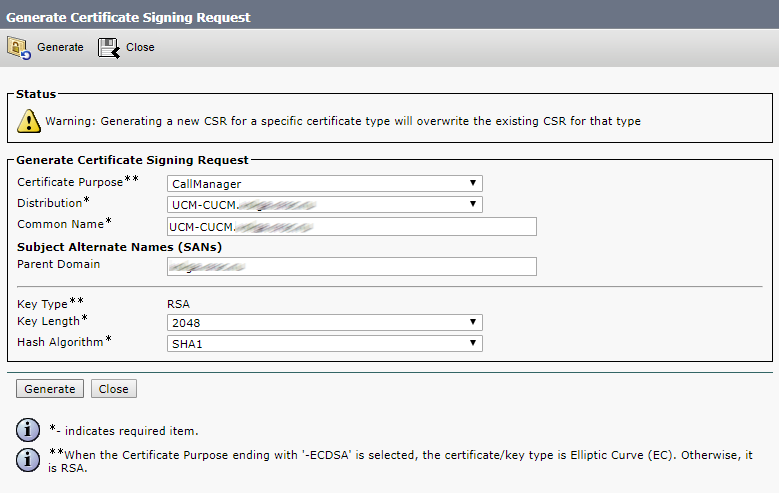
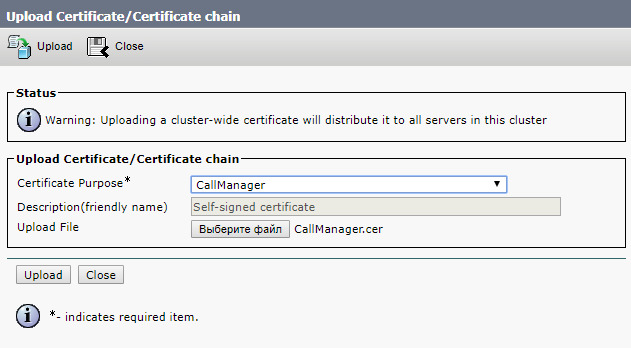
Then CallManager, this is so that CMS and CUCM check each other’s certificates for registration of the Conference Bridge.
Click Generate
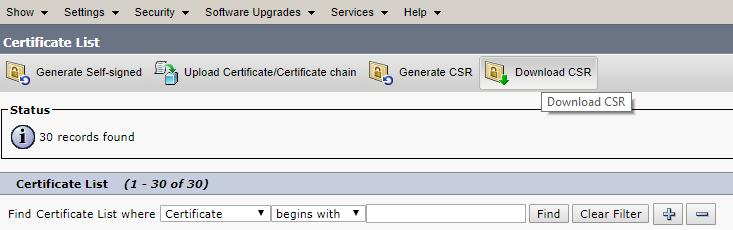
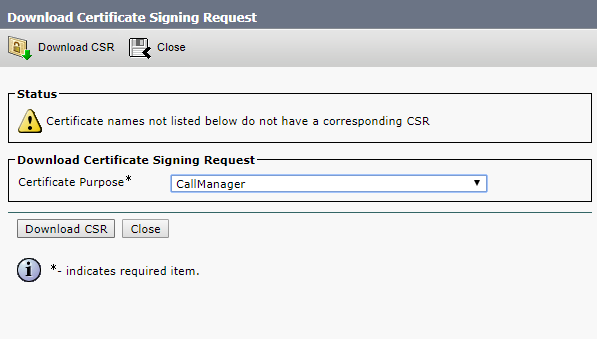
Next, load the request files for the certification authority.
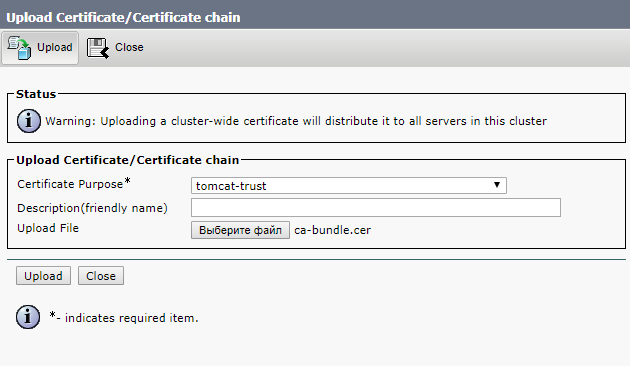
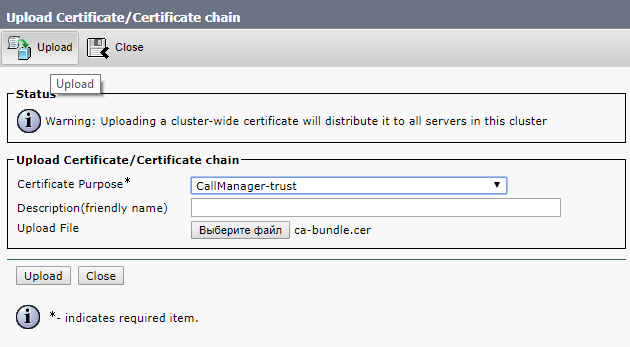
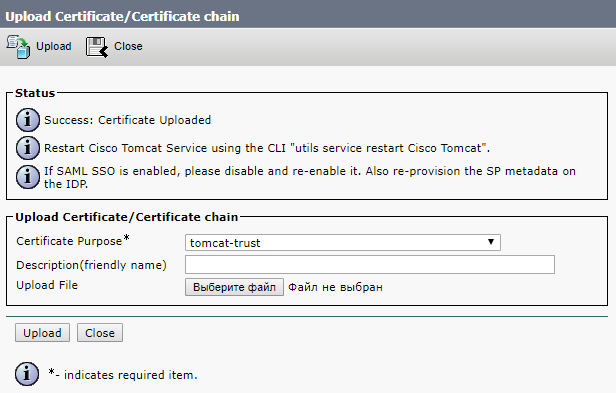
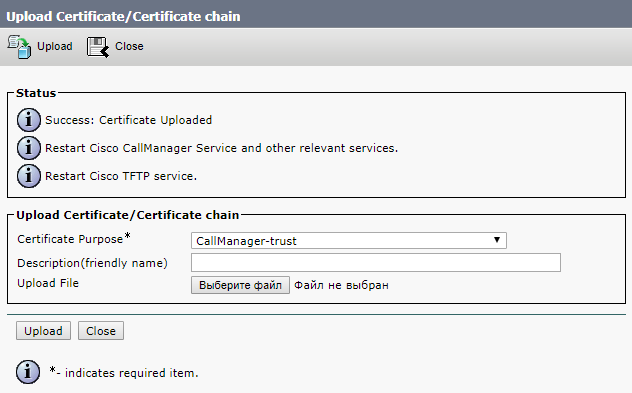
Next, we load the root and intermediate certificates into Tomcat trust and CallManager trust, either in one file, as I wrote above, or first in turn, root, then intermediate
And click Upload
We also load the received certificates from the certification center, which he formed on the basis of our request.
Next, we are going to restart the Cisco Tomcat, Cisco CallManager and Cisco TFTP services. The Cisco Tomcat
service is restarted from the console.
The rest can be through the Web-interface.
Click Restart and wait.
SIP trunk security profile
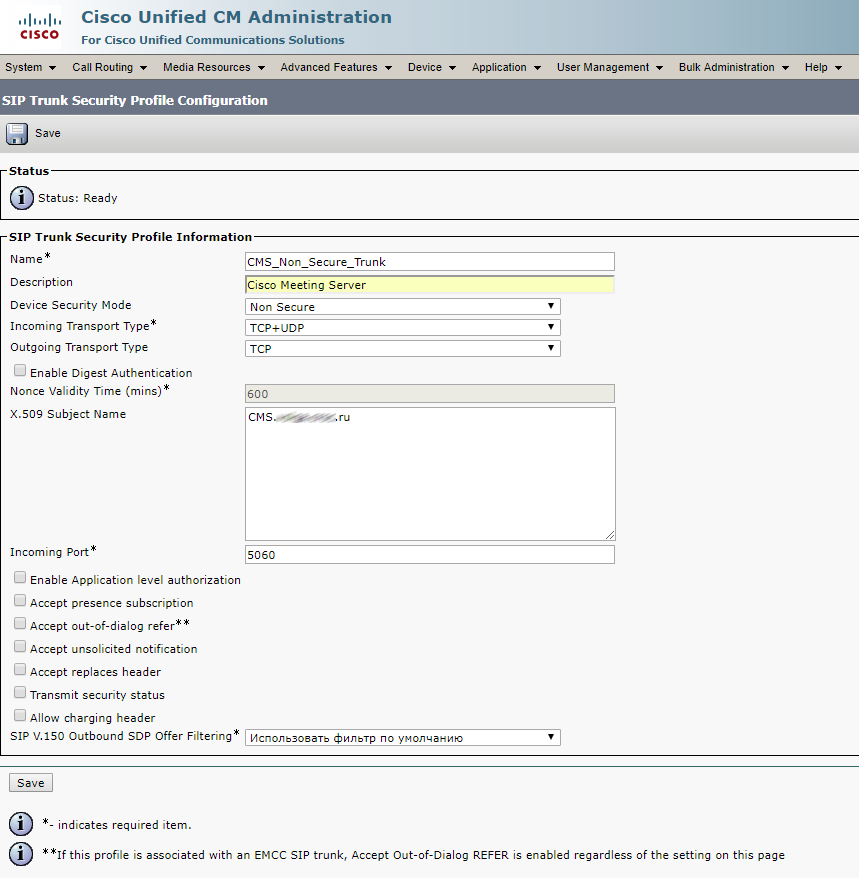
Now we create a SIP trunk security profile.
In our case, the calls will be unencrypted, so we select the values that are listed below and enter the CN of the Call Bridge certificate. This should be the FQDN of our CMS server.
Opposite Accept Replaces Header , check the box if you are going to use group call bridges.
Conference Bridge
We create the Conference Bridge, as indicated below, login and password we score the user with the role of appadmin, which we created at the very beginning.
Create a Media Resource Group and add our Conference Bridge to it
Create a Media Resource Group List and add our Media Resource Group to it
Go to Standard SIP Profile For TelePresence Conferencing and check if the checkboxes are opposite: Allow iX Application Media , Use Fully Qualified Domain Name in SIP Requests , and Allow Presentation Sharing use BFCP .
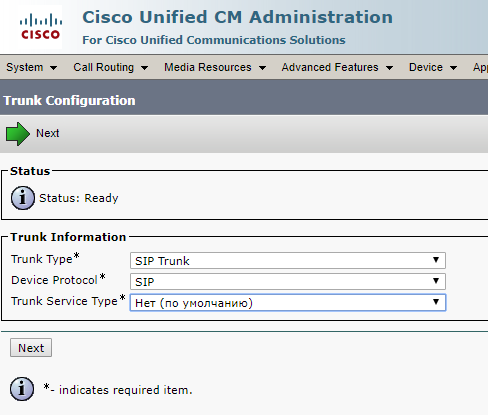
Sip trunk
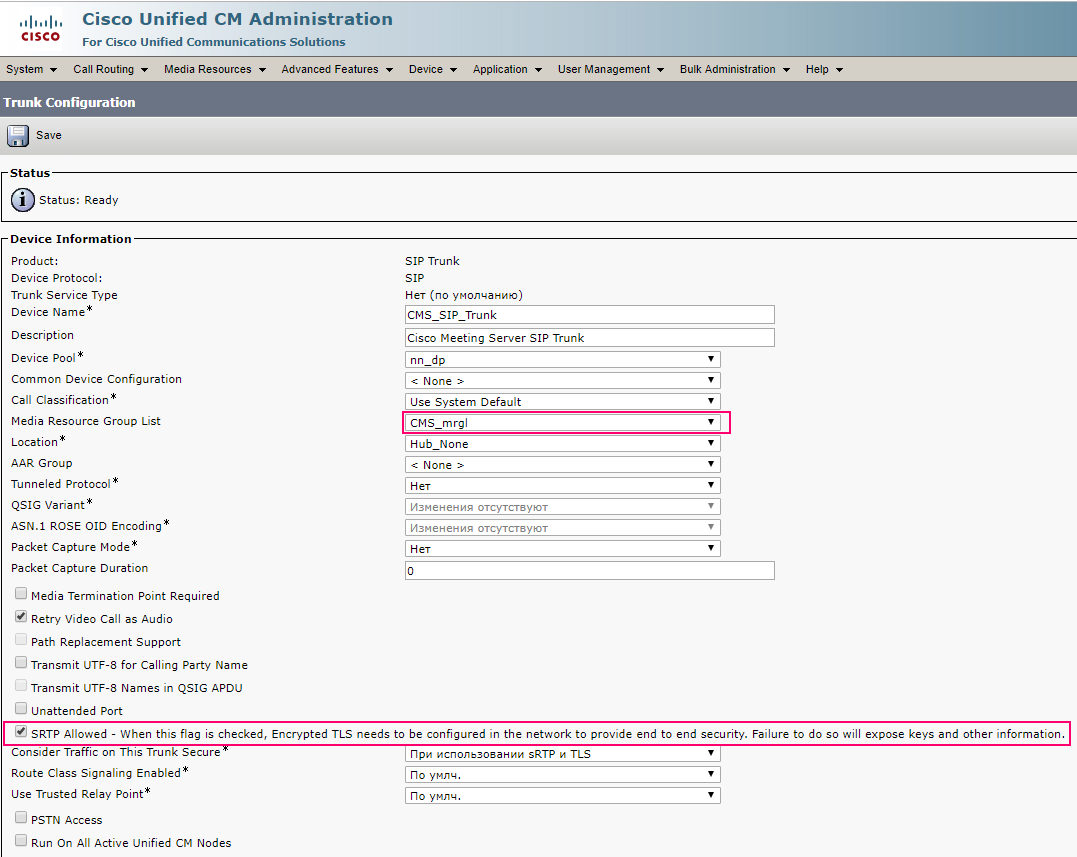
Next, we create a SIP Trunk on a CMS server.
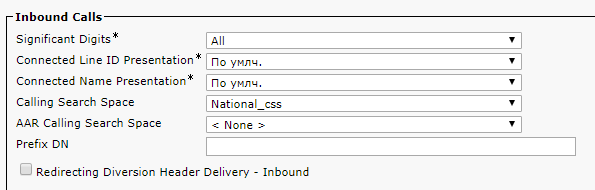
In order for the call from the application or the Web interface of the CMS server to pass, you need to set the required Calling Search Space, otherwise the CMS in the logs will say that you did not find such a number. The phone number and the telephone itself must be in these Calling Search Space'ah.
Media Resource Group List - Select what we created earlier.
The SRTP Allowed checkbox allows the passage of encrypted calls, in principle, you can not put it.
SIP Information> Destination address - Specify the FQDN or IP address of our CMS server.
SIP Information> Destination Port - standard SIP port 5060, 5061 - for encrypted calls
SIP Trunk Security Profile - Select the profile we created earlier.
SIP Profile - Select Standard SIP Profile For TelePresence Conferencing
Normalization Script - Do not select anything. The script is not needed in unencrypted calls. We select cisco-telepresence-conductor-interop only in the case of encryption.
The settings highlighted in green must also be selected wisely / For a full understanding, look at what Calling Search Space is .
Everything else is left by default.
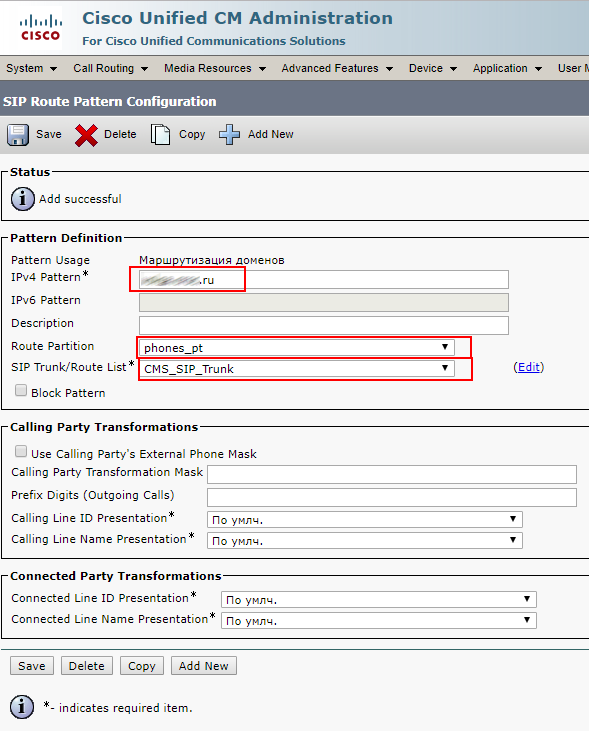
SIP route pattern
Create a SIP route pattern to make calls to sip addresses like zhopin.n@example.com
Check CMS and CUCM
Trunk up
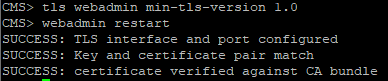
But Conference Bridge hasn’t. This is because the TLS versions on CUCM and CMS do not match. This problem is solved by installing the minimum version of TLS 1.0 on the CMS server with the commands:
tls webadmin min-tls-version 1.0
webadmin restart
Checking the Conference Bridge
Our configuration was performed on trunks without a Media Termination Point (MTP).
Disable MTP if it does not adversely affect the operation of services.
Disabling MTP can have a negative effect if you use telephones that use the SCCP protocol and you need to send DTMF to a CMS server.
If the above matters to your services, you may need to increase MTP capacity on Cisco Unified Communications Manager depending on the number of simultaneous calls.
Import Users from Active Directory
Now import users from Active Directory.
We go as in the figure below, score values.
The filter is very important, set the same as mine, or those that please your soul.
Check the logs
All is well.
We go into users
Everything is great imported.
Health check
Now the sweetest. We go to the web-interface to call, at cms.example.com.
We enter the username / password of the user from Active Directory.
We
checked the video call from the IP background (I have a Cisco E20) on our account.
I’m running both a Web and a desktop version of a Cisco Meeting client, and both are calling.
Let's check the video call from our account to the IP background.
Everything is great, the video call in both directions is over.
With encrypted calls a little more difficult, but more on that some other time.
Links to materials:
- www.cisco.com/c/dam/en/us/td/docs/conferencing/ciscoMeetingServer/Deployment_Guide/Version-2-3/Cisco-Meeting-Server-Single-Server-Simplified-Setup-Guide.pdf
- www.cisco.com/c/dam/en/us/td/docs/conferencing/ciscoMeetingServer/Deployment_Guide/Version-2-4/Cisco-Meeting-Server-2-4-Deployments-with-CUCM.pdf
- www.cisco.com/c/dam/en/us/td/docs/conferencing/ciscoMeetingServer/Reference_Guides/Version-2-3/Cisco-Meeting-Server-MMP-Command-Reference-2-3.pdf