Integration of statistical code analysis tools for OpenStack on Jenkins CI
- Tutorial
PyLint Integration with Jenkins
Installing pylint on Centos
Configuration File Generation
After generating the file, you need to put it in the root directory of the project.
Start in Jenkins
1. In the Jenkins settings - plug-in management, install the “Violations plugin” plugins to generate a visual report
2. Create a project (job) with a free configuration
3. In the source control point, insert the link to the repository
4. In the assembly point, select “Execute shell command” or “Execute Shell”. In the input field, enter the command:
5. In the post-assembly operation point, select “Report Violations“
6. Save the project and execute
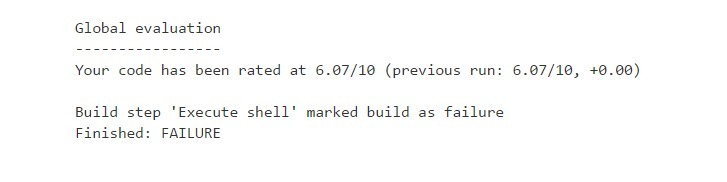
Figure 1. PyLint Test Result

Figure 2. PyLint Test Result - Continued 1
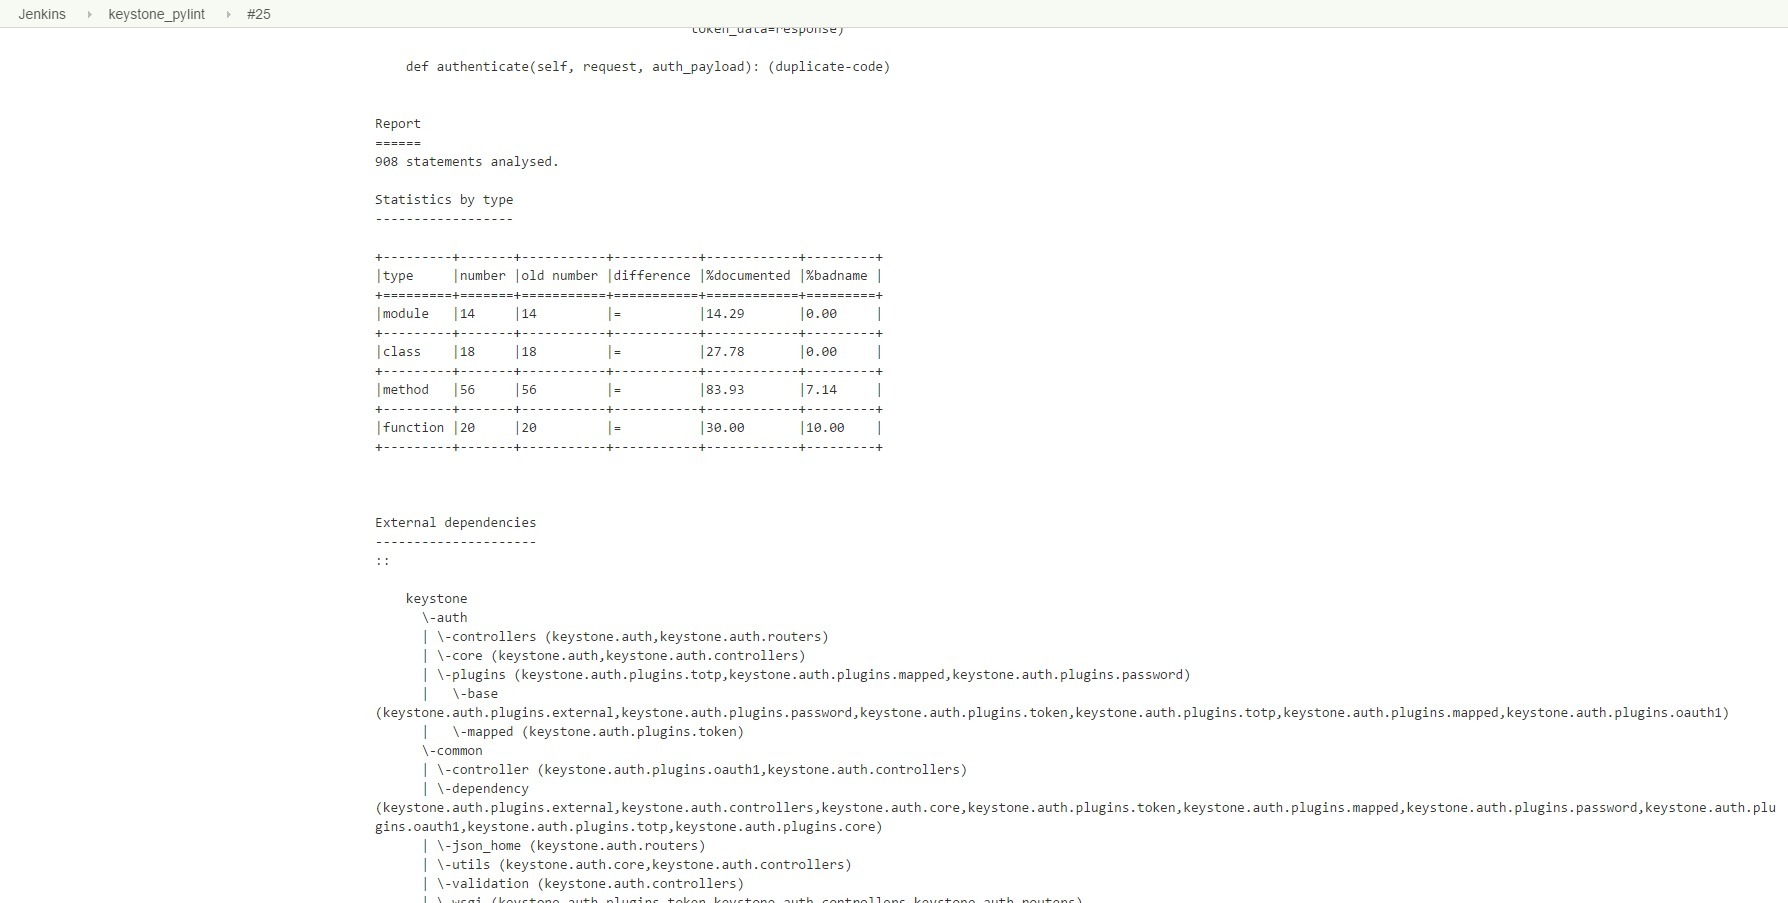
Figure 3. PyLint Test Result - Continued 2 Figure

4. PyLint Test Result - Continued 3 Figure

5. PyLint Test Result - Continued 4 Figure 6
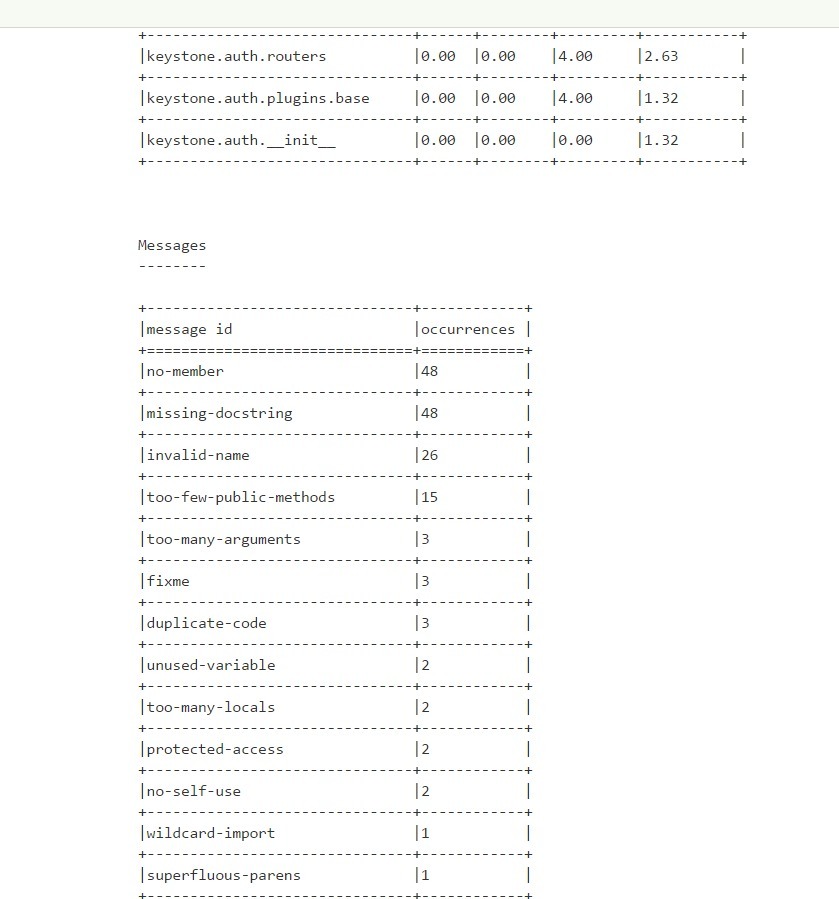
. PyLint Test Result - Continued 5
SonarQube Integration with Jenkins
Installing and Configuring MySQL for SonarQube:
Install SonarQube on Centos:
Download the installation file to / opt
Install unzip and java
Unzipping sonarqube
Configuring a configuration file
Launch SonarQube:
Configuring SonarQube as a Service:
Create File
Copy to file content
Linking to SonarQube
Setting rights and adding to boot
Launch sonar
Install sonar runner:
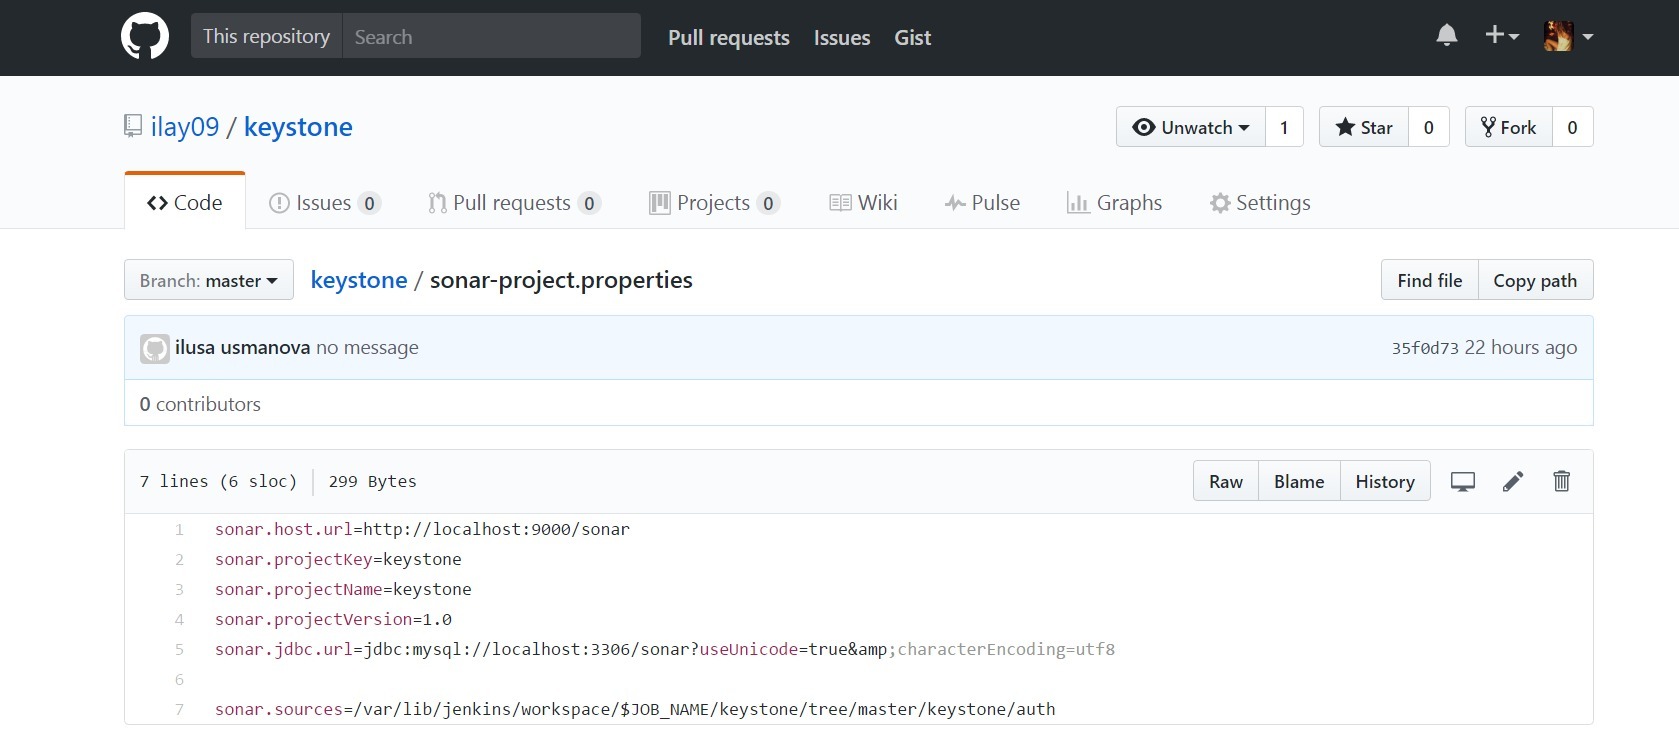
It is necessary to create the sonar-project.properties file in the project root. Example file contents:
Running in Jenkins:
1. In the Jenkins settings - plug-in management, install the plugins “SonarQube Scanner for Jenkins” to generate a visual report
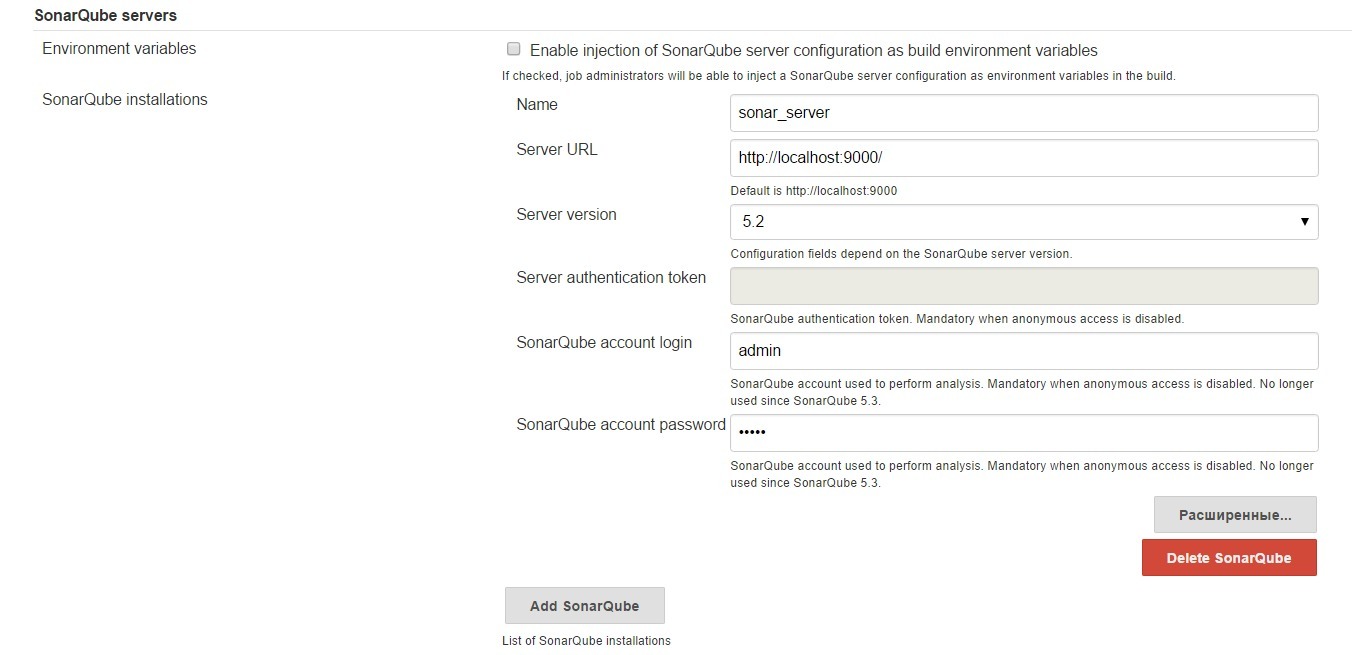
2. Go to “Jenkins settings” - “System configuration” - “SonarQube servers” (if this configuration will not, then you need to restart Jenkins). Next, you need to fill in the configuration fields:
Fig. 8. Configuring the SonarQube Server in the Jenkins Continuous Integration System
3. Go to “Jenkins Settings” - “Global Tool Configuration” - “SonarQube Scanner”. Fill in the configuration fields
Fig. 9. Configuring the SonarQube scanner in the Jenkins continuous integration system

4. Create a project (job) with a free configuration
5. In the source control point, insert the link to the repository
6. In the assembly point, select “Execute SonarQube Scanner”
In the “Analysis properties” field, enter the parameters from the sonar-project.properties file or specify the path to this file
7. Save the project and run
Fig .10. The result of the SonarQube
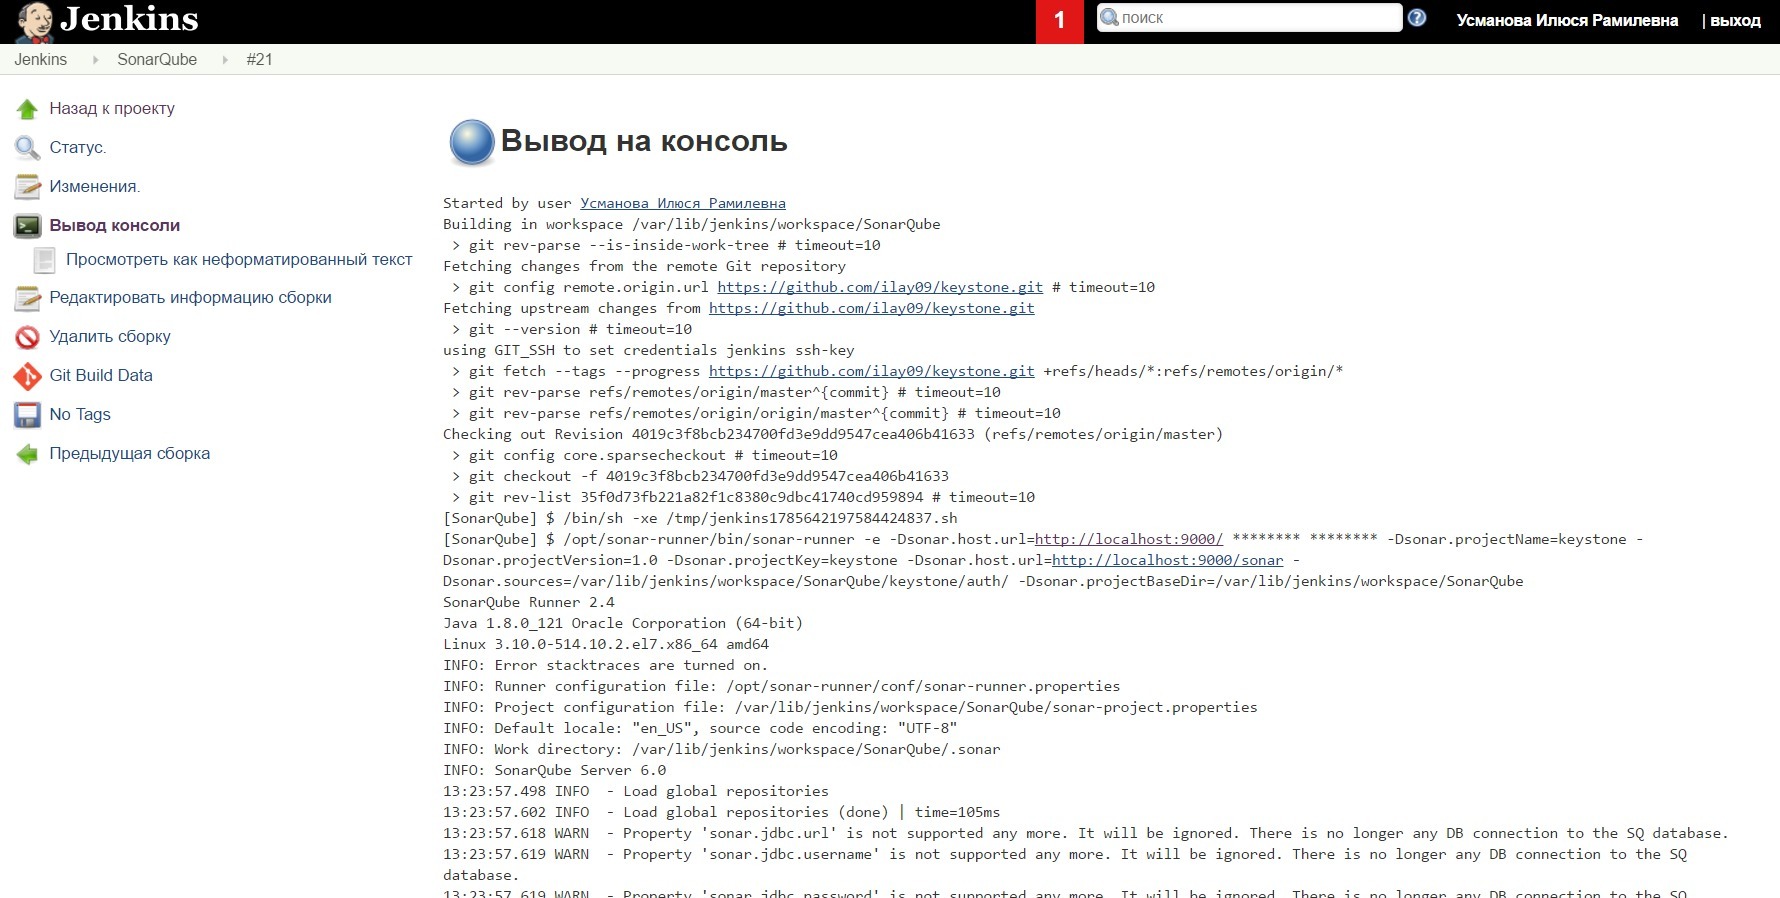
Fig. 11. The result of the work of SonarQube - continued 1
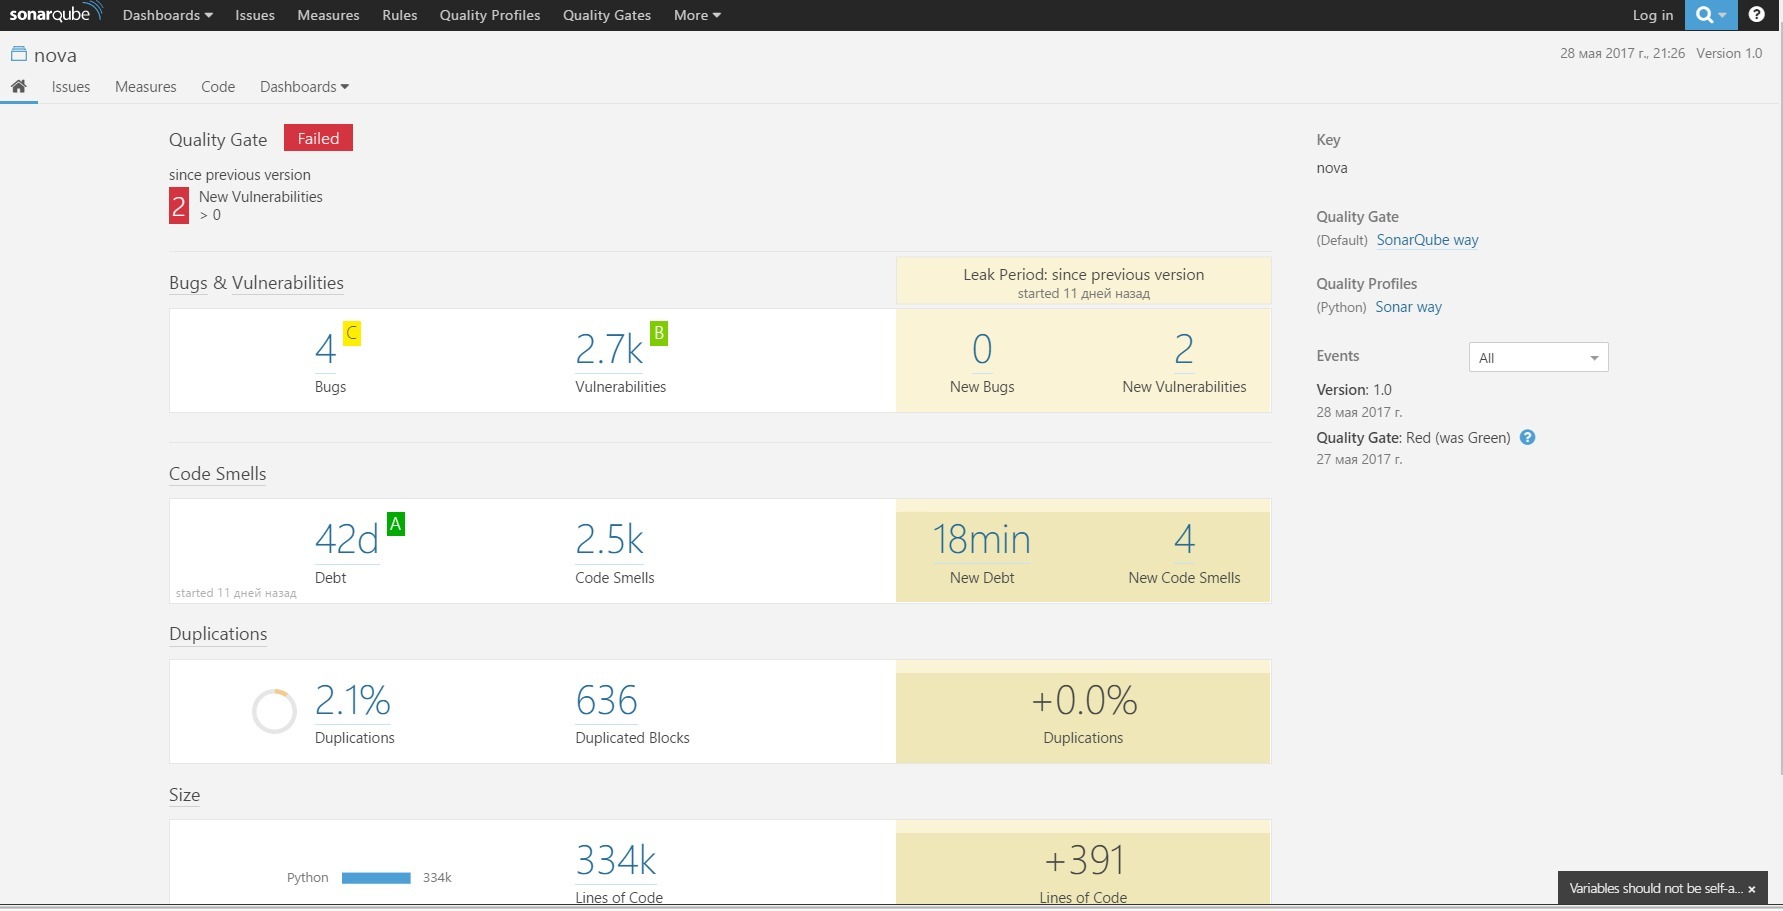
By clicking on the link from the result of the localhost project : 9000 / sonar / dashboard / index / keystone, you can examine in detail the report on the quality control of the keystone code Fig
. 12 . Example of a generated SonarQube report

Fig. 13. SonarQube Report Generated Example - Continued 1
Installing pylint on Centos
pip install pylintConfiguration File Generation
touch pylint.cfg
pylint --generate-rcfile > pylint.cfg
After generating the file, you need to put it in the root directory of the project.
Start in Jenkins
1. In the Jenkins settings - plug-in management, install the “Violations plugin” plugins to generate a visual report
2. Create a project (job) with a free configuration
3. In the source control point, insert the link to the repository
4. In the assembly point, select “Execute shell command” or “Execute Shell”. In the input field, enter the command:
find /var/lib/jenkins/workspace/$JOB_NAME/ -iname "*.py" | xargs pylint --disable=all 5. In the post-assembly operation point, select “Report Violations“
6. Save the project and execute
Figure 1. PyLint Test Result
Figure 2. PyLint Test Result - Continued 1
Figure 3. PyLint Test Result - Continued 2 Figure
4. PyLint Test Result - Continued 3 Figure
5. PyLint Test Result - Continued 4 Figure 6
. PyLint Test Result - Continued 5
SonarQube Integration with Jenkins
Installing and Configuring MySQL for SonarQube:
wget http://repo.mysql.com/mysql-community-release-el7-5.noarch.rpm
sudo rpm -ivh mysql-community-release-el7-5.noarch.rpm
sudo yum update -y
sudo yum install mysql-server
sudo systemctl start mysqld
sudo mysql_secure_installation - нажать enter если пароль по умолчанию отсутствует
mysql -u root -p
CREATE DATABASE sonar CHARACTER SET utf8 COLLATE utf8_general_ci;
CREATE USER 'sonar' IDENTIFIED BY 'sonar';
GRANT ALL ON sonar.* TO 'sonar'@'%' IDENTIFIED BY 'sonar';
GRANT ALL ON sonar.* TO 'sonar'@'localhost' IDENTIFIED BY 'sonar';
Install SonarQube on Centos:
Download the installation file to / opt
cd /opt
sudo wget https://sonarsource.bintray.com/Distribution/sonarqube/sonarqube-6.0.zip
Install unzip and java
sudo yum install unzip -y
sudo yum install java-1.8.0-openjdk -y
Unzipping sonarqube
sudo unzip sonarqube-6.0.zip
mv sonarqube-6.0 sonarqube
Configuring a configuration file
vi /opt/sonarqube/conf/sonar.properties
sonar.jdbc.username=sonar
sonar.jdbc.password=sonar
sonar.jdbc.url=jdbc:mysql://localhost:3306/sonar?useUnicode=true&characterEncoding=utf8&rewriteBatchedStatements=true&useConfigs=maxPerformance
sonar.web.host=localhost
sonar.web.context=/sonar
sonar.web.port=9000
По ссылке http://localhost:9000 будет находиться сервер sonarqube
Launch SonarQube:
cd /opt/sonar/bin/linux-x86-64/
sudo ./sonar.sh start
Configuring SonarQube as a Service:
Create File
/etc/init.d/sonarCopy to file content
#!/bin/sh
#
# rc file for SonarQube
#
# chkconfig: 345 96 10
# description: SonarQube system (www.sonarsource.org)
#
### BEGIN INIT INFO
# Provides: sonar
# Required-Start: $network
# Required-Stop: $network
# Default-Start: 3 4 5
# Default-Stop: 0 1 2 6
# Short-Description: SonarQube system (www.sonarsource.org)
# Description: SonarQube system (www.sonarsource.org)
### END INIT INFO
/usr/bin/sonar $*
Linking to SonarQube
sudo ln -s /opt/sonarqube/bin/linux-x86-64/sonar.sh /usr/bin/sonarSetting rights and adding to boot
sudo chmod 755 /etc/init.d/sonar
sudo chkconfig --add sonar
Launch sonar
sudo service sonar startInstall sonar runner:
yum install sonar-runner
wget http://repo1.maven.org/maven2/org/codehaus/sonar/runner/sonar-runner-dist/2.4/sonar-runner-dist-2.4.zip
unzip sonar-runner-dist-2.4.zip
mv sonar-runner-2.4 /opt/sonar-runner
export SONAR_RUNNER_HOME=/opt/sonar-runner
export PATH=$PATH:$SONAR_RUNNER_HOME/bin
It is necessary to create the sonar-project.properties file in the project root. Example file contents:
Running in Jenkins:
1. In the Jenkins settings - plug-in management, install the plugins “SonarQube Scanner for Jenkins” to generate a visual report
2. Go to “Jenkins settings” - “System configuration” - “SonarQube servers” (if this configuration will not, then you need to restart Jenkins). Next, you need to fill in the configuration fields:
Fig. 8. Configuring the SonarQube Server in the Jenkins Continuous Integration System
3. Go to “Jenkins Settings” - “Global Tool Configuration” - “SonarQube Scanner”. Fill in the configuration fields
Fig. 9. Configuring the SonarQube scanner in the Jenkins continuous integration system
4. Create a project (job) with a free configuration
5. In the source control point, insert the link to the repository
6. In the assembly point, select “Execute SonarQube Scanner”
In the “Analysis properties” field, enter the parameters from the sonar-project.properties file or specify the path to this file
7. Save the project and run
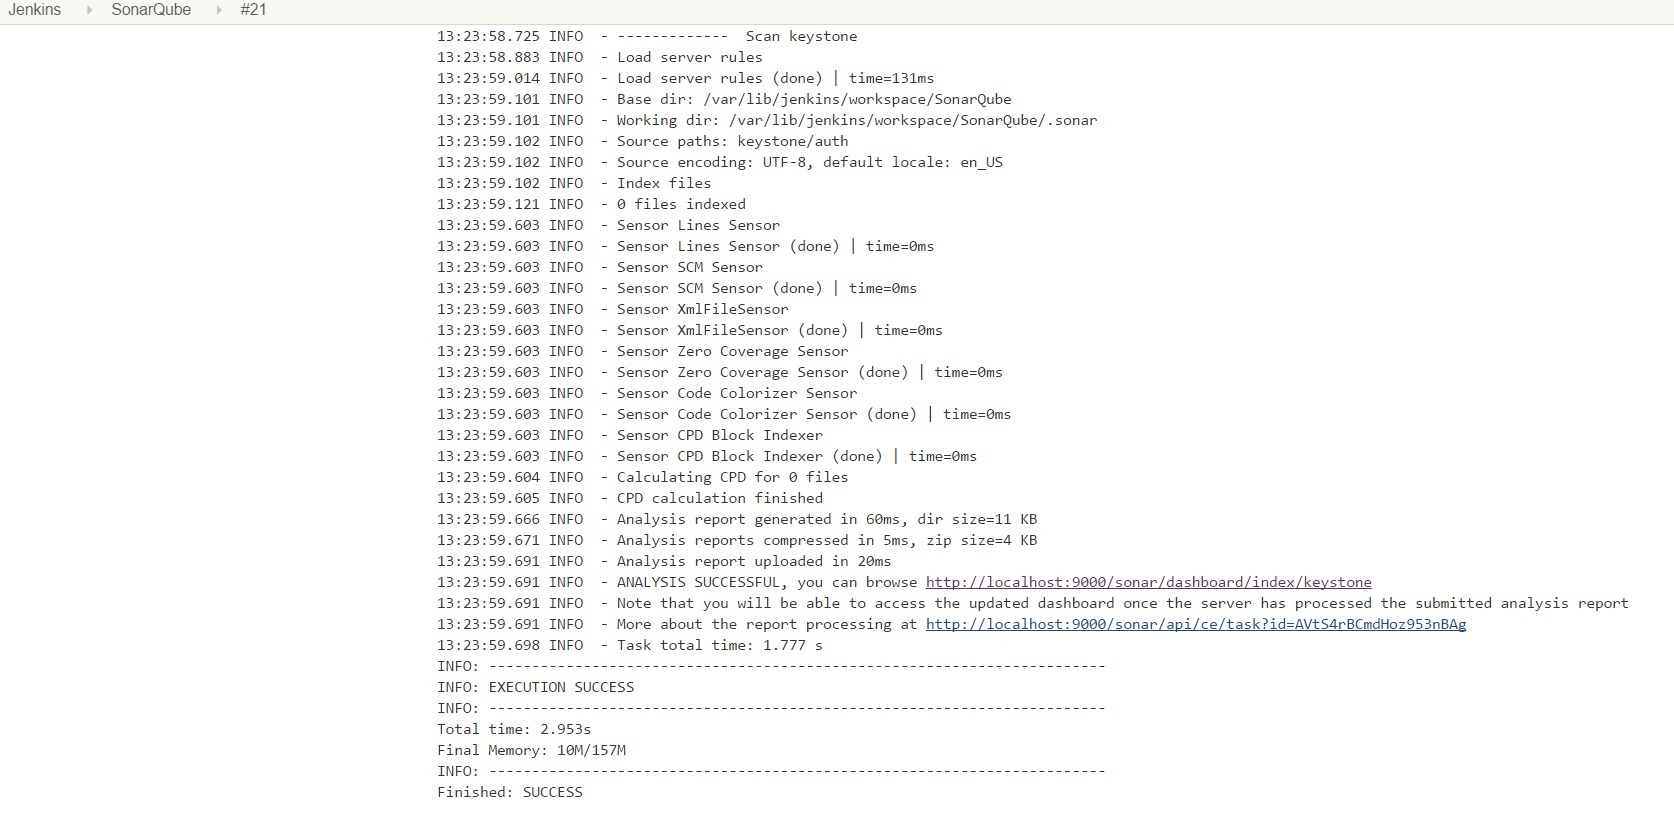
Fig .10. The result of the SonarQube
Fig. 11. The result of the work of SonarQube - continued 1
By clicking on the link from the result of the localhost project : 9000 / sonar / dashboard / index / keystone, you can examine in detail the report on the quality control of the keystone code Fig
. 12 . Example of a generated SonarQube report
Fig. 13. SonarQube Report Generated Example - Continued 1