3CX WebMeeting Video Conferencing - The Complete Guide
- Tutorial
For our clients, who often use 3CX WebMeeting video conferencing, we have prepared a detailed guide that will guide you from creating a conference to creating a webinar video for Youtube. System administrators can use it as a cheat sheet, especially when introducing new employees to the course. We will look at the various ways to create a conference, the tools you can use, and the management of participants.
The 3CX web client uses WebRTC technology , which allows you to create video conferencing in the browser, without installing additional software and equipment (except headset and webcam).
To participate in the conference, you must allow browser access to the camera and microphone. To use a number of conference functions (for example, manage other PCs), you need to install the browser extension 3CX Click to Call for Chrome or Firefox .
To participate in the conference from mobile devices, install the 3CX WebMeeting mobile app from the iOS App Store or Android Play .
Consider creating a conference in the browser.

a. WebMeeting - creating video conferencing (done in the 3CX web client).
b. Invite People - add new participants to the video conference.
c. Add Participants - specify the names and e-mails of users to whom the invitation will be sent. They will receive an e-mail with a link to the connection.
d. Copy Meeting Link - copy the connection link to the clipboard. It can be sent to any Internet user or placed on your website.
e. Settings - WebMeeting advanced settings (consider them below).

a. Start Recording - select the recording quality and click Start to start. After the end of the conference, the organizer will receive an e-mail with a link to download the video.
b. Screen Sharing is a handy feature for displaying products or collaborating with colleagues (consider it below).
c. Remote Control is a technology for remote user support. It allows you to connect to a remote PC and solve most of the problems directly from the browser (see below).
d. Share PDF - display of PDF-documents, as a rule, presentations, to other conference participants (consider it below).
e. Whiteboard - flipchart (writing board) for the description of ideas and online learning (consider it below).
You can show other participants the entire desktop or a specific application window. To start the demonstration, click the Screen Sharing button and select a desktop or a separate window.

To stop the show, click Stop Sharing.
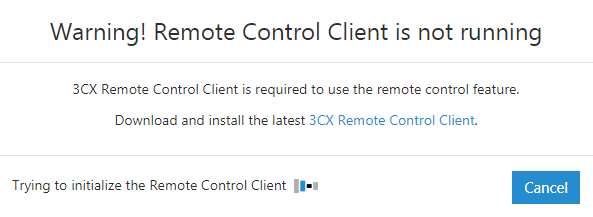
To use this feature, use the 3CX Remote Control Client extension. If the extension is not installed, the system will suggest its installation.
When a participant clicks Request Remote Control, the present conference organizers receive an Allow Remote Control message and can connect. If the organizers have left the conference, this feature will not be available.
You can upload a PDF file to the repository and then show it to conference participants. To do this, click Share PDF. A pdf document repository window will open where you can download, preview, or start displaying documents.
To show a presentation, click on the document, and then use the presentation management tools on top (Cursor, Marker, Eraser, and Text).

To finish the presentation, click Stop Sharing.
Flipchart is activated by the Whiteboard button. You can use a blank (Blank) or marked (Dotted Grid) board. Tools for working with the board are similar to similar tools for working with a presentation.
You can take a screenshot (photo) of the participant during a video conference by clicking the Snapshot button in the lower left corner of the participant's image. The screenshot is saved locally on the computer.

The conference organizer, by clicking on the Change Role icon near the participant's name, may grant him additional rights, depending on the role in the conference.

The organizer icon, the conference creator, is blue and cannot be moderated by other participants.
Participants, regardless of their role, can respond to events in the conference with the React button. There are several reactions: question, approval, idea, etc.

A participant with the organizer's rights can disconnect another participant from the conference by selecting him in the side list and pressing Kick. Disabled participants are notified and disconnected from the conference for 3 seconds. Disconnected users can reconnect to the conference - disconnecting the user does not mean that the user is blocked (banned).
The conference organizer can accept or reject the user's request to participate in the conference if he has the additional right to moderate the participants of the Moderate Participants. In this case, the user can connect only if there is already an organizer in the conference and he explicitly confirmed the user's request for connection.
Also, having this right, you can not only disconnect the participant from the conference, but also prohibit him from connecting again.

Conference organizers can receive a response from the audience by creating various polls and polls. To do this, click the Start a new Poll button in the panel on the right to open the survey repository.
Click New to create a new poll. Specify the name and duration of the survey, add questions and answer options, and then click Save to save the survey.

To start a survey, select it from the repository and click Submit. The survey will be shown in the conference interface - participants will see questions and answer options.
Organizers can track the progress of the survey: the percentage of completion, status (open or closed), the time since the beginning of the survey, as well as see a summary of the participants' responses in real time. The Close Polling button completes the survey. Click Share Results to prepare a survey PDF file for participants.
The Stop Sharing button removes the poll from the conference interface, returning it to its normal form.
For personal video calls, such as job interviews, technical support and advice for clients, virtual personal meeting rooms are used. For the extension number and 3CX Call Queue there is a personal room link Click to Meet URL.
Your link Click to Meet like https://mypbx.3cx.eu/ntesla is set by the PBX administrator. It is sent to you in the 3CX Welcome Letter and can be personalized (for example, under your name) for inclusion in an e-mail signature or on the website. Clicking on this link, any Internet user enters into a "chat":
When a user from the Internet clicks on the Click to Meet link, he is taken to the WebMeeting conference interface, and an incoming video conference request is sent to the PBX user. You can click on the link and start a personalized conference or simply ignore the request. In the Call Queue, as soon as the first operator answered the request, others can no longer accept it. However, you can then invite other participants to a personal conference. After the end of the conference, the operators will receive a report by e-mail.
At the same time, you can only be in one virtual "negotiation".
For group hangouts, general meeting rooms are better suited. The right to organize group conferences should be granted to you by the PBX administrator. Users who click on the link in the invitation are connected to the conference immediately, unless the administrator has added you the moderation right for the Moderate Participants.
New participants who connect after the start of the conference will not see the previous conversation in the chat.
The new version of WebMeeting allows you to configure quite a lot of media options. To do this, click the Settings icon in the right pane. The following options are available:
Also, the following diagnostic parameters are available in the left sidebar:
Creating a videoconference
The 3CX web client uses WebRTC technology , which allows you to create video conferencing in the browser, without installing additional software and equipment (except headset and webcam).
To participate in the conference, you must allow browser access to the camera and microphone. To use a number of conference functions (for example, manage other PCs), you need to install the browser extension 3CX Click to Call for Chrome or Firefox .
To participate in the conference from mobile devices, install the 3CX WebMeeting mobile app from the iOS App Store or Android Play .
Consider creating a conference in the browser.
a. WebMeeting - creating video conferencing (done in the 3CX web client).
b. Invite People - add new participants to the video conference.
c. Add Participants - specify the names and e-mails of users to whom the invitation will be sent. They will receive an e-mail with a link to the connection.
d. Copy Meeting Link - copy the connection link to the clipboard. It can be sent to any Internet user or placed on your website.
e. Settings - WebMeeting advanced settings (consider them below).
Video conferencing management
a. Start Recording - select the recording quality and click Start to start. After the end of the conference, the organizer will receive an e-mail with a link to download the video.
b. Screen Sharing is a handy feature for displaying products or collaborating with colleagues (consider it below).
c. Remote Control is a technology for remote user support. It allows you to connect to a remote PC and solve most of the problems directly from the browser (see below).
d. Share PDF - display of PDF-documents, as a rule, presentations, to other conference participants (consider it below).
e. Whiteboard - flipchart (writing board) for the description of ideas and online learning (consider it below).
Showing your desktop - Screen Sharing
You can show other participants the entire desktop or a specific application window. To start the demonstration, click the Screen Sharing button and select a desktop or a separate window.
To stop the show, click Stop Sharing.
Remote control of the participant's PC - Remote Control
To use this feature, use the 3CX Remote Control Client extension. If the extension is not installed, the system will suggest its installation.
When a participant clicks Request Remote Control, the present conference organizers receive an Allow Remote Control message and can connect. If the organizers have left the conference, this feature will not be available.
PDF demo - Share PDF
You can upload a PDF file to the repository and then show it to conference participants. To do this, click Share PDF. A pdf document repository window will open where you can download, preview, or start displaying documents.
To show a presentation, click on the document, and then use the presentation management tools on top (Cursor, Marker, Eraser, and Text).
To finish the presentation, click Stop Sharing.
Flipchart - Whiteboard
Flipchart is activated by the Whiteboard button. You can use a blank (Blank) or marked (Dotted Grid) board. Tools for working with the board are similar to similar tools for working with a presentation.
Screenshot of the participant
You can take a screenshot (photo) of the participant during a video conference by clicking the Snapshot button in the lower left corner of the participant's image. The screenshot is saved locally on the computer.
Managing conference participants
The conference organizer, by clicking on the Change Role icon near the participant's name, may grant him additional rights, depending on the role in the conference.
- Organizer - the organizer has full conference management, can use all the tools, allow participants to use the camera, microphone and chat. He also has the right to accept or reject the user's request to participate in the conference, as well as to disconnect the participant from the current conference.
- Presenter - a presenter can show his screen, respond to remote control requests, conduct polls and show presentations.
- Participant - a participant can only send requests for a remote connection to his PC.
The organizer icon, the conference creator, is blue and cannot be moderated by other participants.
Conference participant response
Participants, regardless of their role, can respond to events in the conference with the React button. There are several reactions: question, approval, idea, etc.
Disconnection from the conference
A participant with the organizer's rights can disconnect another participant from the conference by selecting him in the side list and pressing Kick. Disabled participants are notified and disconnected from the conference for 3 seconds. Disconnected users can reconnect to the conference - disconnecting the user does not mean that the user is blocked (banned).
Confirmation / rejection of the request to connect to the conference
The conference organizer can accept or reject the user's request to participate in the conference if he has the additional right to moderate the participants of the Moderate Participants. In this case, the user can connect only if there is already an organizer in the conference and he explicitly confirmed the user's request for connection.
Also, having this right, you can not only disconnect the participant from the conference, but also prohibit him from connecting again.
Polls and polls among participants
Conference organizers can receive a response from the audience by creating various polls and polls. To do this, click the Start a new Poll button in the panel on the right to open the survey repository.
Click New to create a new poll. Specify the name and duration of the survey, add questions and answer options, and then click Save to save the survey.
To start a survey, select it from the repository and click Submit. The survey will be shown in the conference interface - participants will see questions and answer options.
Organizers can track the progress of the survey: the percentage of completion, status (open or closed), the time since the beginning of the survey, as well as see a summary of the participants' responses in real time. The Close Polling button completes the survey. Click Share Results to prepare a survey PDF file for participants.
The Stop Sharing button removes the poll from the conference interface, returning it to its normal form.
Personal conference rooms
For personal video calls, such as job interviews, technical support and advice for clients, virtual personal meeting rooms are used. For the extension number and 3CX Call Queue there is a personal room link Click to Meet URL.
Your link Click to Meet like https://mypbx.3cx.eu/ntesla is set by the PBX administrator. It is sent to you in the 3CX Welcome Letter and can be personalized (for example, under your name) for inclusion in an e-mail signature or on the website. Clicking on this link, any Internet user enters into a "chat":
- Link Click to Meet of the extension number 3CX - the user of the PBX with this number receives an e-mail notification or chat message about the upcoming conference.
- Link Click to Meet 3CX Call Queues - all Call Queue operators receive an e-mail notification or chat message about an upcoming conference. Only the first operator who clicks the link in the notification connects to the conference.
When a user from the Internet clicks on the Click to Meet link, he is taken to the WebMeeting conference interface, and an incoming video conference request is sent to the PBX user. You can click on the link and start a personalized conference or simply ignore the request. In the Call Queue, as soon as the first operator answered the request, others can no longer accept it. However, you can then invite other participants to a personal conference. After the end of the conference, the operators will receive a report by e-mail.
At the same time, you can only be in one virtual "negotiation".
General conference rooms
For group hangouts, general meeting rooms are better suited. The right to organize group conferences should be granted to you by the PBX administrator. Users who click on the link in the invitation are connected to the conference immediately, unless the administrator has added you the moderation right for the Moderate Participants.
New participants who connect after the start of the conference will not see the previous conversation in the chat.
Audio and video conference parameters
The new version of WebMeeting allows you to configure quite a lot of media options. To do this, click the Settings icon in the right pane. The following options are available:
- Audio input source - select recording device (microphone)
- Audio output device - select playback device (headphones or PC speakers)
- Audio quality - audio quality, depends on the width of the Internet channel.
- Sensitivity threshold - microphone sensitivity
- Auto Gain Control - Microphone AGC
- Echo cancellation - Echo cancellation (microphone captures sounds from speakers)
- Noise suppression - suppresses specific noises, such as keyboard sounds
- Video input source - video capture device selection (camera)
- Video quality - video quality depends on the width of the Internet channel.
- Device test - the “Start” button starts testing multimedia devices.
Also, the following diagnostic parameters are available in the left sidebar:
- Statistics - technical information and graphics to help troubleshoot communications problems.
- Info - additional information about the current conference and 3CX WebMeeting version