Learning Retrofit 2
- Tutorial
In the world of Android development, there are many interesting libraries, and today we look at the brainchild of the company Square - Retrofit . What kind of animal is this? Retrofit (according to the official site) is a type-safe HTTP client for Android and Java. It is an indispensable tool for working with APIs in client-server applications. Some 5 years ago, Android developers to work with the network had to turn the mountains of code with callbacks, AsyncTask'ami and other "low-level" things. And Square has released such a wonderful library - Retrofit.
On the Internet, I could not find intelligible tutorials on the second version of the library, so today we will deal with it with an example of an application receiving posts from bash.im
Better to see once than hear a hundred times
We will create an application that receives data from the API of the Umorili website , since only they provide data from the bash in a convenient form for parsing. This is how the final version will look:
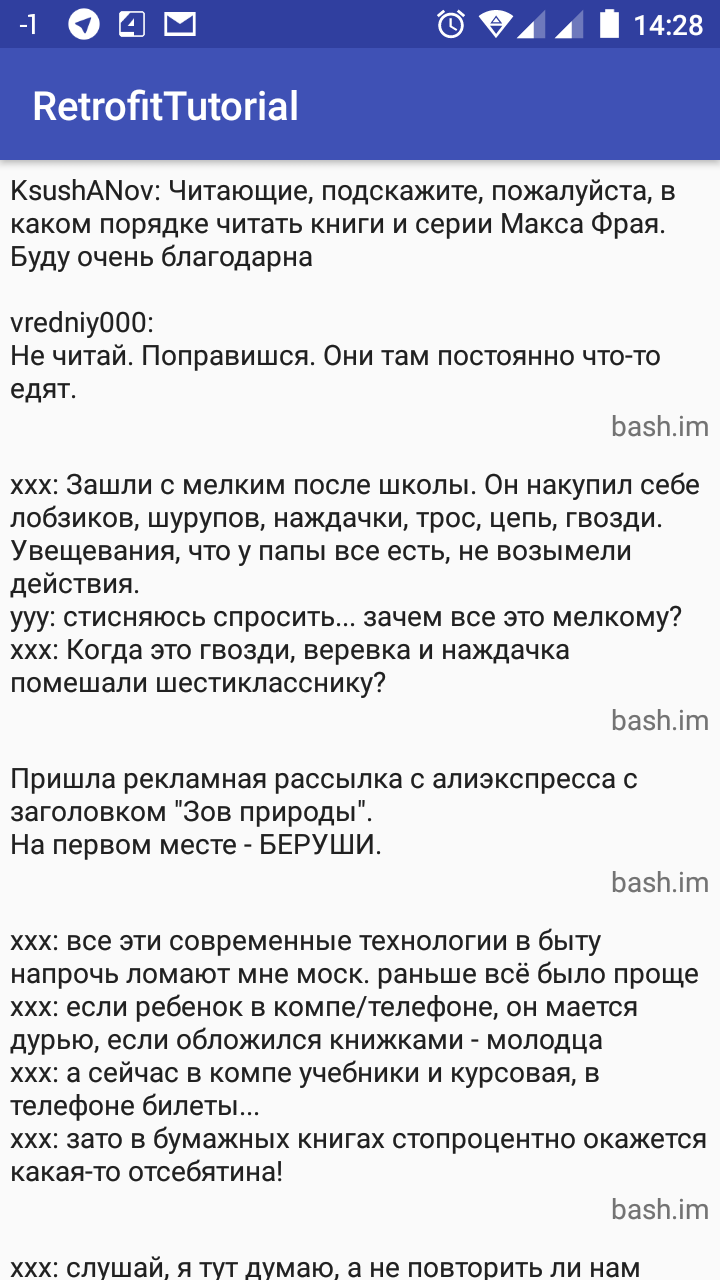
Design, of course, does not shine
Dependencies
The Retrofit library can be connected in three ways: Gradle, Maven, Jar. We describe each method.
Gradle
In most cases, this tool is used to build applications for Android, so if you are not sure, take this option :) (hereinafter, Gradle will be used for dependencies).
To connect the application module to the build.gradle file,
dependenciesinsert the line in the section :compile 'com.squareup.retrofit2:retrofit:2.1.0'Maven
If someone uses this system of dependencies and assemblies, then the fragment of the dependency will look like this:
com.squareup.retrofit2 retrofit 2.1.0 Jar
I do not welcome the use of this option, but some love it. Download the jar file ( link ) from the official site and drop it into the libs folder.
In addition to the library itself, we need a JSON parser and RecyclerView-v7, so we’ll connect them:
compile 'com.squareup.retrofit2:converter-gson:2.1.0' //Конвертер JSON, можно, если предпочитаете, использовать Jackson
compile 'com.android.support:recyclerview-v7:25.0.0' //RecyclerView
With the dependencies sorted out, now let's move on to the sweetest part - development. First things first, we need to describe API requests, therefore.
Description of API requests
Retrofit allows you to make a full-fledged REST client that can perform POST, GET, PUT, DELETE. Annotations are used to indicate the type and other aspects of the request. For example, in order to indicate that you want to GET request, we need to write a method to GET to POST request POST , and so on. In parentheses to the type of request is the target address. For example, take the GitHub API. The full URL to get the list of repositories for a specific user can be represented in the form
https://api.github.com/users/octocat/repos, where:- api.github.com - the base part of the address (always ends with a slash)
- users / {user} / repos - method (document address, destination address), where we replaced a specific user (octocat) with an alias (about using aliases a bit later)
There are still request parameters, for example, in a request to Umorili we will use the following address -
https://umorili.herokuapp.com/api/get?name=bash&num=50, where name=bash&num=50- parameters. But the description does not end with mere annotations, but we need to describe them somewhere. And we describe them in the interface. For our application, the interface will be as follows:
package ru.mustakimov.retrofittutorial.api;
import java.util.List;
import retrofit2.Call;
import retrofit2.http.GET;
import retrofit2.http.Query;
import ru.mustakimov.retrofittutorial.PostModel;
public interface UmoriliApi {
    @GET("/api/get")
    Call> getData(@Query("name") String resourceName, @Query("num") int count);
}
Let's analyze this interface. We have a getData method that returns a type object . Methods should always return a type object and have a request type annotation (GET, POST, PUT, DELETE). The annotation shows Retrofit that you need to put a couple name = <string value resourceName> as the query parameter. If we have an alias in the target address, then in order to replace the alias with a value, we need to write in the parameters of the function , where SomeType is any type (for example, String, int, float). PostModel is a class generated by the jsonschema2pojo website based on a server response.
Call> Call@Query("name") String resourceName@Path("<Название аласа>") SomeType variableHere is the class itself
package ru.mustakimov.retrofittutorial;
import com.google.gson.annotations.Expose;
import com.google.gson.annotations.SerializedName;
public class PostModel {
    @SerializedName("site")
    @Expose
    private String site;
    @SerializedName("name")
    @Expose
    private String name;
    @SerializedName("desc")
    @Expose
    private String desc;
    @SerializedName("link")
    @Expose
    private String link;
    @SerializedName("elementPureHtml")
    @Expose
    private String elementPureHtml;
    /**
     * @return The site
     */
    public String getSite() {
        return site;
    }
    /**
     * @param site The site
     */
    public void setSite(String site) {
        this.site = site;
    }
    /**
     * @return Site name
     */
    public String getName() {
        return name;
    }
    /**
     * @param name Site name
     */
    public void setName(String name) {
        this.name = name;
    }
    /**
     * @return Site description
     */
    public String getDesc() {
        return desc;
    }
    /**
     * @param desc Site description
     */
    public void setDesc(String desc) {
        this.desc = desc;
    }
    /**
     * @return The link
     */
    public String getLink() {
        return link;
    }
    /**
     * @param link The link
     */
    public void setLink(String link) {
        this.link = link;
    }
    /**
     * @return The elementPureHtml
     */
    public String getElementPureHtml() {
        return elementPureHtml;
    }
    /**
     * @param elementPureHtml The elementPureHtml
     */
    public void setElementPureHtml(String elementPureHtml) {
        this.elementPureHtml = elementPureHtml;
    }
}
Preparing for the request
Before sending the request and receiving the result, we need to initialize Retrofit and the interface object. So that the application does not have hundreds of objects that perform the same function, we will do all the initialization in the class inherited from Application. The code will then be as follows:
package ru.mustakimov.retrofittutorial;
import android.app.Application;
import retrofit2.Retrofit;
import retrofit2.converter.gson.GsonConverterFactory;
import ru.mustakimov.retrofittutorial.api.UmoriliApi;
public class App extends Application {
    private static UmoriliApi umoriliApi;
    private Retrofit retrofit;
    @Override
    public void onCreate() {
        super.onCreate();
        retrofit = new Retrofit.Builder()
                .baseUrl("https://umorili.herokuapp.com") //Базовая часть адреса
                .addConverterFactory(GsonConverterFactory.create()) //Конвертер, необходимый для преобразования JSON'а в объекты
                .build();
        umoriliApi = retrofit.create(UmoriliApi.class); //Создаем объект, при помощи которого будем выполнять запросы
    }
    public static UmoriliApi getApi() {
        return umoriliApi;
    }
}
Now from any class we have access to the API.
Data retrieval
We can execute requests (and, therefore, receive data) in two ways - synchronous and asynchronous requests. For synchronous (blocking) receipt, we use the method
execute()of an object of type Call. For our example, the code would be as follows:Response response = App.getApi().getData("bash", 50).execute();
As a result of execution, we get an object of type Response (response), from where we can already get the parsed response by the method
body(). For asynchronous receiving, we replace
execute()with enqueue(), where in the parameters we pass the callback functions (callbacks). In our example, it will look something like this:App.getApi().getData("bash", 50).enqueue(new Callback>() {
@Override
public void onResponse(Call> call, Response> response) {
//Данные успешно пришли, но надо проверить response.body() на null
}
@Override
public void onFailure(Call> call, Throwable t) {
//Произошла ошибка
}
});
Making data mapping
We have already received the data, but how to display it now? We throw the RecyclerView into the activity markup and call it somehow. After that we create markup for the element.
That's what I got
activity_main.xml
post_item.xml
post_item.xml
After we create the adapter for RecyclerView:
Adapter code
package ru.mustakimov.retrofittutorial;
import android.os.Build;
import android.support.v7.widget.RecyclerView;
import android.text.Html;
import android.view.LayoutInflater;
import android.view.View;
import android.view.ViewGroup;
import android.widget.TextView;
import java.util.List;
public class PostsAdapter extends RecyclerView.Adapter {
    private List posts;
    public PostsAdapter(List posts) {
        this.posts = posts;
    }
    @Override
    public ViewHolder onCreateViewHolder(ViewGroup parent, int viewType) {
        View v = LayoutInflater.from(parent.getContext()).inflate(R.layout.post_item, parent, false);
        return new ViewHolder(v);
    }
    @Override
    public void onBindViewHolder(ViewHolder holder, int position) {
        PostModel post = posts.get(position);
        if (Build.VERSION.SDK_INT >= Build.VERSION_CODES.N) {
            holder.post.setText(Html.fromHtml(post.getElementPureHtml(), Html.FROM_HTML_MODE_LEGACY));
        } else {
            holder.post.setText(Html.fromHtml(post.getElementPureHtml()));
        }
        holder.site.setText(post.getSite());
    }
    @Override
    public int getItemCount() {
        if (posts == null)
            return 0;
        return posts.size();
    }
    class ViewHolder extends RecyclerView.ViewHolder {
        TextView post;
        TextView site;
        public ViewHolder(View itemView) {
            super(itemView);
            post = (TextView) itemView.findViewById(R.id.postitem_post);
            site = (TextView) itemView.findViewById(R.id.postitem_site);
        }
    }
}
And we prescribe in MainActivity.java the initialization of the RecyclerView, the adapter, as well as the receipt of data.
And here is MainActivity
package ru.mustakimov.retrofittutorial;
import android.support.v7.app.AppCompatActivity;
import android.os.Bundle;
import android.support.v7.widget.LinearLayoutManager;
import android.support.v7.widget.RecyclerView;
import android.widget.Toast;
import java.io.IOException;
import java.util.ArrayList;
import java.util.List;
import retrofit2.Call;
import retrofit2.Callback;
import retrofit2.Response;
public class MainActivity extends AppCompatActivity {
    RecyclerView recyclerView;
    List posts;
    @Override
    protected void onCreate(Bundle savedInstanceState) {
        super.onCreate(savedInstanceState);
        setContentView(R.layout.activity_main);
        posts = new ArrayList<>();
        recyclerView = (RecyclerView) findViewById(R.id.posts_recycle_view);
        LinearLayoutManager layoutManager = new LinearLayoutManager(this);
        recyclerView.setLayoutManager(layoutManager);
        PostsAdapter adapter = new PostsAdapter(posts);
        recyclerView.setAdapter(adapter);
        try {
            Response response = App.getApi().getData("bash", 50).execute();
        } catch (IOException e) {
            e.printStackTrace();
        }
        App.getApi().getData("bash", 50).enqueue(new Callback>() {
            @Override
            public void onResponse(Call> call, Response> response) {
                posts.addAll(response.body());
                recyclerView.getAdapter().notifyDataSetChanged();
            }
            @Override
            public void onFailure(Call> call, Throwable t) {
                Toast.makeText(MainActivity.this, "An error occurred during networking", Toast.LENGTH_SHORT).show();
            }
        });
    }
}
On GitHub you can find the full code for this application.