Running NodeJS application on Android
No doubt you will enjoy running NodeJS on your Android device. Thanks to the terminal emulator and Linux environment for Android, the development of web applications on your smartphone will no longer be a problem for you.

Termux is a free application that can be installed directly from the Google Play store . Requires Android 5.0 or later. No root privileges required.
When you open Termux, you are greeted by the command line interface. It is recommended that you check for updates immediately after installing Termux. Type the following command and press Enter:
Termux comes with minimal basic hardware, so you must install coreutils to fully utilize command line commands such as mv, ls, etc.

Termux stores data in its own data warehouse, i.e. the $ HOME folder is located inside a private Termux area, like a regular Android application. Removing Termux will cause the loss of this data. If you are going to store important files there, then use termux-setup-storage to ensure that data is stored in external storage (for example, on an SD card).
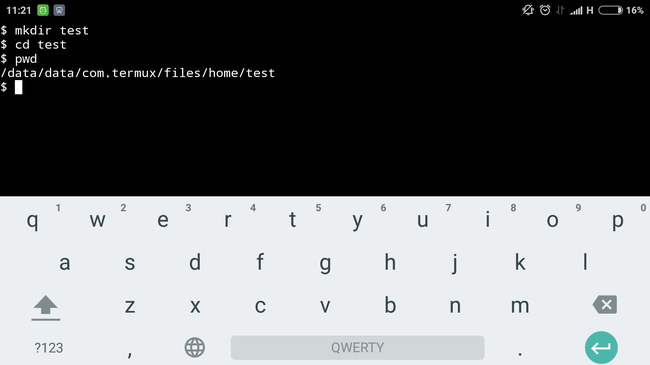
So, let's create a folder for our application and go to this directory:
At this point, you will most likely feel some problems when working in the console with a standard keyboard. To get around them, I installed a hacker keyboard from Google play . This is a touch keyboard that has everything you need to write code - Esc, Tab and arrow keys.

To write the code, we need any text editor available in the console. You can install Emacs or Vim, but for simplicity you can use nano. Install it:
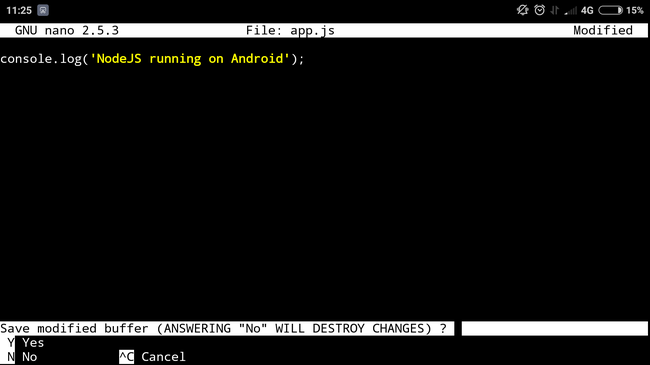
Create the app.js file and open it in the editor:
Let's write some simple NodeJS code to check:
To exit nano, you need to press Ctrl + X, write 'yes' and press Enter.
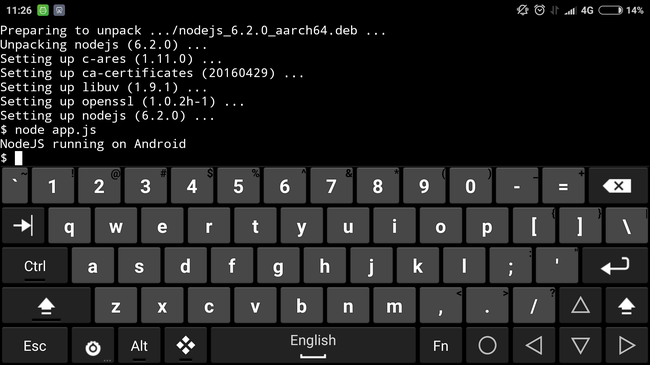
Now is the time to install NodeJS. It is very easy to do:
Now we can finally run our script:
Together with NodeJS, the npm package manager is available to us. Let's use it:
Open app.js and write / copy-paste the following code there:

This should print to the console the port number on which the server is responding. If you open http: // localhost: 8080 / in a browser, you will see the following text on the page:

To avoid manually restarting the server each time the app.js file changes, we can install nodemon. Nodemon is a utility that will track changes in your code and automatically restart the server.
Now you can start the server using the nodemon command instead of node:
Even with a hacker keyboard, writing code on the touch screen is not very convenient. Most likely, you write your code in much more convenient places and store it in the repository. Install git:
Now you can run git commands like git push, git pull, etc. without any errors.
Unfortunately, I did not manage to run the MongoDB server on Android. As an alternative, you can use cloud services such as MongoLab or be content with something like NeDB .
Building a Node.js application on Android
Termux is the ONE for Android
Termux
Termux is a free application that can be installed directly from the Google Play store . Requires Android 5.0 or later. No root privileges required.
When you open Termux, you are greeted by the command line interface. It is recommended that you check for updates immediately after installing Termux. Type the following command and press Enter:
$ apt updateTermux comes with minimal basic hardware, so you must install coreutils to fully utilize command line commands such as mv, ls, etc.
$ apt install coreutilsTermux stores data in its own data warehouse, i.e. the $ HOME folder is located inside a private Termux area, like a regular Android application. Removing Termux will cause the loss of this data. If you are going to store important files there, then use termux-setup-storage to ensure that data is stored in external storage (for example, on an SD card).
So, let's create a folder for our application and go to this directory:
Keyboard
At this point, you will most likely feel some problems when working in the console with a standard keyboard. To get around them, I installed a hacker keyboard from Google play . This is a touch keyboard that has everything you need to write code - Esc, Tab and arrow keys.
Nano
To write the code, we need any text editor available in the console. You can install Emacs or Vim, but for simplicity you can use nano. Install it:
$ apt install nanoCreate the app.js file and open it in the editor:
$ touch app.js
$ nano app.js
Let's write some simple NodeJS code to check:
console.log('NodeJS running on Android');To exit nano, you need to press Ctrl + X, write 'yes' and press Enter.
NodeJS
Now is the time to install NodeJS. It is very easy to do:
$ apt install nodejsNow we can finally run our script:
$ node app.jsExpress
Together with NodeJS, the npm package manager is available to us. Let's use it:
$ npm init
$ npm install express --save
$ nano app.js
Open app.js and write / copy-paste the following code there:
var express = require('express'),
    app = express(),
    port = Number(process.env.PORT || 8080);
app.get('/', function(req, res) {
   res.send('Express is working');
});
app.listen(port, function() {
   console.log('Listening on port ' + port);
});
$ node app.jsThis should print to the console the port number on which the server is responding. If you open http: // localhost: 8080 / in a browser, you will see the following text on the page:
Nodemon
To avoid manually restarting the server each time the app.js file changes, we can install nodemon. Nodemon is a utility that will track changes in your code and automatically restart the server.
$ npm install nodemon --save-devNow you can start the server using the nodemon command instead of node:
$ nodemon app.jsGit
Even with a hacker keyboard, writing code on the touch screen is not very convenient. Most likely, you write your code in much more convenient places and store it in the repository. Install git:
$ apt install gitNow you can run git commands like git push, git pull, etc. without any errors.
Mongodb
Unfortunately, I did not manage to run the MongoDB server on Android. As an alternative, you can use cloud services such as MongoLab or be content with something like NeDB .
See also:
Building a Node.js application on Android
Termux is the ONE for Android