Publish HTML5 apps to the AppStore without Mac
- Tutorial
Many hybrid mobile app developers face signing and publishing iOS apps without using a Mac.
With Android, everything is more or less simple: install the SDK (for Windows, Mac or Linux), build the application, and publish apk to Google play via the web interface. With Apple, such a number does not work: to generate a key, sign an application and publish ipa to the AppStore, you need a Mac. How to solve this problem in Windows?
You need to download and install OpenSSL under Win. At the installation stage, choose to copy the DLL files to the / bin folder , instead of the system directory.
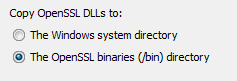
The rest of this guide assumes that you downloaded " Win32 OpenSSL v1.0.2e " and installed it in the C: \ OpenSSL folder .
1. Next you need to generate a private key. Go to the command line and go to the directory in which you plan to store the created files. Then enter the following command to generate the key:
2. Enter the following command to create a certificate request (CSR):
Do not forget to indicate your email address and name, and in the field C = change the code of your country, if necessary.
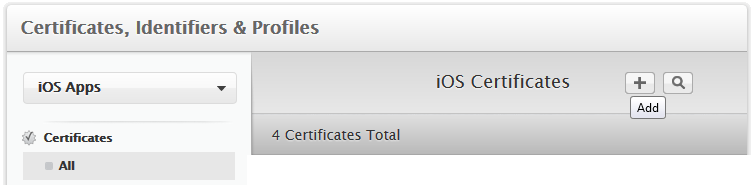
3. Go to the developer account on the Apple website , in the "Certificates, Identifiers & Profiles" section. Click the button to add the certificate:
4. Select which type of certificate you need ( App Store and Ad Hoc are suitable for publishing on the AppStore ).
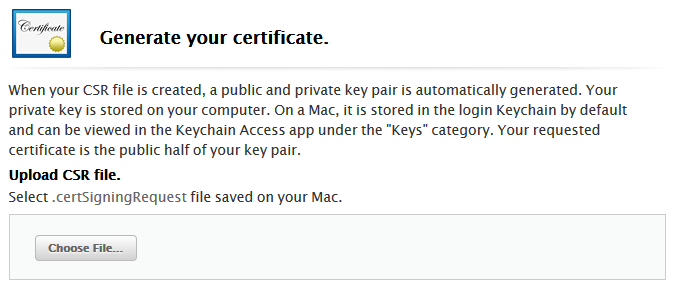
5. The site will display information on Certificate Signing Request (CSR), feel free to click "Continue".
6. Download the certificate request file (.certSigningRequest) and click Generate.
7. The ios_distribution.cer certificate is ready. Download it to the folder that you created earlier.
8. At the command prompt, enter the command to convert .cer to .pem:
9. After that, run the command for generating the P12 key:
You will be prompted to enter a password and confirm it.
1. Go back to the Apple developer account, in the Identifiers> App IDs section and create the application ID.
2. After that, initialize the application profile in the “Provisioning Profiles> Distribution” section. You need to select the App ID and the certificate that will be included in the profile. Click “Generate” and download the .mobileprovision file:

Using the provision-file and the P12-key, you can collect the ipa-file in the cloud PhoneGap Build or Intel XDK .
It remains to upload your ipa file to the AppStore. Unfortunately, this can only be done through Xcode or Application Loader , which only works on Mac. To solve this problem, someone buys a Mac mini (as the most budget of the Mac line), someone uses special services .
Personally, I rent a remote Mac via the Internet (about $ 1 per hour):
macincloud.com
virtualmacosx.com
macminivault.com
With Android, everything is more or less simple: install the SDK (for Windows, Mac or Linux), build the application, and publish apk to Google play via the web interface. With Apple, such a number does not work: to generate a key, sign an application and publish ipa to the AppStore, you need a Mac. How to solve this problem in Windows?
Openssl
You need to download and install OpenSSL under Win. At the installation stage, choose to copy the DLL files to the / bin folder , instead of the system directory.
The rest of this guide assumes that you downloaded " Win32 OpenSSL v1.0.2e " and installed it in the C: \ OpenSSL folder .
Key generation
1. Next you need to generate a private key. Go to the command line and go to the directory in which you plan to store the created files. Then enter the following command to generate the key:
C:\OpenSSL\bin\openssl genrsa -out mykey.key 2048
2. Enter the following command to create a certificate request (CSR):
C:\OpenSSL\bin\openssl req -new -key mykey.key -out CertificateSigningRequest.certSigningRequest -subj "/emailAddress=you@mail.ru, CN=Your Name, C=RU"Do not forget to indicate your email address and name, and in the field C = change the code of your country, if necessary.
3. Go to the developer account on the Apple website , in the "Certificates, Identifiers & Profiles" section. Click the button to add the certificate:
4. Select which type of certificate you need ( App Store and Ad Hoc are suitable for publishing on the AppStore ).
5. The site will display information on Certificate Signing Request (CSR), feel free to click "Continue".
6. Download the certificate request file (.certSigningRequest) and click Generate.
7. The ios_distribution.cer certificate is ready. Download it to the folder that you created earlier.
8. At the command prompt, enter the command to convert .cer to .pem:
C:\OpenSSL\bin\openssl x509 -in ios_distribution.cer -inform DER -out ios_distribution.pem -outform PEM
9. After that, run the command for generating the P12 key:
C:\OpenSSL\bin\openssl pkcs12 -export -inkey mykey.key -in ios_distribution.pem -out iphone_dist.p12
You will be prompted to enter a password and confirm it.
Profile Generation
1. Go back to the Apple developer account, in the Identifiers> App IDs section and create the application ID.
2. After that, initialize the application profile in the “Provisioning Profiles> Distribution” section. You need to select the App ID and the certificate that will be included in the profile. Click “Generate” and download the .mobileprovision file:
Download to AppStore
Using the provision-file and the P12-key, you can collect the ipa-file in the cloud PhoneGap Build or Intel XDK .
It remains to upload your ipa file to the AppStore. Unfortunately, this can only be done through Xcode or Application Loader , which only works on Mac. To solve this problem, someone buys a Mac mini (as the most budget of the Mac line), someone uses special services .
Personally, I rent a remote Mac via the Internet (about $ 1 per hour):
macincloud.com
virtualmacosx.com
macminivault.com