We pump the HP t5325 thin client
This article will focus on refining the HP thin client to install Debian 8. The

HP t5325 thin client is the smallest in its family and the only one built on the ARM architecture. Below I will give its main characteristics:
This client runs on HP ThinPro, which is based on Debian. The problem is that the system is installed on 512MB internal Flash memory. By modern standards, this amount is not enough for comfortable work, and the resource of the rewriting cycles of the built-in Flash is small. Therefore, it was decided to install the OS on an external hard drive.
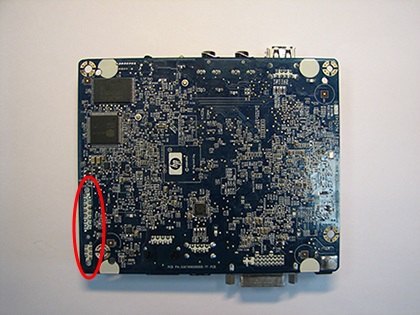
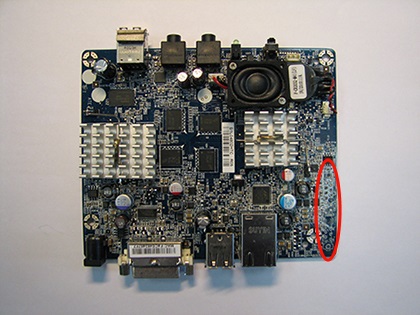
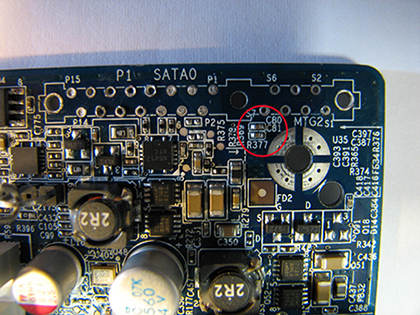
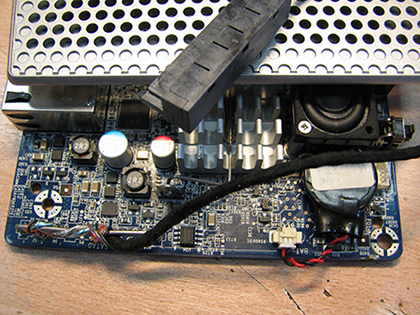
On the printed circuit board it can be seen that there is a place for installing a vertical SATA connector, but the dimensions of the case do not allow this. In a more detailed study, it turned out that some elements, in particular, filtering capacitors on the Rx, Tx terminals of the SATA0 connector: C80, C81, C82, C83, were not soldered on the board. The photo below shows the installation location.

These capacitors can be borrowed from the board from the old hard drive:

After installing the capacitors and studying the wiring of the board in the area of the SATA connector, the following connection diagram was determined:

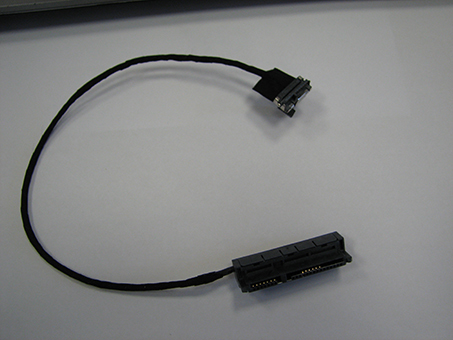
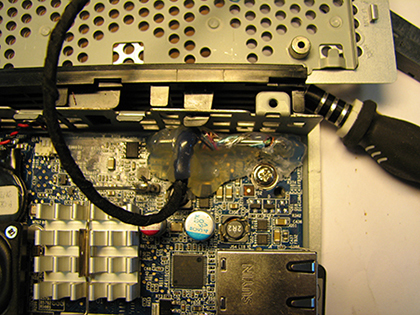
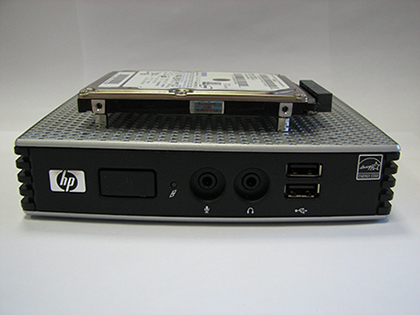
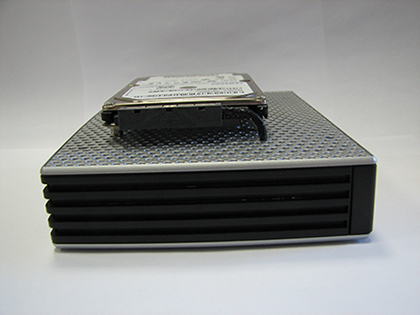
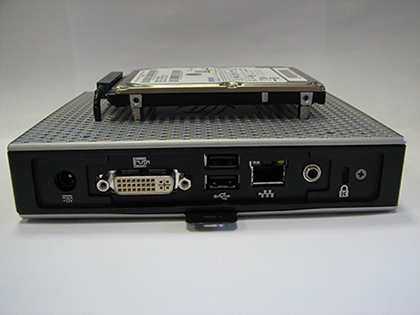
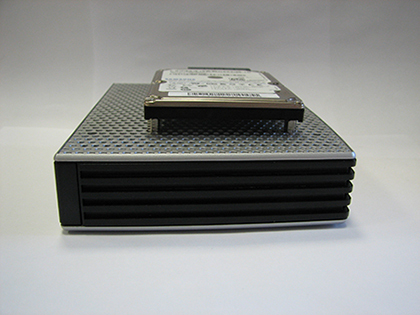
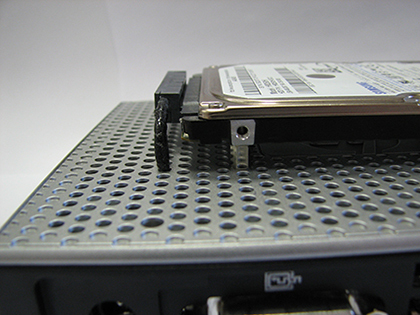
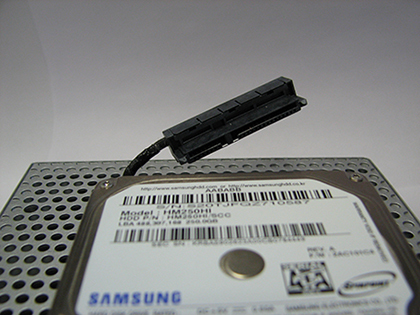
Due to the lack of space inside the case, it was decided to install the hard drive outside, on the top cover. This provided convenient disk access and better cooling. For these purposes, a SATA cable was purchased from an HP DV5 laptop, it is also suitable for DV6 and DV7-1000, it has a sufficient length and a suitable diameter in order to crawl into the holes in the top cover.
Next, remove the connector, determine the pinout and solder according to the scheme.
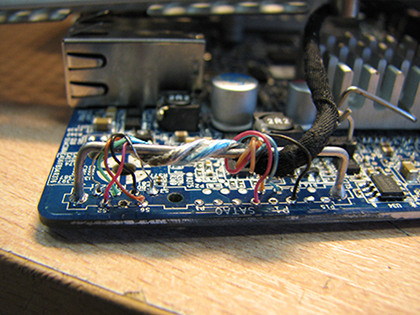
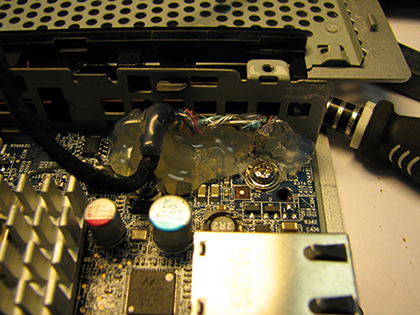
To increase the mechanical strength of the joint, we fix everything with hot-melt adhesive.
This thin client does not have a BIOS; U-Boot is used to boot the OS. To configure booting from an external drive, you need to access the U-Boot console - this can be done by connecting to the corresponding pins on the board, USB - UART converter.

Open Putty and select the COM port that is assigned to the converter. We supply power and quickly press the space bar until we see an invitation to enter commands.

In the U-Boot console, enter the following commands:
Here we set the boot from the hard drive (ide 1: 1), uImage and uInitrd will boot. The saveenv command means writing the configuration to non-volatile memory. You can learn more about the available commands by typing a question mark in the console.
Debian 8 was chosen as the OS, as the most compatible and does not require additional "finishing". Before starting the installation, you must prepare the hard drive. On the disk, you need to create one partition and format it to the ext2 file system, then copy, to the root, uImage and uInitrd . Next, connect the hard drive to the thin client and apply power. If everything is done correctly, then the system boot log should be displayed in the console and installation should begin.

After a successful installation, you must enter the U-Boot console and make small changes to the config. If the default disk partitioning was selected during system installation and a separate disk partition was created for the boot folder, enter the following commands:
If everything is installed in one partition:
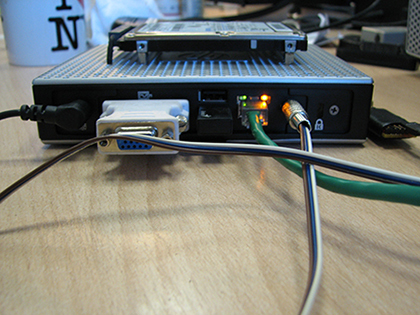
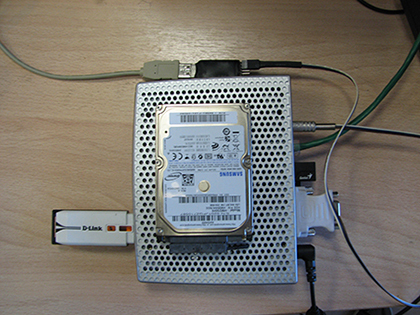
All! Now you have a miniature server running Debian, which can find a lot of applications at work and at home. Below are photos of what happened in the end. The hard drive is mounted on bolts from the VGA connector.


HP t5325 thin client is the smallest in its family and the only one built on the ARM architecture. Below I will give its main characteristics:
- Processor Marvell ARM 88F6281 1.2 GHz.
- Video card XGI VOLARI-Z11-A2CB-HF 64MB.
- RAM 512MB DDR2.
- Flash memory 512MB.
Training
This client runs on HP ThinPro, which is based on Debian. The problem is that the system is installed on 512MB internal Flash memory. By modern standards, this amount is not enough for comfortable work, and the resource of the rewriting cycles of the built-in Flash is small. Therefore, it was decided to install the OS on an external hard drive.
On the printed circuit board it can be seen that there is a place for installing a vertical SATA connector, but the dimensions of the case do not allow this. In a more detailed study, it turned out that some elements, in particular, filtering capacitors on the Rx, Tx terminals of the SATA0 connector: C80, C81, C82, C83, were not soldered on the board. The photo below shows the installation location.
These capacitors can be borrowed from the board from the old hard drive:
After installing the capacitors and studying the wiring of the board in the area of the SATA connector, the following connection diagram was determined:
Due to the lack of space inside the case, it was decided to install the hard drive outside, on the top cover. This provided convenient disk access and better cooling. For these purposes, a SATA cable was purchased from an HP DV5 laptop, it is also suitable for DV6 and DV7-1000, it has a sufficient length and a suitable diameter in order to crawl into the holes in the top cover.
Next, remove the connector, determine the pinout and solder according to the scheme.
To increase the mechanical strength of the joint, we fix everything with hot-melt adhesive.
This thin client does not have a BIOS; U-Boot is used to boot the OS. To configure booting from an external drive, you need to access the U-Boot console - this can be done by connecting to the corresponding pins on the board, USB - UART converter.
Open Putty and select the COM port that is assigned to the converter. We supply power and quickly press the space bar until we see an invitation to enter commands.
In the U-Boot console, enter the following commands:
setenv hdd_bootargs 'console=ttyS0,115200 root=/dev/sdb1 rw rootwait video=xgifb'
setenv boot_hdd 'ext2load ide 1:1 0x800000 /uImage; ext2load ide 1:1 0x1100000 /uInitrd'
setenv hdd 'ide reset; wol; setenv bootargs $(hdd_bootargs); run boot_hdd; bootm 0x800000 0x1100000'
setenv mainlineLinux yes
setenv arcNumber 2846
setenv bootcmd 'run hdd'
saveenv
Here we set the boot from the hard drive (ide 1: 1), uImage and uInitrd will boot. The saveenv command means writing the configuration to non-volatile memory. You can learn more about the available commands by typing a question mark in the console.
System installation
Debian 8 was chosen as the OS, as the most compatible and does not require additional "finishing". Before starting the installation, you must prepare the hard drive. On the disk, you need to create one partition and format it to the ext2 file system, then copy, to the root, uImage and uInitrd . Next, connect the hard drive to the thin client and apply power. If everything is done correctly, then the system boot log should be displayed in the console and installation should begin.
After a successful installation, you must enter the U-Boot console and make small changes to the config. If the default disk partitioning was selected during system installation and a separate disk partition was created for the boot folder, enter the following commands:
setenv hdd_bootargs 'console=ttyS0,115200 root=/dev/sdb1 rw rootwait video=xgifb'
setenv boot_hdd 'ide reset; ext2load ide 1:1 0x800000 /uImage; bootm 0x800000'
setenv hdd 'setenv bootargs $(hdd_bootargs); run boot_hdd; bootm 0x800000'
saveenv
If everything is installed in one partition:
setenv hdd_bootargs 'console=ttyS0,115200 root=/dev/sdb1 rw rootwait video=xgifb'
setenv boot_hdd 'ide reset; ext2load ide 1:1 0x800000 /boot/uImage; bootm 0x800000'
setenv hdd 'setenv bootargs $(hdd_bootargs); run boot_hdd; bootm 0x800000'
saveenv
All! Now you have a miniature server running Debian, which can find a lot of applications at work and at home. Below are photos of what happened in the end. The hard drive is mounted on bolts from the VGA connector.