Attempt to manufacture a housing for a robot with a limited budget. Glass Mat and Epoxy
How to show investors a beautiful robot? Develop a beautiful body. How to do it while there is no investment? I tried to briefly describe my path. I am developing a robot for collecting golf balls in the driving range . Now in the world, only one company sells a robot to solve this problem, it costs more than $ 15.000. The market is very promising, it made me turn the project from DIY into a technology startup. Without packing the difference is very difficult to feel. In this article I will tell you how for 4727 rubles. get the case 1000mm x 800mm x 250mm.
How to explain to potential investors in Russia, what is a robot for collecting golf balls at the driving range? Most often you need to start with what golf is, the driving range, why collect balls, why the robot does not fall into the sand traps, why the golf car doesn’t knock it, etc.
The easiest way to show the video is how it works. That's just from the view of the plywood box everyone has an involuntary smile on their face and the conversation ceases to be constructive. This is no less acute when preparing an application to Western investment funds.
In the future, the body is planned to be manufactured by injection molding , but the cost of manufacturing molds is a huge barrier to a startup.
First of all, we need to develop a form on which to glue fiberglass with epoxy resin. Some prefer to make a matrix (counterform).
The most budget option is obtained from the foam. You can glue it into a blank, you need a size and process it on a CNC milling machine. We are not looking for easy ways, and the goal is to make a very budget.

You can even get a model from sculptural clay, but realizing that the sculptor is very mediocre of me, I decided to go a more technological way.
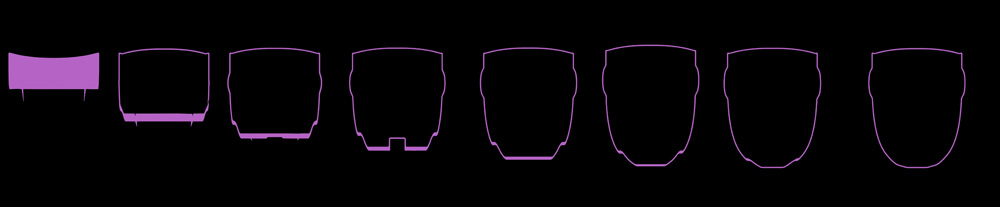
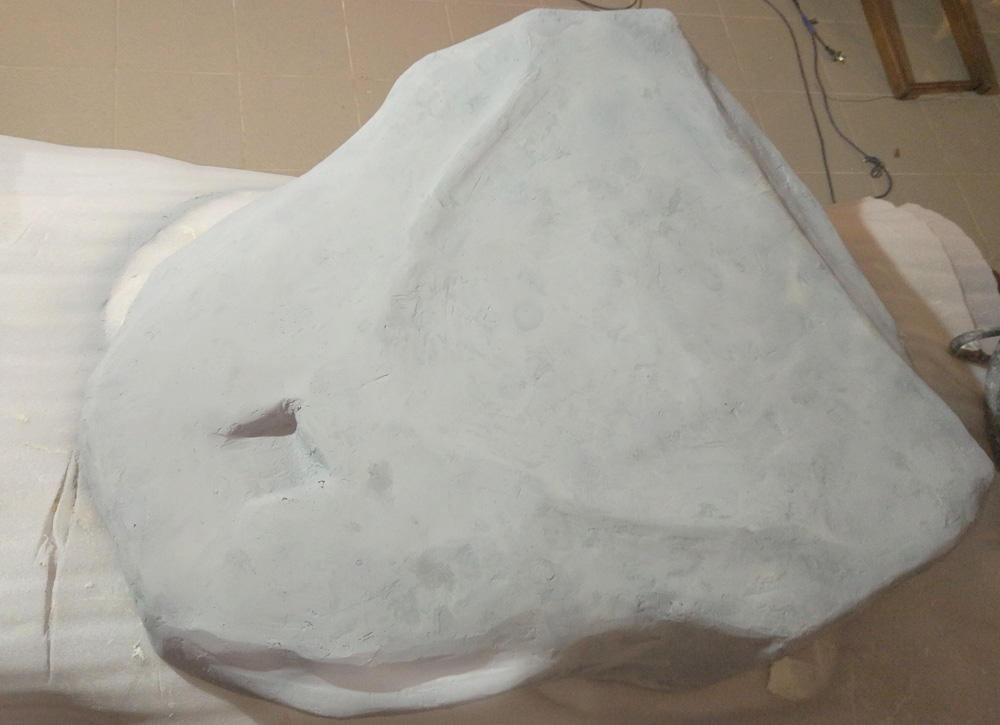
The existing 3D model is cut into layers equal to the thickness of the foam, in my case it is 30mm.
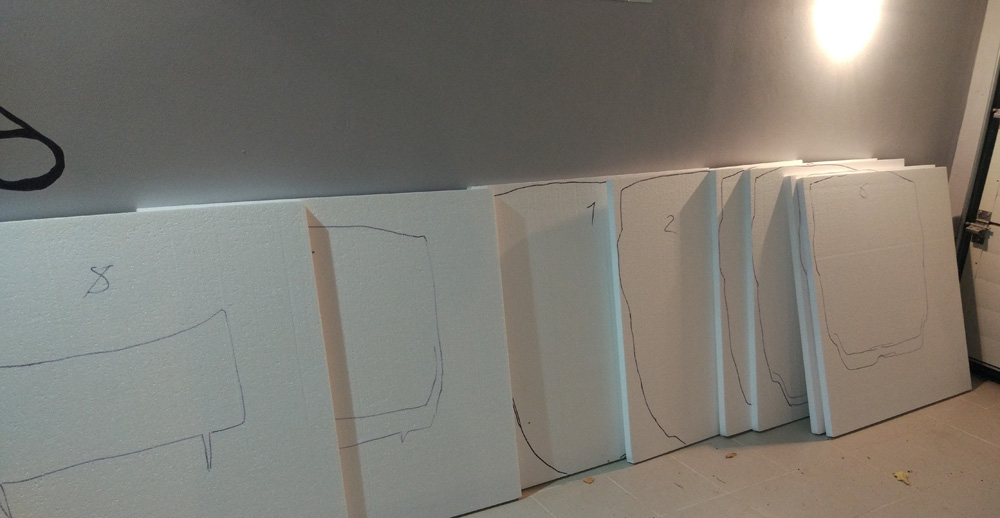
The resulting images we need to transfer to the foam and cut. This can be done using wide format printing and transfer lines from paper. I decided to use the projector. This method also helped me a lot in transferring images to the wall.

After transfer, we cut sheets of foam plastic along the lines.
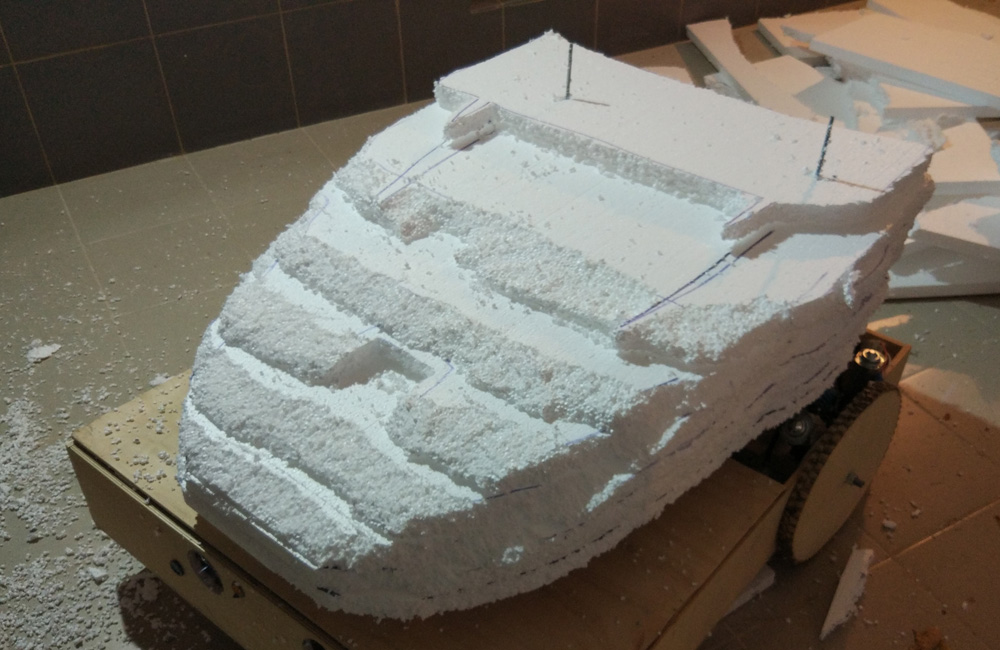
The resulting layers are glued together.
Align the form can be plasticine. I chose the easiest way - wrapping with cling film.

After obtaining the required form, we paste over all the adhesive tape, there is hope that the epoxy does not stick to it and I can use the blank several times.
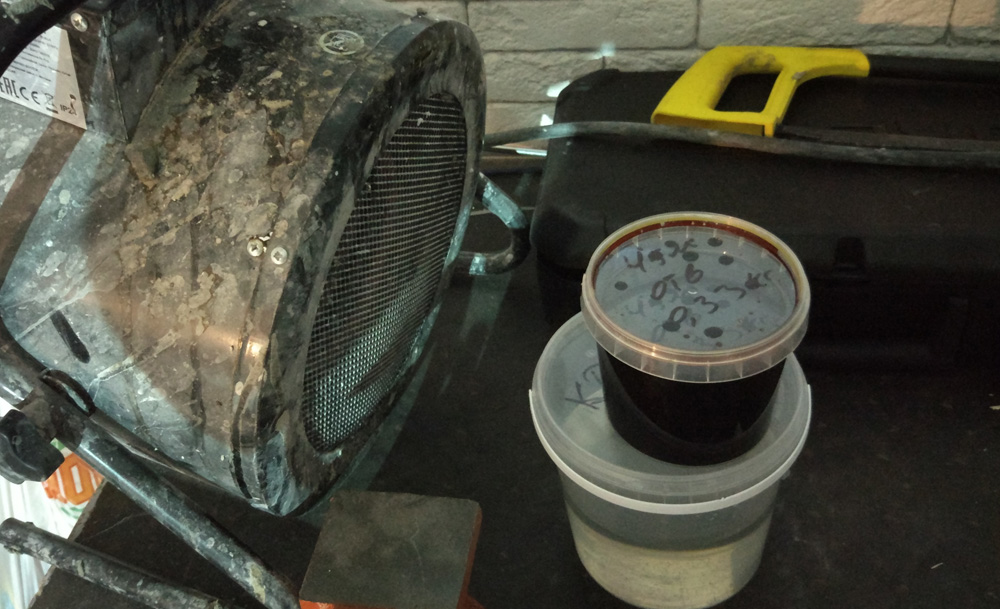
The resin and hardener must be brought to room temperature in order to improve the viscosity and lifetime of the mixture. Mix until uniform color.

It is best to use not glass fiber, but glass mat. In the glass mat, the fibers are simply randomly chopped, they fit better on the form.
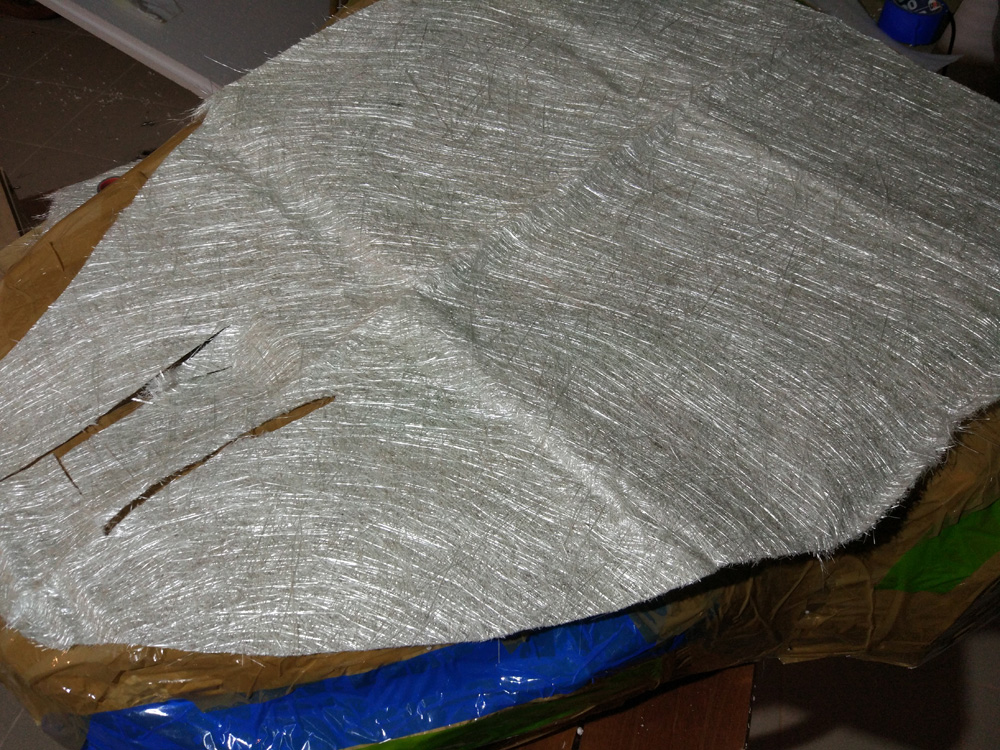
Cut the glass mat into pieces, put it into layers of glass mat and brush it with epoxy resin. Up to 3 layers can be repeated at a time. Then you need to leave to dry for 12 hours. You can use a polyester resin, but the smell is disgustingly strong.
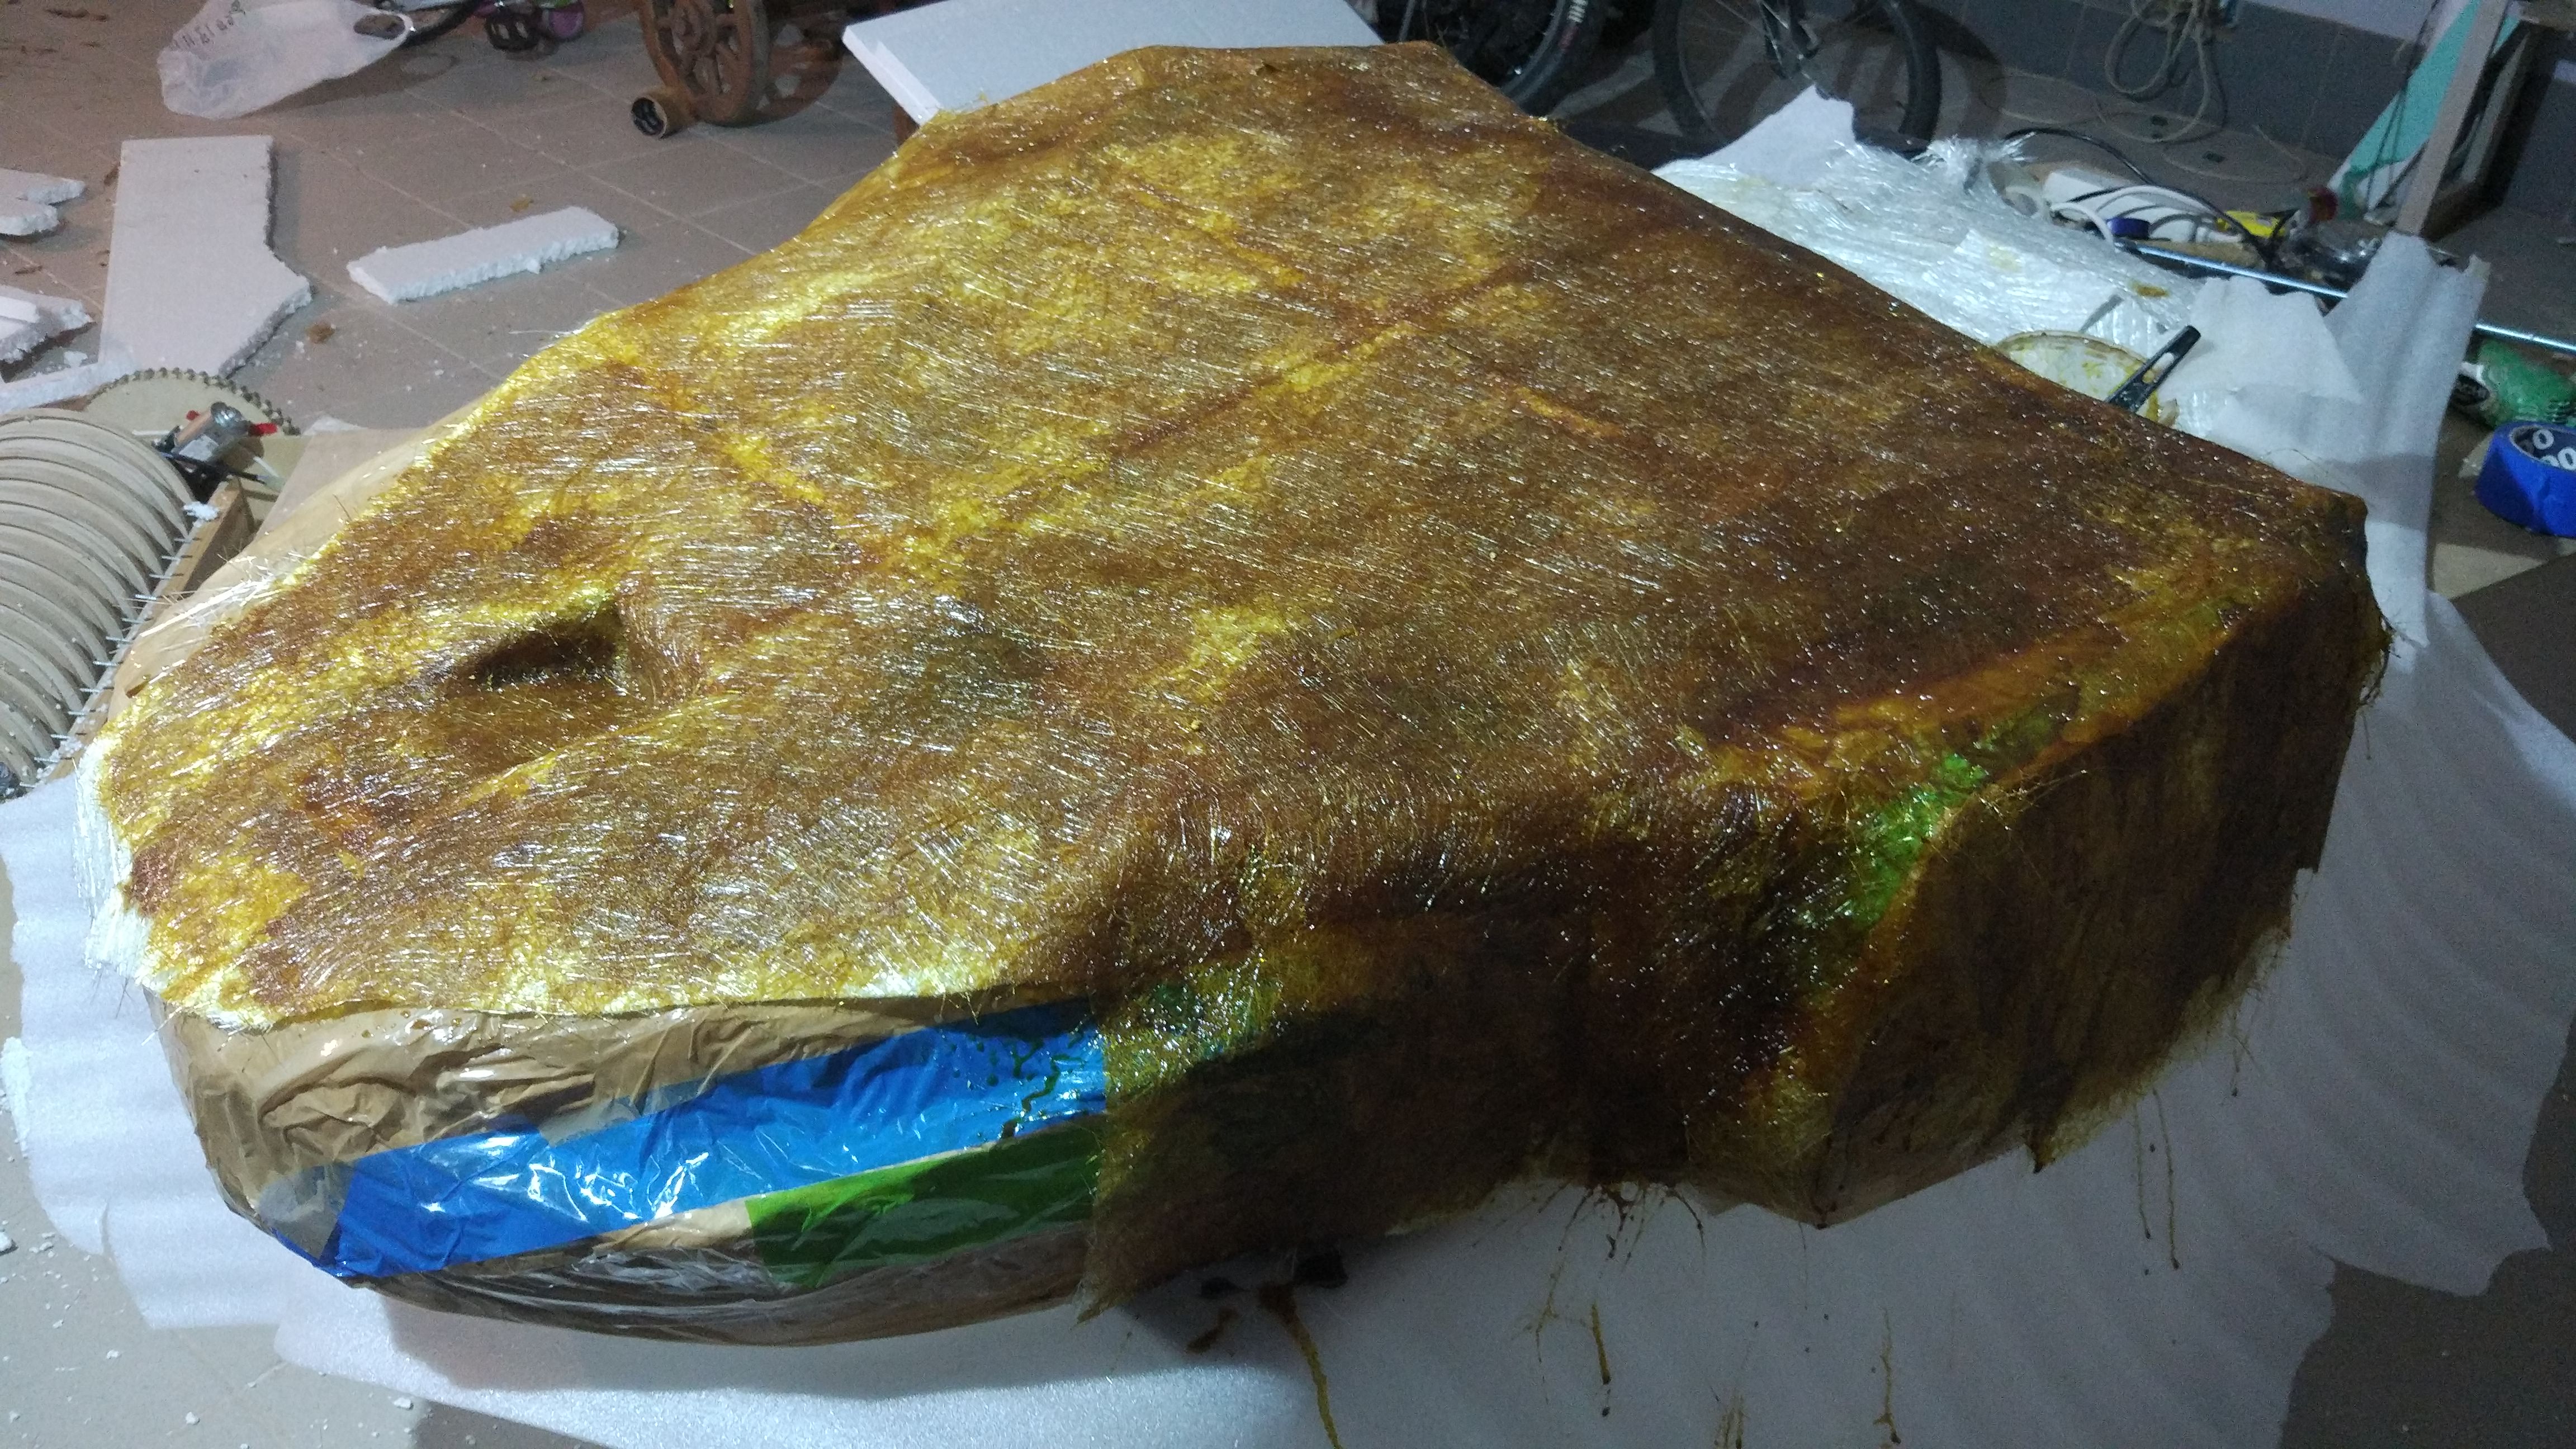
The number of layers you can gain the required thickness of the part. Adhesion between layers is good.

The resulting shape can be putty. Putty needed on epoxy base with hardener.
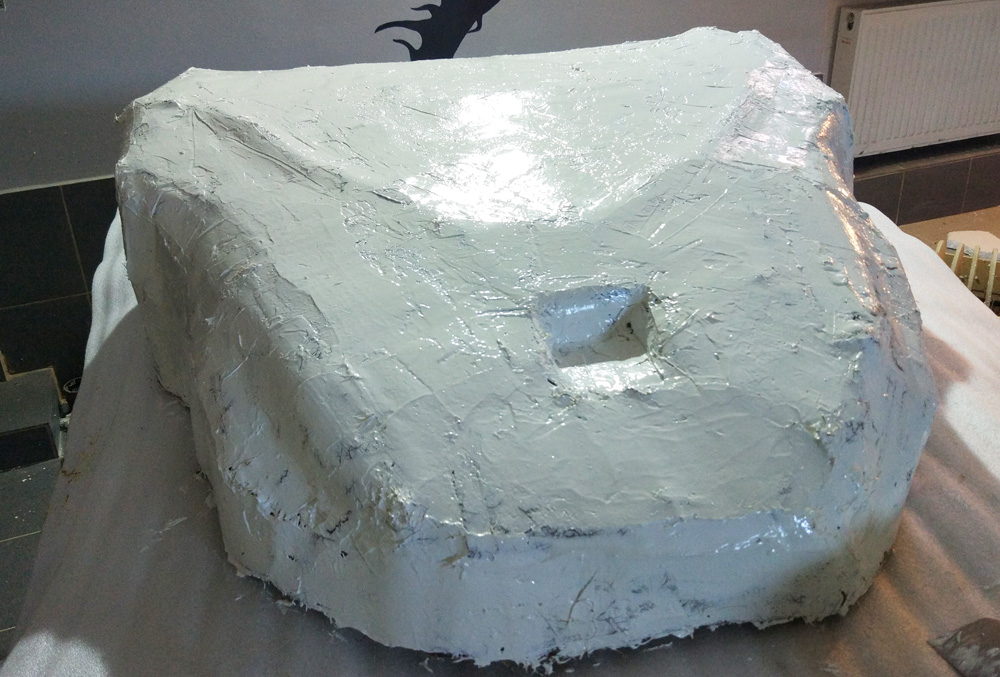
Sand the putty after drying.
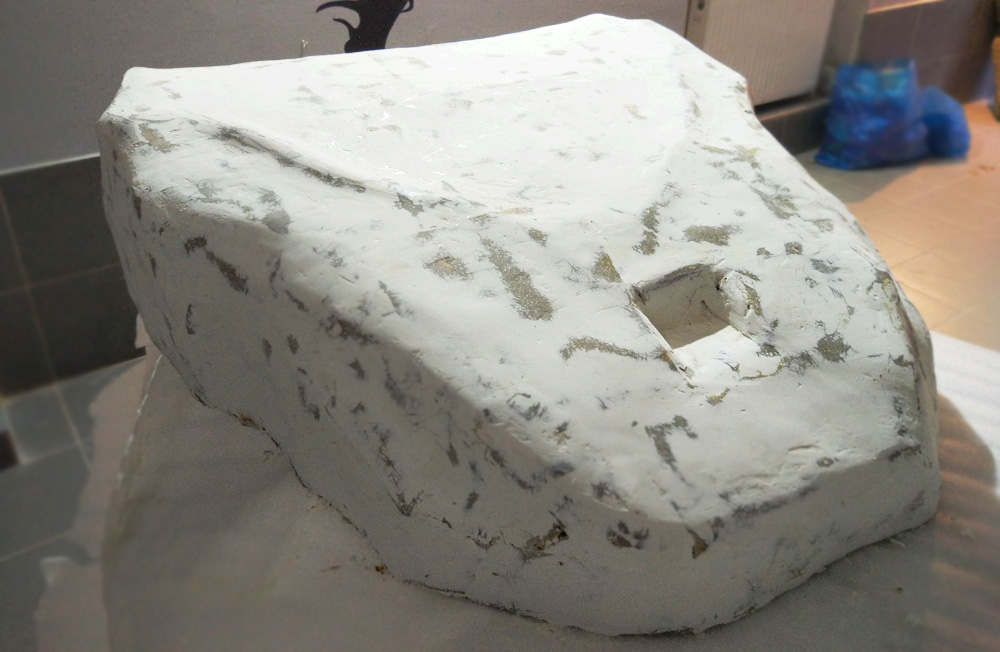
Primed.
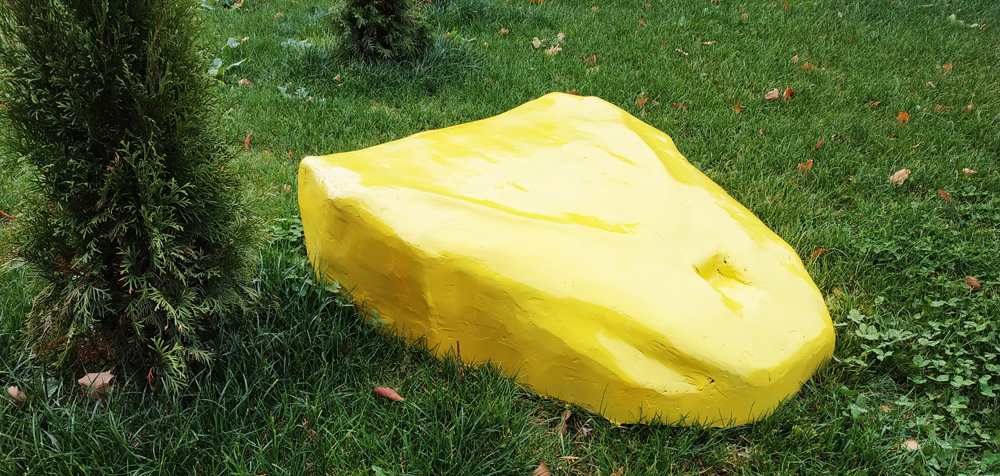
And paint in the desired color.
The body turned out the desired shape. The surface has some defects, because This was the first such experience. The body can be made of almost any shape with minimal cost, this is a plus of this technology. I spent 5 evenings for this building, each additional building will require approximately the same time, this is a significant minus.
Total: 4727 rubles.
In addition, each subsequent case will cost about the same and take the same amount of time. The super budget case for the 800x1000x250 robot is ready. Thanks for attention!
In the next article I will show the development of the case by vacuum molding for 23,000 rubles. + 1500 rub. every body.
The hull and mechanics design NikitaKhvoryk . Module connection board n12eq3 .
If you want to help - please write to me in the LAN or VC , FB .
In the near future plans to refine the algorithms and design. Create 5 robots and place them at golf clubs for free for long-term tests for the new season.

Thank you for reading, ask and criticize me completely.
Do I need a case in the first version of the robot?
How to explain to potential investors in Russia, what is a robot for collecting golf balls at the driving range? Most often you need to start with what golf is, the driving range, why collect balls, why the robot does not fall into the sand traps, why the golf car doesn’t knock it, etc.
What is golf and driving range?
Гольф — это спортивная игра. Основная цель — за меньшее количество ударов закатить мяч в лунку на каждом поле, за меньшее количество ударов пройти все поля. В нашей стране гольф развит крайне плохо и это печально. Игра достаточно интересная, позволяет людям проводить время на свежем воздухе, общаться во время игры, подходит для всех возрастов. В игре есть четкое измерение Вашего успеха «гандикап» — числовой показатель квалификации спортсмена. Все эти факторы делают гольф потоковым занятием. Если Вы еще не пробовали гольф — самое время!

Чтобы ударить с первого раза в конец поля, ближе к лунке, Вы должны уметь совершать дальние и точные удары. Драйвинг-рэйндж – это тренировочное поле для отработки дальних и средних ударов игры в гольф. Выглядят эти поля примерно так.

Чтобы ударить с первого раза в конец поля, ближе к лунке, Вы должны уметь совершать дальние и точные удары. Драйвинг-рэйндж – это тренировочное поле для отработки дальних и средних ударов игры в гольф. Выглядят эти поля примерно так.
The easiest way to show the video is how it works. That's just from the view of the plywood box everyone has an involuntary smile on their face and the conversation ceases to be constructive. This is no less acute when preparing an application to Western investment funds.
In the future, the body is planned to be manufactured by injection molding , but the cost of manufacturing molds is a huge barrier to a startup.
Fiberglass housing design
First of all, we need to develop a form on which to glue fiberglass with epoxy resin. Some prefer to make a matrix (counterform).
The most budget option is obtained from the foam. You can glue it into a blank, you need a size and process it on a CNC milling machine. We are not looking for easy ways, and the goal is to make a very budget.
You can even get a model from sculptural clay, but realizing that the sculptor is very mediocre of me, I decided to go a more technological way.
I have mom sculptures from the remnants of tile glue from the construction site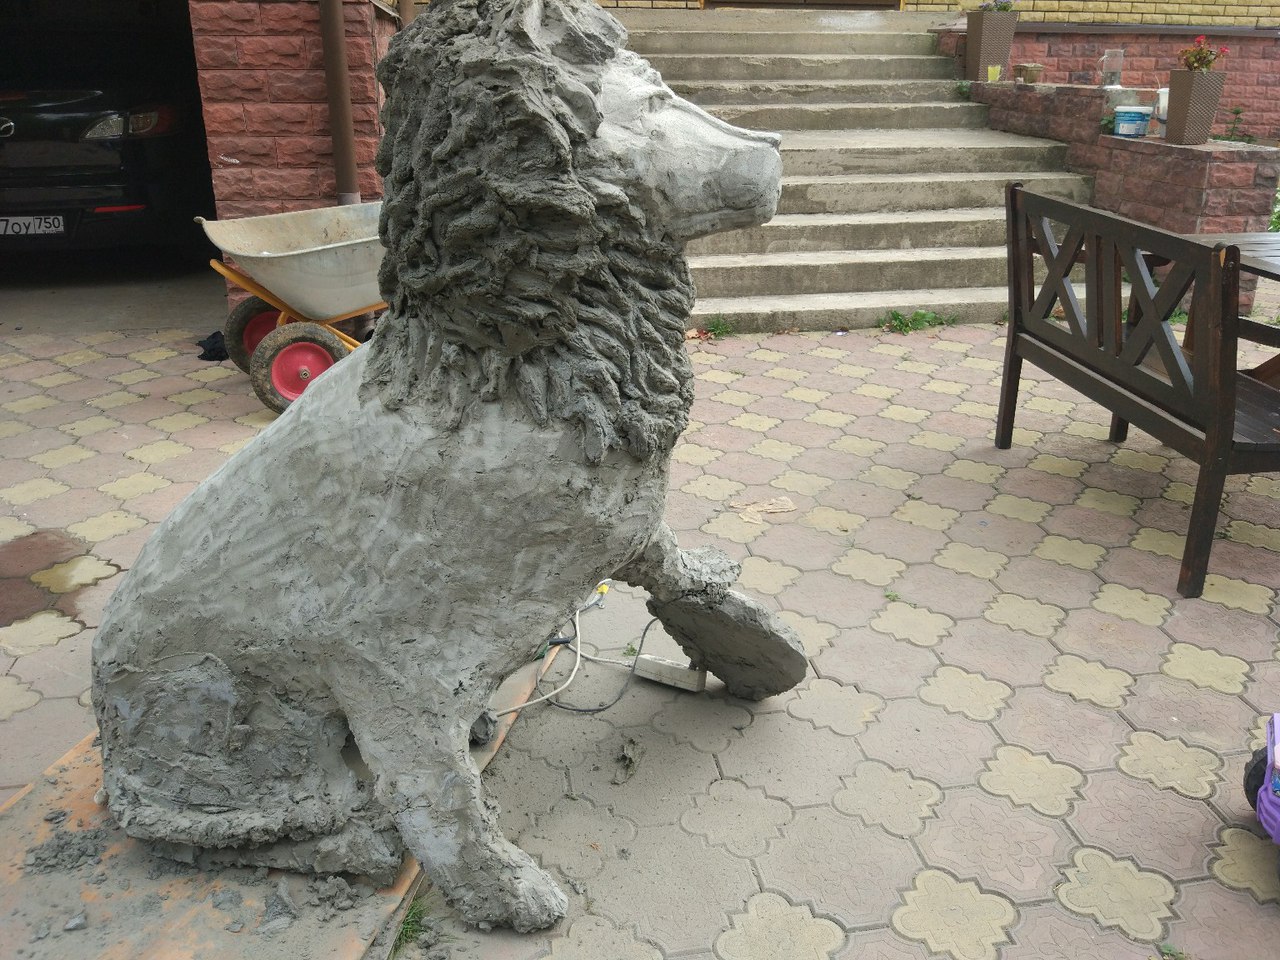
Пояснение: Это Лев.
Пояснение: Это Лев.
The existing 3D model is cut into layers equal to the thickness of the foam, in my case it is 30mm.
The resulting images we need to transfer to the foam and cut. This can be done using wide format printing and transfer lines from paper. I decided to use the projector. This method also helped me a lot in transferring images to the wall.
I'm a mom's painter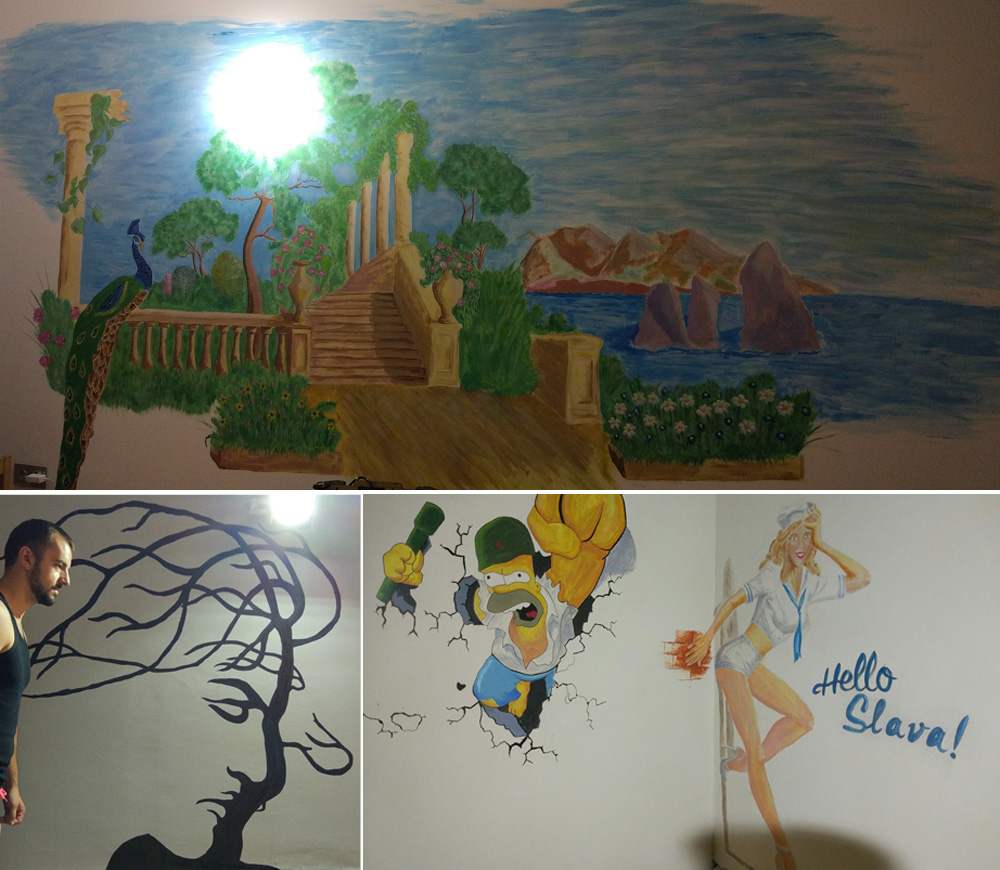
After transfer, we cut sheets of foam plastic along the lines.
The resulting layers are glued together.
Align the form can be plasticine. I chose the easiest way - wrapping with cling film.
After obtaining the required form, we paste over all the adhesive tape, there is hope that the epoxy does not stick to it and I can use the blank several times.
The resin and hardener must be brought to room temperature in order to improve the viscosity and lifetime of the mixture. Mix until uniform color.
It is best to use not glass fiber, but glass mat. In the glass mat, the fibers are simply randomly chopped, they fit better on the form.
Cut the glass mat into pieces, put it into layers of glass mat and brush it with epoxy resin. Up to 3 layers can be repeated at a time. Then you need to leave to dry for 12 hours. You can use a polyester resin, but the smell is disgustingly strong.
The number of layers you can gain the required thickness of the part. Adhesion between layers is good.
The resulting shape can be putty. Putty needed on epoxy base with hardener.
Sand the putty after drying.
Primed.
And paint in the desired color.
The body turned out the desired shape. The surface has some defects, because This was the first such experience. The body can be made of almost any shape with minimal cost, this is a plus of this technology. I spent 5 evenings for this building, each additional building will require approximately the same time, this is a significant minus.
Expenses
| Prices | Qty | Cost of | |
|---|---|---|---|
| Styrofoam | 30 rub. | 8pcs | 240 rub. |
| Set resin KDA (667gr) and hardener Etal-45M (333gr) | 635 rub. | 3 pcs | 1905 rub. |
| Putty epoxy universal 1kg kit (0.667 kg of resin and 0.333 kg hardener) pcs | 700 rub. | 1 PC | 700 rub. |
| Flat brush 2 " | 26 rub. | 2 pcs | 52 rub. |
| A set of flexible metal spatulas | 300 rub. | 1 PC | 300 rub. |
| Glass mat 600gr / m2 | 270 rub. | 2kg | 540 rub. |
| Antiaerosol respirator with valve | 360 rub. | 1 PC | 360 rub. |
| Primer | 170 rub. | 1 PC | 170 rub. |
| Paint | 230 rub. | 2 pcs | 460 rub. |
Total: 4727 rubles.
In addition, each subsequent case will cost about the same and take the same amount of time. The super budget case for the 800x1000x250 robot is ready. Thanks for attention!
In the next article I will show the development of the case by vacuum molding for 23,000 rubles. + 1500 rub. every body.
Need your help:
- programming arduino, python;
- with driving range testing;
- legal issues, exportation from the country of the robot, patent law;
- with startup packaging, investment search.
The hull and mechanics design NikitaKhvoryk . Module connection board n12eq3 .
If you want to help - please write to me in the LAN or VC , FB .
In the near future plans to refine the algorithms and design. Create 5 robots and place them at golf clubs for free for long-term tests for the new season.
Thank you for reading, ask and criticize me completely.
Only registered users can participate in the survey. Sign in , please.