Microsoft SQL Server Data Tools
- Tutorial
In this article I would like to talk about a set of useful additions to Visual Studio, which can greatly facilitate the development of databases based on MS SQL Server.
The main advantages of using SSDT, I would highlight the following:
Of course, the advantages of using SSDT do not end there, but the rest is not as impressive as the one mentioned above. If you are interested in how to take advantage of these and other advantages - I ask for a cat.
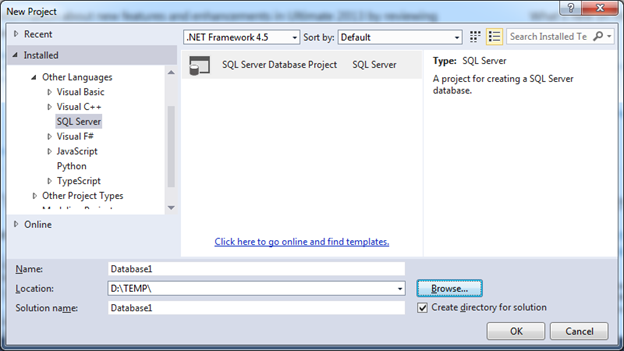
Everything you need to install can be found on the download page in the Data Developer Center. Having chosen the necessary version, you can easily install tools on your computer and describe it, I see no reason. After installation, a new type of project will appear in the window for creating a new project:
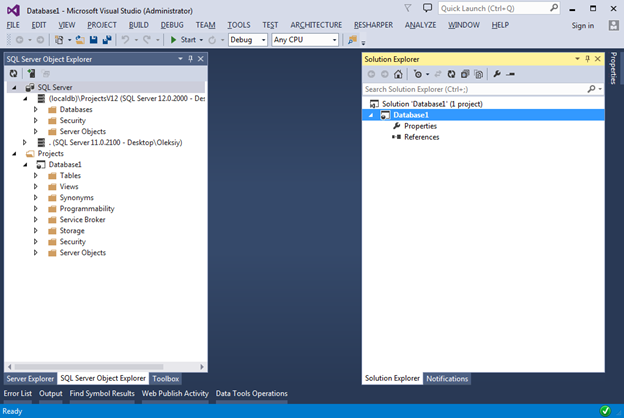
Having created a new project, you will see the following:
In the SQL Server Object Explorer panel (View menu -> SQL Server Object Explorer) we see something very similar to the Object Explorer in SQL Server Management Studio , from which everything that does not make much sense at the stage of database development has been removed.
By connecting to an existing database, you can develop the database in the so-called Connected mode. This is not unlike the classical approach used in SQL Server Management Studio and will not be considered in this article.
This development mode is most interesting to us, because it is he who provides the main advantages of using SSDT.
The basis of the work is a very simple idea - to allow developers to store all scripts for creating database objects (tables, views, store procedures, etc.) in a special type of project as part of an existing or new solution (solution). Based on scripts, Visual Studio can generate a DACPAC file, which is essentially a zip archive with all t-sql scripts. Having a DACPAC file, it will be possible to publish on the required database instance by comparing the schema described in DACPAC and the schema in the target database. During the publication, special mechanisms make comparisons, as a result of which migration scripts are automatically created for applying changes without data loss.
In order to see this in action, I propose to see the following examples.
Let's start with the ability to import. We call the context menu of the project and see 3 possible options:

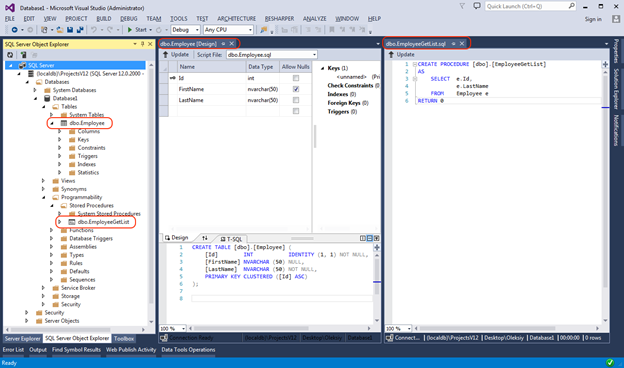
We will select the “Database ...” option and import the local database. It contains one table and one stored procedure. In the SQL Server Object Explorer, the source database is as follows:
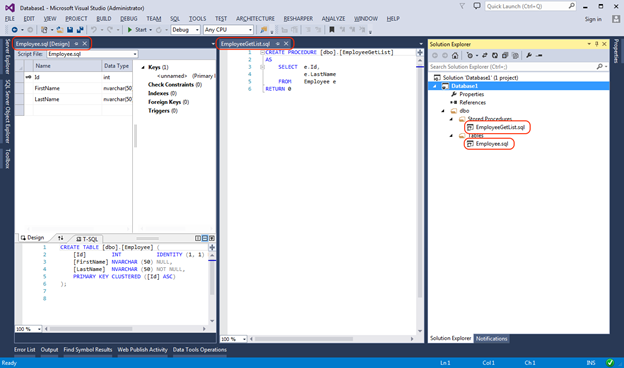
After the import is complete, we will see a very similar picture, with the only difference that the database structure will be presented in the Solution Explorer as * .sql files.
We can also always add new items using the Add New Item dialog box, which lists all the possible database objects:
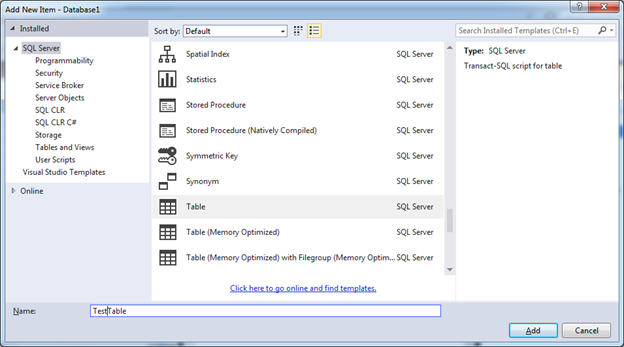
Add a TestTable table. The new TestTable.sql script file will be added to the root of the project and for convenience we will transfer it to the Tables folder.

To create a table schema, we can use both the designer panel and the T-SQL panel. All changes made in one panel will be immediately displayed in another.
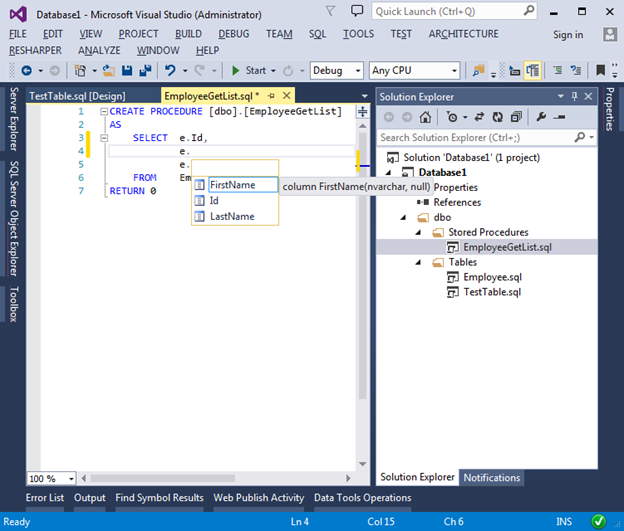
We can also modify existing scripts. Visual Studio for this provides a convenient and beloved IntelliSense. Since we are not connected to a physical database, Visual Studio parses all scripts in the project for IntelliSence to work correctly, which allows it to instantly reflect the latest changes made to the database schema.
I want to draw attention to the fact that we do not have to worry about incremental changes in our base. Instead, we always create scripts as if objects were being recreated. When a DACPAC package is published, migration scripts will be generated automatically by comparing the DACPAC file and the schema in the target database.
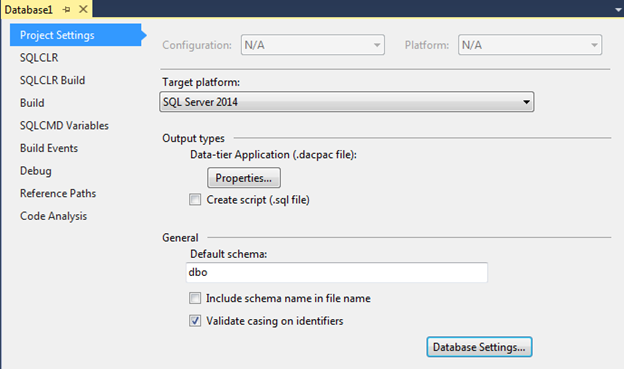
As already mentioned, DACPAC contains not only the diagram and data, but also a number of useful settings, for viewing / editing of which we can use the properties window of our project.
The Target platform property allows you to set the version of the database for which scripts in the project will be validated. The minimum supported version of MS SQL Server 2005. For example, if you specify a version of the database 2005 and try to create a column of type Geography, then when compiling we get the following message:

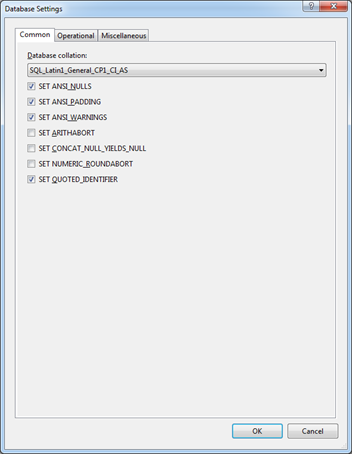
On the Project Settings tab, we can set the database settings by clicking on the Database Settings button. By clicking on it we will see a dialog with settings similar to what we are used to seeing in SQL Server Management Studio:
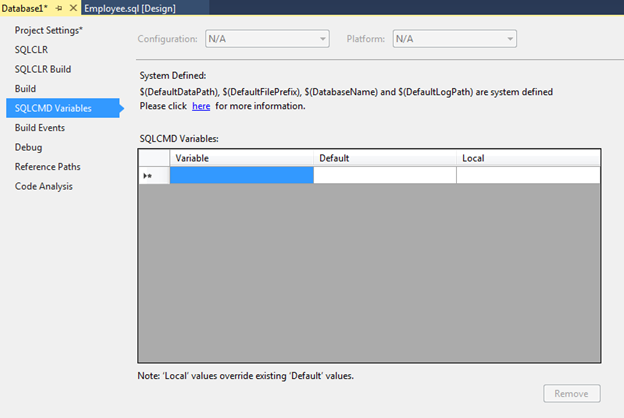
I would also like to mention the SQLCMD Variables tab, on which we can set various variables for further use in our scripts.
After all the settings are set and * .sql scripts are added / updated, we can apply the changes to the target database. To do this, go to the Build-> Publish menu or select a similar item in the project’s context menu.
In the dialog box that appears, set the connection string to the target database and, if necessary, additional settings by clicking the Advanced button:
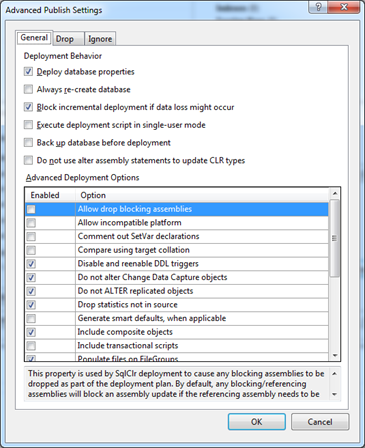
Most settings are clear without further description, so we won’t dwell on them in detail, but I recommend that you familiarize yourself with them in in case of impossibility to successfully “publish” the project, you knew what could be the problem.
If you want to publish to the target database more than once, then the settings can be saved in the publish profile by clicking on the Create Profile button. This will add a file with the extension * .publish.xml to our project and in the future we will be able to publish without having to enter the settings again. If any of the publication profiles should be used by default, then you can select Set As Default Publish Profile in the context menu of the publication file. This profile will be automatically loaded into the Publish dialog.
All necessary changes can be applied immediately by clicking on the Publish button. And you can postpone it for later by generating the appropriate migration script (Generate Script button) - it will contain all the necessary instructions to bring the destination database to the desired state.
If we do not have access to the database, then we can transfer the results of our work in the form of a DACPAC file, which is created by compiling the project and located in ../bin/Debug/Database1.dacpac. Having given the file, for example, to the database administrator, he, in turn, will be able to use any convenient method for applying the changes to the target database.
Ways to publish DACPAC (publishing):
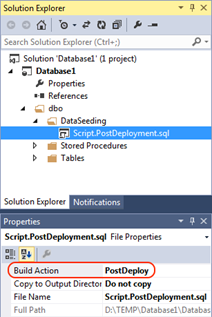
In our project, create the DataSeeding folder (the name does not matter) and add a new script to it.
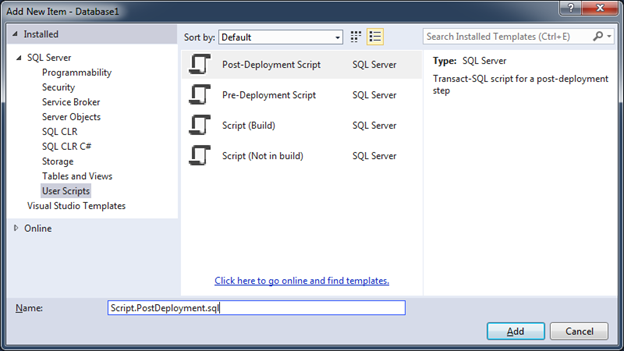
In fact, all types in the User Script section are ordinary * .sql scripts and differ only in the value of the “Build Action” property of the newly created file.
The logic from the PostDeployment.sql file will be executed after applying all changes to the database schema. If PreDeployment.sql is created, the logic will execute before applying the schema changes.
The value of the Build Action property for files created through the Script (Not in Build) template will be set to "None". They are useful for conveniently structuring commands in separate files that are called from Pre or Post Deployment scripts.
Files created through the Script template have a Build Action value of “Build”, and their contents are added to the resulting script, which is executed when the DACPAC file is published'e at the moment of changing the database schema.
Since there can be only one Post Deployment script in a project and its size can grow rapidly, it is recommended that the data insertion logic be put into separate scripts. That is why we will add a file of type Script (Not in Build), and in the Post Deployment script add a link to it. Here's how it will look:
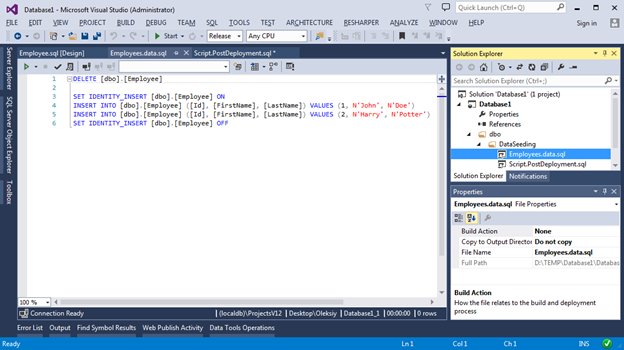
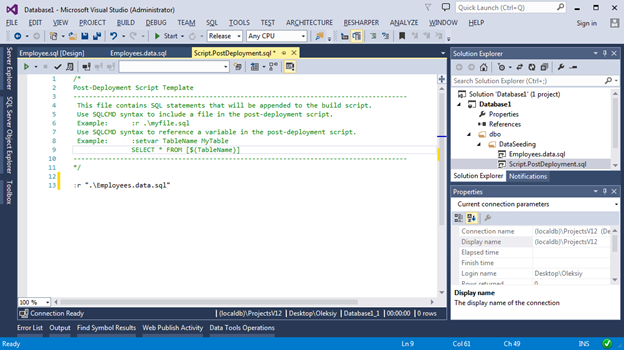
Now, when publishing our project, 2 records will always be inserted in the database in the Employees table.
Along with the ability to create a Database project, installing SSDT adds a number of useful tools available from the Tools menu.
I think that from the name it’s clear what each of the points does. As an example, I will show a convenient graphical comparison tool for circuits. You can choose one of three options as a source and target:
We will compare our project with a local database. The result of the comparison will look like this:
In the resulting window, we can apply various grouping methods (according to the scheme, by type of objects and by the required action) to more conveniently view the proposed changes and select the objects that need to be updated. In order to apply the migration script, you must click the Update button - this will bring Target DB to the state of our project.
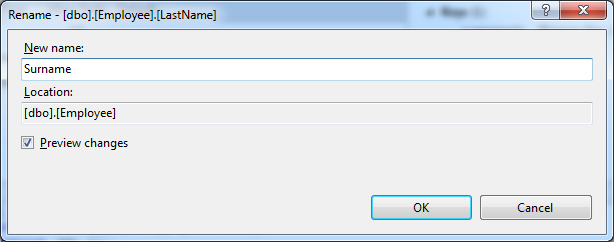
This is my favorite feature. For an example, we will show how to rename the LastName column in the Employees table. To do this, open the table creation script, select the LastName column in the table editor and select the Rename item in the SQL -> Refactor
menu : Set a new name:
View the consequences of renaming and apply the proposed changes:
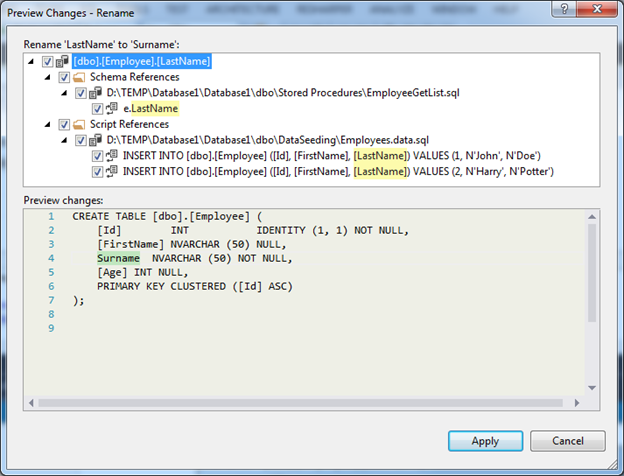
As a result, all scripts will be changed and after the first refactoring will be added to the project special * .refactoring file. It will save all changes to the schema in historical order in the XML document format. This data will be useful in generating the migration script and will allow more correct migration of the schema and data.

Let's create our first unit test. To do this, we call the context menu for the stored procedure that we want to test:

In the dialog that appears, we will be able to select additional objects (if any) and set the type and name of the test project and the name of the class containing the unit test code:

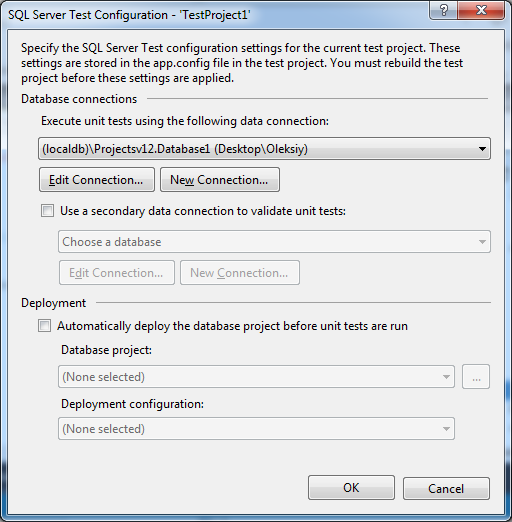
After creating the project, we will It is proposed to select a database on which tests will be launched, as well as some project settings:
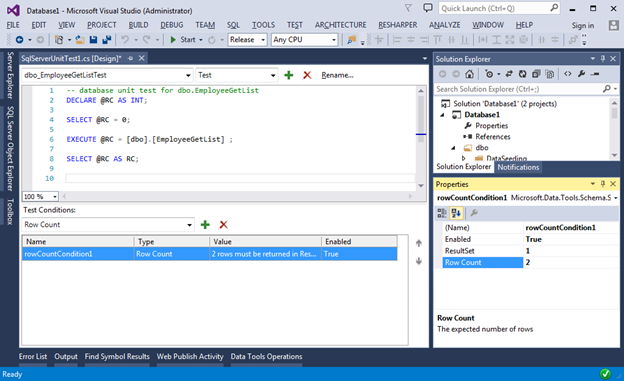
After successful creation, we will open a graphical unit test editor, at the bottom of which various checks will be presented for testing object being dubbed. In our case, this is the stored procedure EmployeeGetList.

Our task is to write the necessary Sql script and set the required verification conditions that will be produced after the script code is executed. Checks can be different: runtime, number of returned rows, Checksum of returned data, etc. The full list of checks can be found in the drop-down menu under the text of the script and above the table of checks. For each test, you can set a number of settings through the standard Properties panel. To call it, select the Properties item in the context menu of a specific check.
For example, this is how the check of the returned number of rows will look:
And this is how Checksum can be checked:
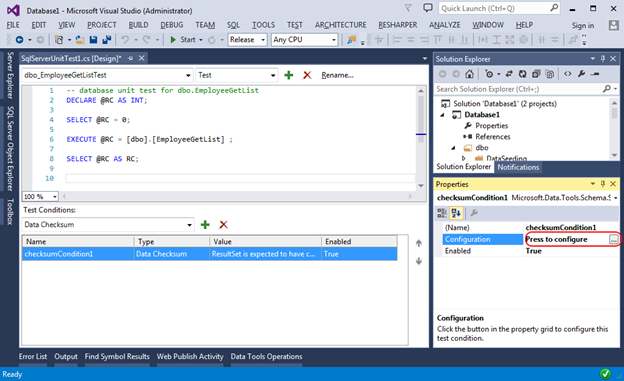
In fact, this check is performed by our script (gets 2 rows from the Employees table) and finds Checksum on the received data. Our task at the stage of creating the test is to find the reference data, to calculate Checksum on them, and in the future, the result will be verified with this value. In other words, this is a convenient way to make sure that the result of the stored procedure does not change. To get the Checksum control value, you need to use the button in the Properties window, which will allow you to select the reference base and get the Chexum reference value:
I hope this brief overview allowed me to get a general idea of what SSDTs are and how they can be useful in your project. Of course, all the details were not considered here. But you, as a developer, do not need this. You should just have a general idea of the list of features, and I hope their further use will be intuitive, as SSDT developers worked hard and provided the tools with a huge number of helpers (wizards) and contextual tips.
The main advantages of using SSDT, I would highlight the following:
- the possibility of a simple change (refactoring) of the database schema (you can rename the table column and all Views, Functions and Stored Procedures referencing it will be automatically corrected to reflect the changes)
- creating unit tests for the database
- storing database structure in Source Control
- comparison of the circuit / data with the ability to generate a script to bring the circuit / data to the desired state
Of course, the advantages of using SSDT do not end there, but the rest is not as impressive as the one mentioned above. If you are interested in how to take advantage of these and other advantages - I ask for a cat.
Installation and first acquaintance
Everything you need to install can be found on the download page in the Data Developer Center. Having chosen the necessary version, you can easily install tools on your computer and describe it, I see no reason. After installation, a new type of project will appear in the window for creating a new project:
Having created a new project, you will see the following:
In the SQL Server Object Explorer panel (View menu -> SQL Server Object Explorer) we see something very similar to the Object Explorer in SQL Server Management Studio , from which everything that does not make much sense at the stage of database development has been removed.
By connecting to an existing database, you can develop the database in the so-called Connected mode. This is not unlike the classical approach used in SQL Server Management Studio and will not be considered in this article.
Disconnected mode
This development mode is most interesting to us, because it is he who provides the main advantages of using SSDT.
The basis of the work is a very simple idea - to allow developers to store all scripts for creating database objects (tables, views, store procedures, etc.) in a special type of project as part of an existing or new solution (solution). Based on scripts, Visual Studio can generate a DACPAC file, which is essentially a zip archive with all t-sql scripts. Having a DACPAC file, it will be possible to publish on the required database instance by comparing the schema described in DACPAC and the schema in the target database. During the publication, special mechanisms make comparisons, as a result of which migration scripts are automatically created for applying changes without data loss.
In order to see this in action, I propose to see the following examples.
Let's start with the ability to import. We call the context menu of the project and see 3 possible options:
- Script (* .sql) - adds one or more * .sql files from a given location to the project structure;
- Data-tier Application (* .dacpac) - adds * .sql files, as well as various database settings from a special DACPAC file described above; may contain not only the database scheme, but also data and various database settings;
- Database ... - similar to the previous option, but the existing database serves as a data source
We will select the “Database ...” option and import the local database. It contains one table and one stored procedure. In the SQL Server Object Explorer, the source database is as follows:
After the import is complete, we will see a very similar picture, with the only difference that the database structure will be presented in the Solution Explorer as * .sql files.
We can also always add new items using the Add New Item dialog box, which lists all the possible database objects:
Add a TestTable table. The new TestTable.sql script file will be added to the root of the project and for convenience we will transfer it to the Tables folder.
To create a table schema, we can use both the designer panel and the T-SQL panel. All changes made in one panel will be immediately displayed in another.
We can also modify existing scripts. Visual Studio for this provides a convenient and beloved IntelliSense. Since we are not connected to a physical database, Visual Studio parses all scripts in the project for IntelliSence to work correctly, which allows it to instantly reflect the latest changes made to the database schema.
I want to draw attention to the fact that we do not have to worry about incremental changes in our base. Instead, we always create scripts as if objects were being recreated. When a DACPAC package is published, migration scripts will be generated automatically by comparing the DACPAC file and the schema in the target database.
As already mentioned, DACPAC contains not only the diagram and data, but also a number of useful settings, for viewing / editing of which we can use the properties window of our project.
The Target platform property allows you to set the version of the database for which scripts in the project will be validated. The minimum supported version of MS SQL Server 2005. For example, if you specify a version of the database 2005 and try to create a column of type Geography, then when compiling we get the following message:
On the Project Settings tab, we can set the database settings by clicking on the Database Settings button. By clicking on it we will see a dialog with settings similar to what we are used to seeing in SQL Server Management Studio:
I would also like to mention the SQLCMD Variables tab, on which we can set various variables for further use in our scripts.
Publishing a DACPAC file (publishing)
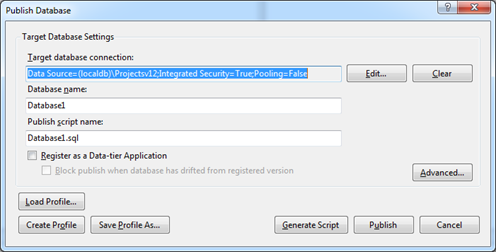
After all the settings are set and * .sql scripts are added / updated, we can apply the changes to the target database. To do this, go to the Build-> Publish menu or select a similar item in the project’s context menu.
In the dialog box that appears, set the connection string to the target database and, if necessary, additional settings by clicking the Advanced button:
Most settings are clear without further description, so we won’t dwell on them in detail, but I recommend that you familiarize yourself with them in in case of impossibility to successfully “publish” the project, you knew what could be the problem.
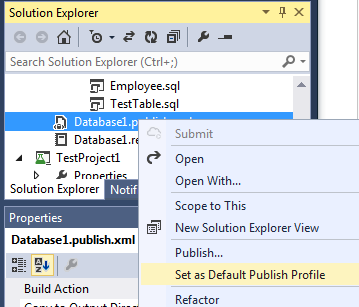
If you want to publish to the target database more than once, then the settings can be saved in the publish profile by clicking on the Create Profile button. This will add a file with the extension * .publish.xml to our project and in the future we will be able to publish without having to enter the settings again. If any of the publication profiles should be used by default, then you can select Set As Default Publish Profile in the context menu of the publication file. This profile will be automatically loaded into the Publish dialog.
All necessary changes can be applied immediately by clicking on the Publish button. And you can postpone it for later by generating the appropriate migration script (Generate Script button) - it will contain all the necessary instructions to bring the destination database to the desired state.
If we do not have access to the database, then we can transfer the results of our work in the form of a DACPAC file, which is created by compiling the project and located in ../bin/Debug/Database1.dacpac. Having given the file, for example, to the database administrator, he, in turn, will be able to use any convenient method for applying the changes to the target database.
Ways to publish DACPAC (publishing):
- Free edition of Visual Studio with SSDTs installed (in particular, the client tools included in the DAC Framework installed with SSDT are used for publish)
- MS SQL Server Management Studio + DAC Framework
- Console utility SqlPackage.exe
- Windows PowerShell ( example )
- Data-tier Application Framework (DACFx) allowing you to put a DACPAC file by calling methods from a C # program ( documentation and example )
Data seeding
In our project, create the DataSeeding folder (the name does not matter) and add a new script to it.
In fact, all types in the User Script section are ordinary * .sql scripts and differ only in the value of the “Build Action” property of the newly created file.
The logic from the PostDeployment.sql file will be executed after applying all changes to the database schema. If PreDeployment.sql is created, the logic will execute before applying the schema changes.
The value of the Build Action property for files created through the Script (Not in Build) template will be set to "None". They are useful for conveniently structuring commands in separate files that are called from Pre or Post Deployment scripts.
Files created through the Script template have a Build Action value of “Build”, and their contents are added to the resulting script, which is executed when the DACPAC file is published'e at the moment of changing the database schema.
Since there can be only one Post Deployment script in a project and its size can grow rapidly, it is recommended that the data insertion logic be put into separate scripts. That is why we will add a file of type Script (Not in Build), and in the Post Deployment script add a link to it. Here's how it will look:
Now, when publishing our project, 2 records will always be inserted in the database in the Employees table.
Tools -> SQL Server
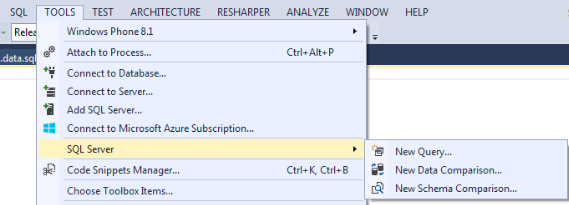
Along with the ability to create a Database project, installing SSDT adds a number of useful tools available from the Tools menu.
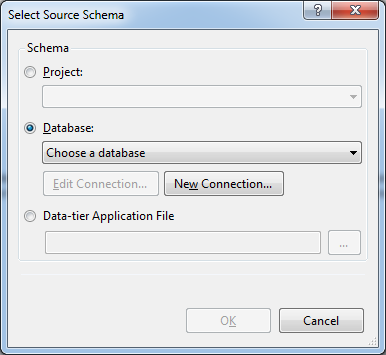
I think that from the name it’s clear what each of the points does. As an example, I will show a convenient graphical comparison tool for circuits. You can choose one of three options as a source and target:
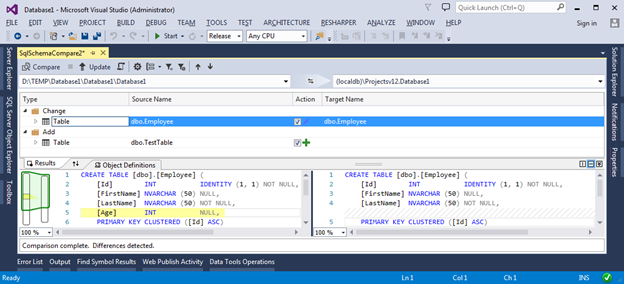
We will compare our project with a local database. The result of the comparison will look like this:
In the resulting window, we can apply various grouping methods (according to the scheme, by type of objects and by the required action) to more conveniently view the proposed changes and select the objects that need to be updated. In order to apply the migration script, you must click the Update button - this will bring Target DB to the state of our project.
Refactoring
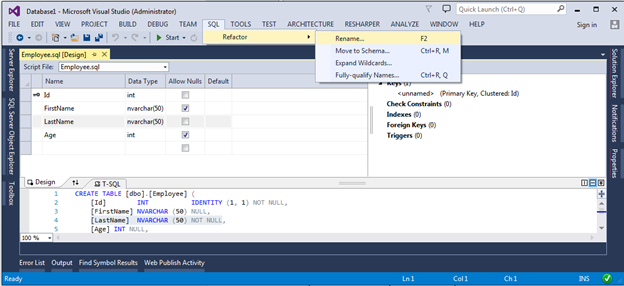
This is my favorite feature. For an example, we will show how to rename the LastName column in the Employees table. To do this, open the table creation script, select the LastName column in the table editor and select the Rename item in the SQL -> Refactor
menu : Set a new name:
View the consequences of renaming and apply the proposed changes:
As a result, all scripts will be changed and after the first refactoring will be added to the project special * .refactoring file. It will save all changes to the schema in historical order in the XML document format. This data will be useful in generating the migration script and will allow more correct migration of the schema and data.
Unit testing
Let's create our first unit test. To do this, we call the context menu for the stored procedure that we want to test:
In the dialog that appears, we will be able to select additional objects (if any) and set the type and name of the test project and the name of the class containing the unit test code:
After creating the project, we will It is proposed to select a database on which tests will be launched, as well as some project settings:
After successful creation, we will open a graphical unit test editor, at the bottom of which various checks will be presented for testing object being dubbed. In our case, this is the stored procedure EmployeeGetList.
Our task is to write the necessary Sql script and set the required verification conditions that will be produced after the script code is executed. Checks can be different: runtime, number of returned rows, Checksum of returned data, etc. The full list of checks can be found in the drop-down menu under the text of the script and above the table of checks. For each test, you can set a number of settings through the standard Properties panel. To call it, select the Properties item in the context menu of a specific check.
For example, this is how the check of the returned number of rows will look:
And this is how Checksum can be checked:
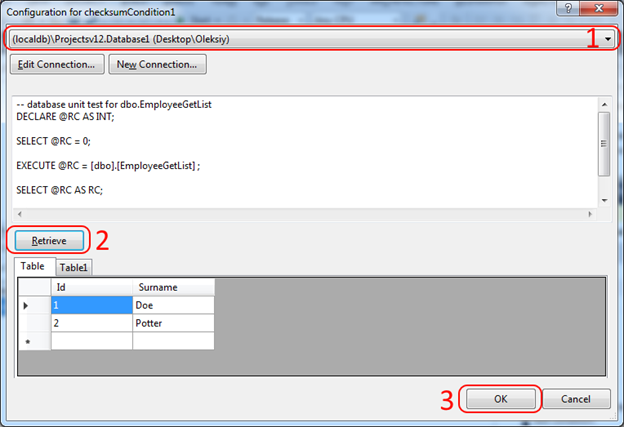
In fact, this check is performed by our script (gets 2 rows from the Employees table) and finds Checksum on the received data. Our task at the stage of creating the test is to find the reference data, to calculate Checksum on them, and in the future, the result will be verified with this value. In other words, this is a convenient way to make sure that the result of the stored procedure does not change. To get the Checksum control value, you need to use the button in the Properties window, which will allow you to select the reference base and get the Chexum reference value:
Conclusion
I hope this brief overview allowed me to get a general idea of what SSDTs are and how they can be useful in your project. Of course, all the details were not considered here. But you, as a developer, do not need this. You should just have a general idea of the list of features, and I hope their further use will be intuitive, as SSDT developers worked hard and provided the tools with a huge number of helpers (wizards) and contextual tips.