Intel® Galileo Gen 2. Getting Started Features
As I wrote in a previous post, the laboratory of the Internet of things at St. Petersburg State Technical University named after Prof. M.A. Bonch-Bruyevich provided Intel Galileo Gen 2 for my work. I managed to integrate it into my project, and I want to talk about the experience with this motherboard obtained during this integration.
I will not touch on the programming of the Linux component of the board, but only on the features of using its Arduino functionality.
The description of the board, where to download the documentation and software, is well described in this post. Therefore, I will not repeat myself.
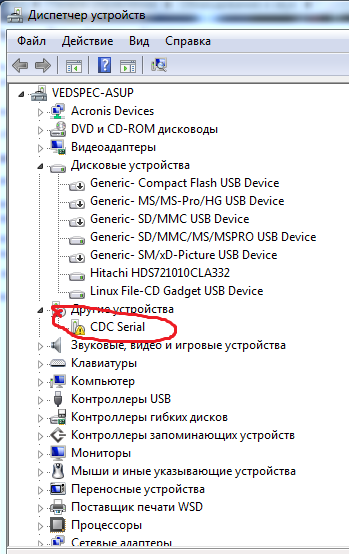
So, the first inclusion. The port is located, fill in the standard Blink, everything is perfectly flooded and worked. I tried the sketch with the output to the comport, and then the first surprise was waiting for me. Whatever I do, some long number is displayed in the comport and that’s all ... Digging began on the docks. As it turned out for Windows, you need to install the driver. The author of the above post worked on a poppy, and probably there, additional drivers are not required. The answer was found in this document. If there is no driver in the system, such a device is installed.

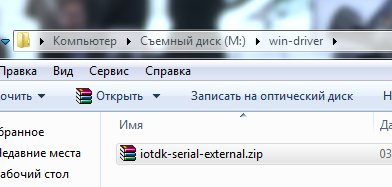
The driver is located in the Arduino IDE folder along the path: hardware / arduino / x86 / tools
After installing the driver, this port will appear

Everything seems to be fine. The expected data appeared in the comport. But here the next difficulties began. When you turn off the power, or press the general reset, skech in the controller disappeared. Installing the SD card and connecting the battery did not lead to anything. On the Internet, I did not find the same answer to this question. The guys from the laboratory of the Internet of things checked this situation on four more boards, the effect was repeated. So this is not a defect in my copy. As a last resort, I decided to re-install OC Yocto on this post. And immediately another difficulties awaited me. The downloaded flash drive image has the extension .direct. I did not find anything about how to transfer it to a USB flash drive under Windows. The author of the post works on a poppy, and wrote about the process on other OS
I will do all the steps on a Mac, for Windows and * nix-platforms everything is similar (of course, with the corresponding “corrections” for the operating system)
Probably, for some it is all simple, but I have not found a solution to this problem. I had to put the poppy axis in the virtual machine for this operation, and carry out all the operations according to the post. Well, it turned out. But I would very much like knowledgeable people to explain how to do this under Windows.
But the difficulties did not end there. After installing the flash drive with the operating system, the com port disappeared on the board. An incorrectly installed device was detected in the system.
So, again we are looking for firewood. Found .... On the very flash drive that we just made.
Install. And here it is happiness. There was a comport, and a flash drive is available as a pluggable drive, and most importantly - the sketches began to be saved. Moreover, they are clearly stored on this same flash drive. It is checked on standard Blink. When removing the flash drive and rebooting, the LED stops blinking. When installing the flash drive back - it starts flashing again without reloading the sketch.
Well, now about the results of testing libraries. In Galileo, pin operation as an output is provided by a special port expander chip with an I2C interface from Cypress. Accordingly, libraries that use direct access to registers and use accurate time calculations do not work. OneWare library did not work. Therefore, it is impossible to use such convenient temperature sensors as the DS18B20. For the same reason, the DHT sensor library did not start.
The library for decoding the signal from the IR control receiver does not work. It is based on interrupts with which Galileo is doing just the same. Also, the library for writing to the SD card refused to work. The reason is unknown.
The sketch for controlling the stepper motor compiled without errors, but the engine refused to work. Servo motors only work on outputs with PWM ohms.
The BMP-085 sensor library did not start. Error compiling. I have not figured out the reason yet.
What works.
The bus runs SPI and I2C. Works library displays HD44780 and EEPROM. An ultrasonic rangefinder works. Well, the Ethernet library works fine.
All the described features, and of course all the basic logic is implemented in the FLProg program for this board. In the current version of the program, one common Arduino IDE version 1.5.3 is installed for programming both Arduino boards and Galileo boards. Unfortunately, the environment for Galileo only integrates with this version. But for arduino, an environment with version 1.6 is already much more interesting and with a more optimized compiler. Therefore, in the next release of FLProg, there will be three versions of the program. One for arduino, the second for Galileo, and the third for both, but larger, since the distribution will have two versions of the IDE.
I hope this post helps someone easier to get started with this interesting board.