Translation and voice acting of the film at home: Hawking. My short story
A year ago, I translated and voiced a film by Robert Zubrin Mars: the underground. On Habré, the publication was warmly received, and the film itself over the past time has been viewed more than 200,000 times and still collects scientific discussions in the comments.
Today I would like to provide details about our last transfer. This is a film about the life of Stephen Hawking. In a post I will talk about the translation process (since this time I didn’t do it myself), about how to better process the sound recorded at home, and how easy it is to translate captions in films. And of course I’ll show the film itself.
To begin with, I’ll give you some technical details, information about how we started working on the film, and what has changed in the approach to translation and voice over the year.
Six months ago, in the comments under one of our videos, user Roman C suggested translating this documentary picture. The film by Stephen Finnigan tells the story of one of the greatest scientists of our time, Stephen Hawking. We looked, we liked it, it was decided to get down to business. Last year, I myself voiced the film by ear, now, thanks to a slightly increased popularity, I managed to attract interested people. One of the students at the Kiev Polytechnic, Lera, got down to work the very next day. I asked her to give a comment and describe her work.
But besides the fact that I got a professional translator, some other things changed in the course of the year: I became more comfortable with sound processing (more on this below), stopped speaking in subtitles, and changed my approach to recording.
Subtitle dubbing is good where the timing of these same subtitles is correctly compiled. Otherwise, the text is intermittent, and intonation cannot be conveyed normally. So it’s better to read the text from the file, or having before your eyes the phrase following the screen. A couple of tips for those who want to record a long voice acting at home:
1. Drink warm water. Much water. You can tea from a thermos. This helps to get rid of the "dangling" language and hoarseness in the voice, which invariably appears at the end of the first hour of recording.
2. Do not split the recording into files, if possible. This makes sense only if you are writing sound in an apartment (for example, like me), and you feel that the general level of ambient noise has suddenly changed for a reason beyond your control.
3. Do not be afraid to stumble and overwrite. Take long pauses between phrases: trimming pauses and shortening a phrase is much easier than creating them artificially, trying to stretch the sound.
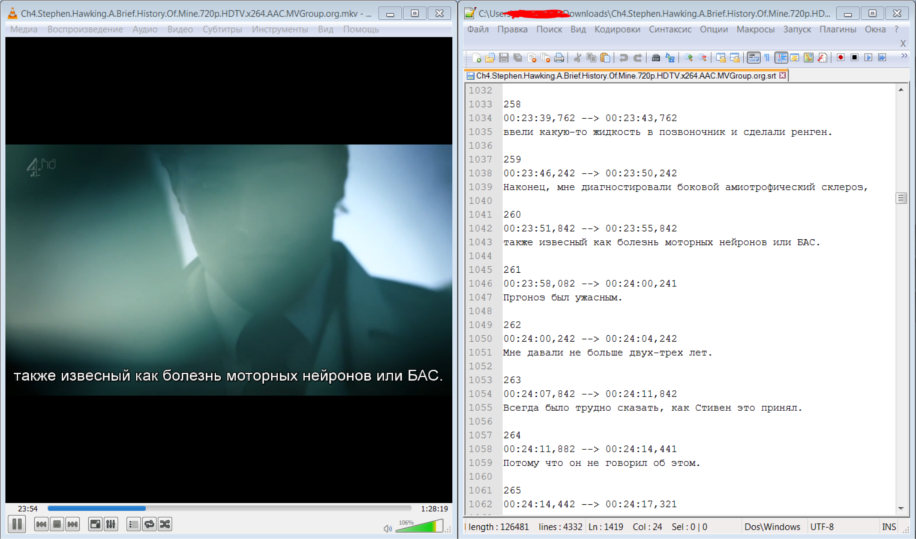
This is what my first screen looks like during voice recording
In my previous major work, many viewers complained that the voice sounds “as if from a can” - muffled and cropped. Let me remind you what software and hard I use. This is an Audio-Technica AT2020 microphone and an external M-Audio Fast Track sound card, as well as a convenient software product from Adobe - Audition.
During the year I tried many different sound processing tools, including those that were recommended to me by Habr users.
As a result, he settled on the following sequence of actions.
1. Record sound from a microphone.
2. Removing clicks (DeClicker tool)
3. Removing noise (Noise Reduction)
4. Leveling (L2, RCompressor compressors)
5. (optional) Removing loud “S”, “Z”, “J” and labial via DeEsser and DeBreath .
Compressors and a declicker work very simply, but I would like to talk more about noise. The fact is that to remove noise, the user must capture a certain area of the recording, where there is a "clean" noise, without voice. At the same time, many capture just a clean piece of the record, and as a result get exactly that “canned” effect that I encountered.
To avoid this, you should open the spectrogram (default hotkey F9), and look at the frequencies. Usually the noise is at higher frequencies than the voice, so you can select a two-dimensional region (not just a piece of the timeline, but also a part of the recording growing on the frequency scale) that does not catch the main “bass” frequencies of the voice. Just draw a conditional line for yourself, above which the voice levels drop significantly, and highlight the noise in a parallel section. In this way, we cut off the upper noise, but leave our useful sound alone.

It looks something like this for me
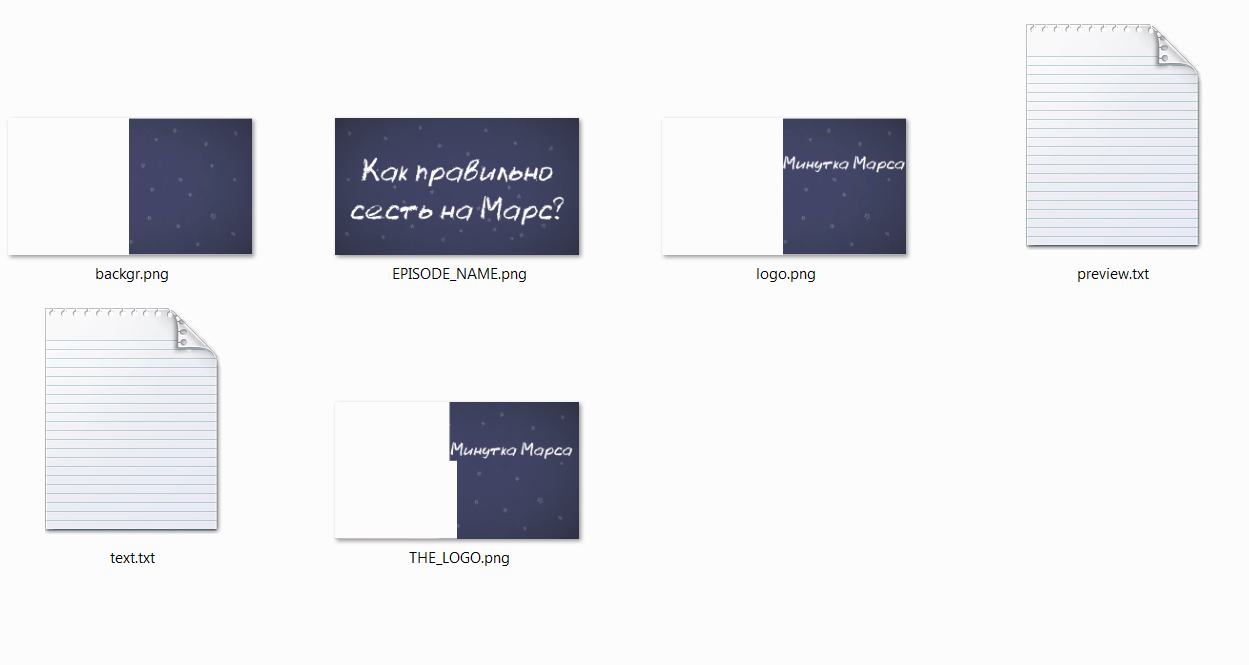
Everything is very simple here, although it is cumbersome in terms of the number of actions. We find the moment when the inscription appears on the screen, go to the previous frame, save it as a PNG image, crop the excess part and “close” the area with the inscription on the screen with a piece of the frame. So, for example, the finished files look for replacing the logo on the logo in the NASA JPL series of clips, “Mars in a minute” , which I translated a year ago:
In total, much less time was spent on work, with a higher quality of work than last year. I didn’t do the translation, it took the author about 16-20 hours, the final editing took place on the fly, the sound recording took about two and a half hours. Sound editing - another two hours, then about four hours it took to edit the video and overlay the sound on the original track. Oh yes, the rendering of a 1080p movie in Sony Vegas took us almost 10 hours. I was personally pleased with the result of the work. Well, I suggest you evaluate it yourself:
Enjoy watching!
PS Special thanks to our editor, Nikita Kolimbet, who corrected the translation and kicked me all the time.
PPS Sound was cut out in a short section of the video - at the same time, a new YouTube feature was tested, which removes copyright infringing compositions.
PPS In the comments asked for details for material rewards. Why not!
Yandex.money: 41001784052094
WMZ: Z772686954269
WMR: R345291690536
Any Visa / MasterCard: goo.gl/OuGVpc
Today I would like to provide details about our last transfer. This is a film about the life of Stephen Hawking. In a post I will talk about the translation process (since this time I didn’t do it myself), about how to better process the sound recorded at home, and how easy it is to translate captions in films. And of course I’ll show the film itself.
To begin with, I’ll give you some technical details, information about how we started working on the film, and what has changed in the approach to translation and voice over the year.
General information
Six months ago, in the comments under one of our videos, user Roman C suggested translating this documentary picture. The film by Stephen Finnigan tells the story of one of the greatest scientists of our time, Stephen Hawking. We looked, we liked it, it was decided to get down to business. Last year, I myself voiced the film by ear, now, thanks to a slightly increased popularity, I managed to attract interested people. One of the students at the Kiev Polytechnic, Lera, got down to work the very next day. I asked her to give a comment and describe her work.
Although translating a written text is easier than interpreting, translating a movie is something else. At first, until at least some kind of dexterity appeared and I did not delve into the film, the translation went slowly and without much pleasure. Moreover, the guys said not to rush, so I stretched the pleasure for a couple of weeks. And then I somehow got involved and translated 15-20 films a day (I would have had more experience, things would have gone faster, of course).Lera Shukatka, translator
The most difficult thing was to translate something about physics, which I do not fully understand. I had to read a lot to get to the bottom of the matter and translate it, but I also had to google a lot or watch Wikipedia articles on the principle: the English definition is the correspondence of the article in Russian, hence the Russian definition. Sometimes, she even clarified with Pasha how something scientifically sounds.
I did the proofreading of the translation at the very end, when everything was ready, because before that there was no point: the work would have stopped altogether if I had only edited. Moreover, in the end the arm was more full and the suitable vocabulary in my head spun. Unfortunately, I only read it once, but I’m sure that if I subtracted it three more times, then I’ve changed a lot.
But besides the fact that I got a professional translator, some other things changed in the course of the year: I became more comfortable with sound processing (more on this below), stopped speaking in subtitles, and changed my approach to recording.
Subtitle dubbing is good where the timing of these same subtitles is correctly compiled. Otherwise, the text is intermittent, and intonation cannot be conveyed normally. So it’s better to read the text from the file, or having before your eyes the phrase following the screen. A couple of tips for those who want to record a long voice acting at home:
1. Drink warm water. Much water. You can tea from a thermos. This helps to get rid of the "dangling" language and hoarseness in the voice, which invariably appears at the end of the first hour of recording.
2. Do not split the recording into files, if possible. This makes sense only if you are writing sound in an apartment (for example, like me), and you feel that the general level of ambient noise has suddenly changed for a reason beyond your control.
3. Do not be afraid to stumble and overwrite. Take long pauses between phrases: trimming pauses and shortening a phrase is much easier than creating them artificially, trying to stretch the sound.
This is what my first screen looks like during voice recording
Sound processing
In my previous major work, many viewers complained that the voice sounds “as if from a can” - muffled and cropped. Let me remind you what software and hard I use. This is an Audio-Technica AT2020 microphone and an external M-Audio Fast Track sound card, as well as a convenient software product from Adobe - Audition.
During the year I tried many different sound processing tools, including those that were recommended to me by Habr users.
As a result, he settled on the following sequence of actions.
1. Record sound from a microphone.
2. Removing clicks (DeClicker tool)
3. Removing noise (Noise Reduction)
4. Leveling (L2, RCompressor compressors)
5. (optional) Removing loud “S”, “Z”, “J” and labial via DeEsser and DeBreath .
Compressors and a declicker work very simply, but I would like to talk more about noise. The fact is that to remove noise, the user must capture a certain area of the recording, where there is a "clean" noise, without voice. At the same time, many capture just a clean piece of the record, and as a result get exactly that “canned” effect that I encountered.
To avoid this, you should open the spectrogram (default hotkey F9), and look at the frequencies. Usually the noise is at higher frequencies than the voice, so you can select a two-dimensional region (not just a piece of the timeline, but also a part of the recording growing on the frequency scale) that does not catch the main “bass” frequencies of the voice. Just draw a conditional line for yourself, above which the voice levels drop significantly, and highlight the noise in a parallel section. In this way, we cut off the upper noise, but leave our useful sound alone.
It looks something like this for me
Translation of inscriptions and captions
Everything is very simple here, although it is cumbersome in terms of the number of actions. We find the moment when the inscription appears on the screen, go to the previous frame, save it as a PNG image, crop the excess part and “close” the area with the inscription on the screen with a piece of the frame. So, for example, the finished files look for replacing the logo on the logo in the NASA JPL series of clips, “Mars in a minute” , which I translated a year ago:
Summary
In total, much less time was spent on work, with a higher quality of work than last year. I didn’t do the translation, it took the author about 16-20 hours, the final editing took place on the fly, the sound recording took about two and a half hours. Sound editing - another two hours, then about four hours it took to edit the video and overlay the sound on the original track. Oh yes, the rendering of a 1080p movie in Sony Vegas took us almost 10 hours. I was personally pleased with the result of the work. Well, I suggest you evaluate it yourself:
Enjoy watching!
PS Special thanks to our editor, Nikita Kolimbet, who corrected the translation and kicked me all the time.
PPS Sound was cut out in a short section of the video - at the same time, a new YouTube feature was tested, which removes copyright infringing compositions.
PPS In the comments asked for details for material rewards. Why not!
Yandex.money: 41001784052094
WMZ: Z772686954269
WMR: R345291690536
Any Visa / MasterCard: goo.gl/OuGVpc