Using TTreeView in Firemonkey Applications
The other day I had to deal with the component TTreeView. The customer insisted on the familiar component - “Tree”, and wanted the application to look the way he was used to in VCL.
In this article, I would like to talk about the TTreeView component (tree branch) and its use in Firemonkey applications, as well as consider the differences between the VCL and FireMonkey implementation.
In VCL, adding a picture to each branch was not difficult. All that is required is to add the TImageList component, “upload” pictures to it and assign this list to the TreeView.Images property: = ImageList;
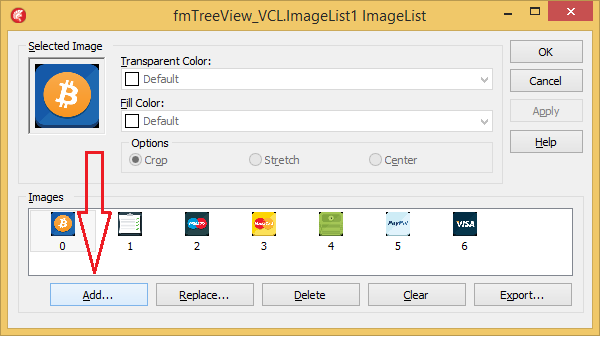
Now 2 times click on the tree and add branches. Each indicate the serial number of the image that we want to display on the branch.
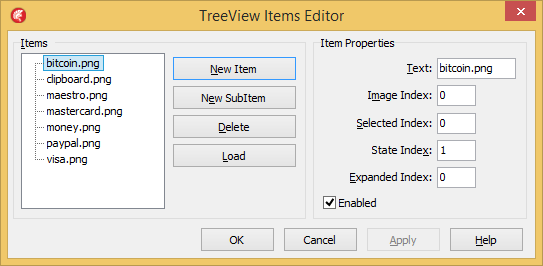
After compilation we get the following result:

In FireMonkey, the tree has changed a bit. Firstly, there is no TTreeNode class in FMX. Secondly, there is no Images property. And thirdly, in the TTreeViewItem class there are no properties responsible for using images.
Internet at the request "how to add image to treeviewitem firemonkey". suggests using a fairly standard, it seems to me, way to change standard components, expanding them by changing the style: monkeystyler.com/blog/entry/adding-images-to-a-firemonkey-treeview
An example has the full right to life and is absolutely necessary, when you want to see immediately the results of style changes, including in the IDE. But there is another way, especially if you do all the manipulations in Run-Time.
The method is based on the features of the FireMonkey architecture. If we look at the documentation, we will see this line:
FireMonkey Controls Have Owners, Parents, and Children ( http://docwiki.embarcadero.com/RADStudio/XE7/en/Arranging_FireMonkey_Controls ). This means that each component can, if necessary, act as a container for "any" other components (TfmxObject). Than I will use.
First, we’ll inherit a new branch class and “extend it” slightly:
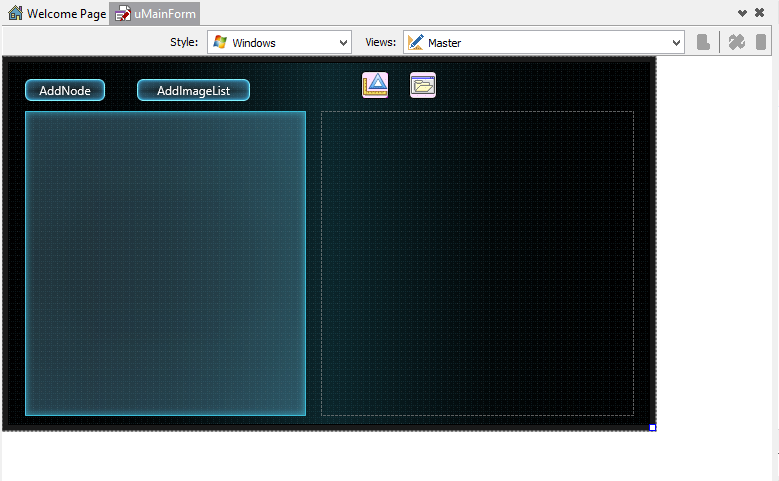
The next step is to place several components on the form:
TTreeView
TImage
2 TButton
TOpenDialog
I also added the TStyleBook component, but it is not necessary, it just changes the standard style to one of the out-of-box styles that Embarcadero provides with the IDE.
After performing the previous operations, my IDE acquired the following form:
Add the button click processing code and the TreeChange event for the tree:
After launch, the application took the following form:
One could end with this, however I would like to draw readers' special attention to the features of TFMXObject. Namely, the AddObject method, which allows us to modify our components on the fly.
Let's now add our branch, for example, a button. To do this, similarly to the example, we expand our class and add button initialization to the constructor:
We compile the application:
Add the input field in the same way:

Code:
So it’s easy to expand your own components in Run-Time. And thanks to FireMonkey, our application is also cross-platform.
Thanks to everyone who read this article. Thanks to everyone who helped. Waiting for comments and comments.
Link to the repository with an example: yadi.sk/d/lwuLryOwcsDyp
In this article, I would like to talk about the TTreeView component (tree branch) and its use in Firemonkey applications, as well as consider the differences between the VCL and FireMonkey implementation.
In VCL, adding a picture to each branch was not difficult. All that is required is to add the TImageList component, “upload” pictures to it and assign this list to the TreeView.Images property: = ImageList;
Now 2 times click on the tree and add branches. Each indicate the serial number of the image that we want to display on the branch.
After compilation we get the following result:
In FireMonkey, the tree has changed a bit. Firstly, there is no TTreeNode class in FMX. Secondly, there is no Images property. And thirdly, in the TTreeViewItem class there are no properties responsible for using images.
Internet at the request "how to add image to treeviewitem firemonkey". suggests using a fairly standard, it seems to me, way to change standard components, expanding them by changing the style: monkeystyler.com/blog/entry/adding-images-to-a-firemonkey-treeview
An example has the full right to life and is absolutely necessary, when you want to see immediately the results of style changes, including in the IDE. But there is another way, especially if you do all the manipulations in Run-Time.
The method is based on the features of the FireMonkey architecture. If we look at the documentation, we will see this line:
FireMonkey Controls Have Owners, Parents, and Children ( http://docwiki.embarcadero.com/RADStudio/XE7/en/Arranging_FireMonkey_Controls ). This means that each component can, if necessary, act as a container for "any" other components (TfmxObject). Than I will use.
First, we’ll inherit a new branch class and “extend it” slightly:
type
  TNode = class(TTreeViewItem)
  strict private
    FImage: TImage;
  private
    procedure SetImage(const aValue: TImage);
  public
    constructor Create(Owner: TComponent; const aText: String;
                                          const aImageFileName: String); reintroduce;
    destructor Destroy; override;
  published
    property Image: TImage Read FImage Write SetImage;
  end;
{ TTestNode }
constructor TNode.Create(Owner: TComponent; const aText: String;
                                            const aImageFileName: String);
begin
  inherited Create(Owner);
  Self.Text := aText;
  // Создаем картинку
  FImage := TImage.Create(Owner);
  // Особая магия FireMonkey, интересующимся - советую заглянуть в код этого метода
  Self.AddObject(FImage);
  // Позиционируем картинку
  FImage.Align := TAlignLayout.Right;
  //Загружаем из файла
  FImage.Bitmap.LoadFromFile(aImageFileName);
  // Делаем картинку фоном
  FImage.SendToBack;
end;
destructor TNode.Destroy;
begin
  Image.FreeOnRelease;
  inherited;
end;
procedure TNode.SetImage(const aValue: TImage);
begin
  FImage := aValue;
end;
The next step is to place several components on the form:
TTreeView
TImage
2 TButton
TOpenDialog
I also added the TStyleBook component, but it is not necessary, it just changes the standard style to one of the out-of-box styles that Embarcadero provides with the IDE.
After performing the previous operations, my IDE acquired the following form:
Add the button click processing code and the TreeChange event for the tree:
procedure TMainForm.AddNodeClick(Sender: TObject);
var
  Node : TNode;
begin
  // Устанавливаем параметры открытия файлов
  OpenImage.Options := OpenImage.Options - [TOpenOption.ofAllowMultiSelect];
  if OpenImage.Execute then
  begin
    // Показываем картинку на форме
    MainImage.Bitmap.LoadFromFile(OpenImage.Files[0]);
    // Создаем новую ветку с нужными нам параметрами
    Node := TNode.Create(MainTree, ExtractFileName(OpenImage.Files[0]), OpenImage.Files[0]);
    // Если ничего не выбрано, добавляем ветку дереву
    if MainTree.Selected = nil then
      MainTree.AddObject(Node)
    else
      // Добавляем ветку той которая выбрана, способ аналогичен тому который описан выше
      MainTree.Selected.AddObject(Node);
  end;
end;
// В этом методе всё аналогично предыдущему, кроме того что здесь есть возможность выбрать несколько картинок сразу
procedure TMainForm.AddImageListClick(Sender: TObject);
var
  ImageFileName: string;
  Node : TNode;
begin
  OpenImage.Options := OpenImage.Options + [TOpenOption.ofAllowMultiSelect];
  if OpenImage.Execute then
  begin
    for ImageFileName in OpenImage.Files do
    begin
      Node := TNode.Create(MainTree, ExtractFileName(ImageFileName), ImageFileName);
      MainTree.AddObject(Node);
    end;
    MainImage.Bitmap.LoadFromFile(OpenImage.Files[0]);
  end;
end;
procedure TMainForm.MainTreeChange(Sender: TObject);
begin
  // Если выбрали ветку, то изменим картинку на картинку ветки
  if MainTree.Selected is TNode then
    MainImage.Bitmap := (MainTree.Selected as TNode).Image.Bitmap;
end;
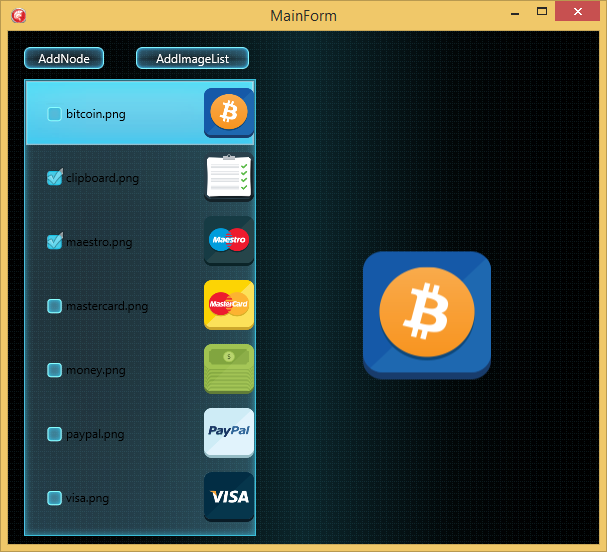
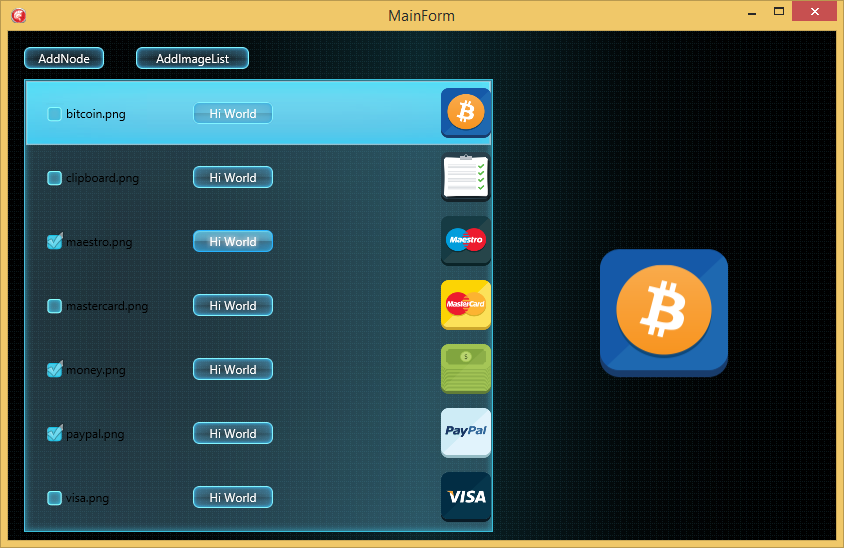
After launch, the application took the following form:
One could end with this, however I would like to draw readers' special attention to the features of TFMXObject. Namely, the AddObject method, which allows us to modify our components on the fly.
Let's now add our branch, for example, a button. To do this, similarly to the example, we expand our class and add button initialization to the constructor:
type
  TNode = class(TTreeViewItem)
  strict private
    FImage: TImage;
    FButton: TButton;
  private
    procedure SetImage(const aValue: TImage);
    procedure TreeButtonClick(Sender: TObject);
    procedure SetButton(const Value: TButton);
  public
    constructor Create(Owner: TComponent; const aText: String;
                                          const aImageFileName: String); reintroduce;
    destructor Destroy; override;
  published
    property Image: TImage Read FImage Write SetImage;
    property Button: TButton Read FButton Write SetButton;
  end;
constructor TNode.Create(Owner: TComponent; const aText: String;
                                            const aImageFileName: String);
begin
  inherited Create(Owner);
  Self.Text := aText;
  // Создаем картинку
  FImage := TImage.Create(Owner);
  // Особая магия FireMonkey, интересующимся - советую заглянуть в код этого метода
  Self.AddObject(FImage);
  // Позиционируем картинку
  FImage.Align := TAlignLayout.Right;
  //Загружаем из файла
  FImage.Bitmap.LoadFromFile(aImageFileName);
  // Делаем картинку фоном
  FImage.SendToBack;
  // Всё по сути аналогично, кроме события OnClick
  FButton := TButton.Create(Owner);
  FButton.Text := 'Hi World';
  Self.AddObject(FButton);
  FButton.Align := TAlignLayout.Center;
  FButton.SendToBack;
  FButton.OnClick := TreeButtonClick;
end;
procedure TNode.TreeButtonClick(Sender: TObject);
begin
  // Тут можно сделать обработку того какая кнопка была нажата
  ShowMessage('Hello World');
end;
We compile the application:
Add the input field in the same way:
Code:
{ TTestNode }
constructor TNode.Create(Owner: TComponent; const aText: String;
                                            const aImageFileName: String);
begin
  inherited Create(Owner);
  Self.Text := aText;
  FButton := TButton.Create(Owner);
  FButton.Text := 'Send';
  Self.AddObject(FButton);
  FButton.Align := TAlignLayout.Center;
  FButton.SendToBack;
  FButton.OnClick := TreeButtonClick;
  // Добавим TEdit
  FEdit:= TEdit.Create(Owner);
  Self.AddObject(FEdit);
  FEdit.Position.X := 150;
  FEdit.Position.Y := 25;
  FEdit.SendToBack;
  FImage := TImage.Create(Owner);
  Self.AddObject(FImage);
  FImage.Align := TAlignLayout.Right;
  FImage.Bitmap.LoadFromFile(aImageFileName);
  FImage.SendToBack;
end;
So it’s easy to expand your own components in Run-Time. And thanks to FireMonkey, our application is also cross-platform.
Thanks to everyone who read this article. Thanks to everyone who helped. Waiting for comments and comments.
Link to the repository with an example: yadi.sk/d/lwuLryOwcsDyp