Organizing Your Virtualization Host at Hetzner

Proxmox Virtual Environment (Proxmox VE) is an open source virtualization system based on Debian GNU / Linux. Developed by the Austrian company Proxmox Server Solutions GmbH, sponsored by Internet Foundation Austria.
... and, I must say, a very pleasant system to maintain and operate.
I have been working with my clients (in most cases, web design studios, or standalone clients) for about 5 years. All my clients use the services of the German hoster Hetzner. You can talk for a long time about the quality of the services they provide, the quality of the iron in their servers - but the fact remains: the Hetzner offers in the root server segment are beyond competition in terms of price / quality ratio.
Help: at the time of writing, the cost of a monthly rental server line EX60(Intel Core i7-920, 48 GB DDR3 RAM, 2 x 2 TB SATA 3 Gb / s 7200 rpm HDD) is only 59 € per month. Agree, quite inexpensive.
In this article, I would like to describe a small howto on installing the proxmox virtualization system on the root server, just to show how easy and affordable it is. I will not describe the options for clustering a system of 2 or more servers (maybe I will do this in the next article, if the community is interested), but I will write the simplest option.
So, first of all, we need the server itself. I recommend the EX60 because it is inexpensive, productive and does not have such an unpleasant feature as a one-time setup fee (be careful when ordering other models!)
We ordered a server. Well, we are waiting for it to be installed, and as soon as the coveted letter arrives in the mail, we proceed directly to the process. It is worth saying that for virtualization purposes we will need additional IP addresses. You can purchase them up to 3 pieces separately, or buy a subnet right away (requires an additional FlexiPack service package, 15 euros per month + subnet rental cost). To do this, go to the server control panel robot.your-server.de and, in fact, place an order on the IPs tab. Be sure to specify Purpose of use!

In case of ordering several IP addresses, repeat to taste.
Now we need to load the server in recovery mode. To do this, go to the Rescue tab, select Operating system Linux, Architecture 64 bit and boldly click on the Activate rescue system.
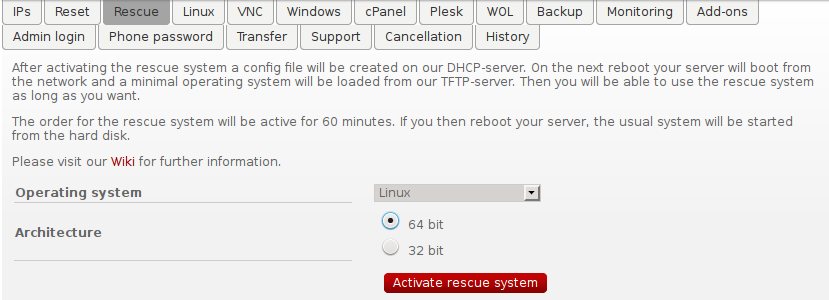
We write down the password that the system will offer us

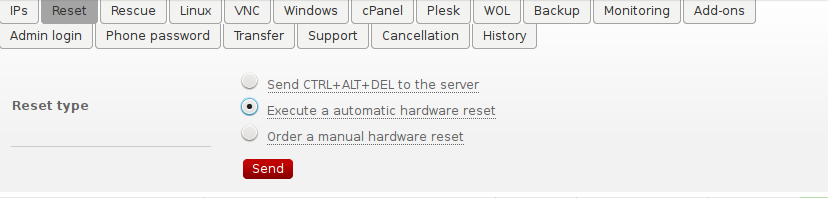
And we reboot the server:
Log in to the server with the password recorded earlier, and execute the following commands:
root@rescue ~ # passwd
root@rescue ~ # installimage
That is, we change the password to a more convenient for us, and start the installation process.
In the wizard that opens, select Virtualization -> Proxmox-Virtualization-on-Debian-Wheezy
The editor of the installation configuration file opens. I will give it in full, already with all the necessary changes, removing unnecessary comments:
Setup Config
## ================================================= ===
## Hetzner Online AG - installimage - standardconfig.
## ================================================= ===
## =====================
## HARD DISK DRIVE (S):
## ============== ======
DRIVE1 / dev / sda
DRIVE2 / dev / sdb
## ===============
## SOFTWARE RAID:
## ========== =====
SWRAID 1
SWRAIDLEVEL 1
## ============
## BOOTLOADER:
## ============
BOOTLOADER grub
## ===== =====
## HOSTNAME:
## ===========
HOSTNAME your_hostname_here
## ========================= =
## PARTITIONS / FILESYSTEMS:
## ==========================
PART / boot ext3 512M
PART lvm vg0 all
LV vg0 root / ext4 20G
LV vg0 swap swap swap 8G
# # =========================
## OPERATING SYSTEM IMAGE:
## ================= =======
IMAGE /root/.oldroot/nfs/install/../images/Debian-76-wheezy-64-minimal.tar.gz
We press F10, saving the changes and we agree with the terrible warning that the data on the disks will be lost
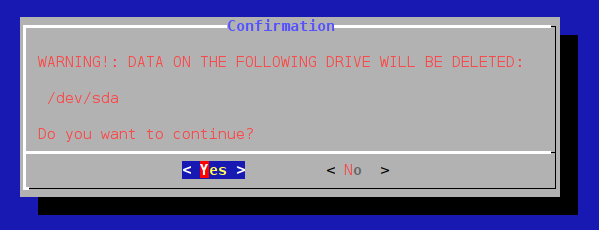
And go to drink coffee.
When a cup of coffee is drunk, and a pleasant warm wave runs through your body, most likely the installation of our server has already been completed. All that remains for us is to reboot by typing in the console
root@rescue ~ # reboot
We load our freshly installed server, and go to the address:
https: // your_ip_address: 8006
Log in with the root account and the password that you changed before installation. After all, have you changed? If not, then use the one that hetzner gave us =) We
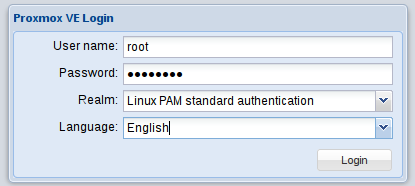
continue to configure.
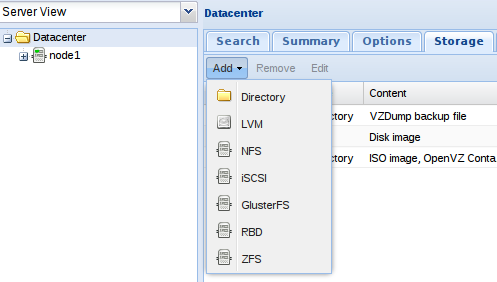
Add storage.
Datacenter -> Storage -> Add -> LVM
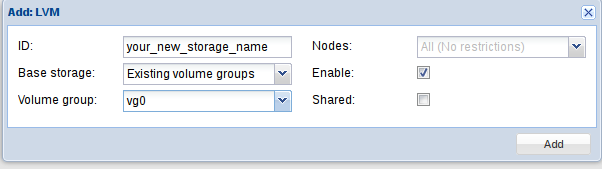
Great, we connected our Volume Group. A little patience, a little bit left =)
Configure the network.
Datacenter -> Node1 -> Network
We bring to the view shown in the screenshot. Please note that you need to configure the network as a bridge! Feel free to operate with the settings, until the reboot, they still will not apply ...

And actually restart the server with the Restart button in the upper right corner.
We eat the cookie remaining after coffee, the server booted up and is ready to work.
Log in to the Proxmox control panel again, and click on Create VM from the top right .
An intuitive wizard is launched, about which it is worth saying only 3 things.
- 1. Do not mix up the Hard Disk tab
- 2. On the Network tab, in the MAC Address field, specify the MAC address for the previously ordered IP
- 3. On the CD / DVD tab, select the image. You can put iso images yourself on the hypervisor in the directory / var / lib / vz / template / iso
Actually, how to generate a MAC for the ordered IP.
We go to the server control panel robot.your-server.de , go to the IPs tab and click on Request separate MAC address. We get the MAC, drive it into the settings of the virtual machine, and get the IP on it via DHCP.
What else is worth adding.
- The virtual machine console can be accessed through the web interface by clicking on the Console button.
- When installing WIndows on a virtual machine, select the SATA controller on the Hard Disk tab.
It seems like everyone. You can pour yourself another cup of coffee and deserve a break.
Thank you for your attention, I hope this material will be useful.
PS Added a vote on whether the reputable community is interested in clustering Proxmox servers.
Only registered users can participate in the survey. Please come in.
Talk about creating a Proxmox cluster in the next article?
- 93.4% Yes 342
- 6.5% No 24