Remote installation of an operating system without KVM over IP
Have you ever had this: you weren’t at work, the employee’s operating system crashed, and the remote administration tools that helped you out like that become useless. Or are you trying to explain over the phone which BIOS menu item is responsible for the boot priority, and the person you speak does not speak English at all, and the conversation turns into torture for both.
There are many ways to solve the problem: the same KVM over IP (relatively expensive), partitioning partitions with the system and data, followed by erasing the system partition in the event of a failure, bootable media with Live distribution kit for temporary work, PXE server, etc.
I propose another way - to assemble a device like KVM over IP (transmitting keystrokes and images over the network) with your own hands.
We will need:
The video capture card turned out to be low profile and I managed to fit it into the corresponding Exegate MI-213 package. Then I cheapened. After a couple of months of operation in the power supply, the fan broke, which turned out to be non-standard (8x8, but narrow), and its order from China is comparable to the price of the entire case. On the other hand, I liked the case because it got into the ATX motherboard (with 4 slots). In general, decide for yourself. For my purposes, the case is quite suitable. And after a bit of work as a grinder, I managed to shove a standard 8x8 fan with a slight loss of presentation of the case.

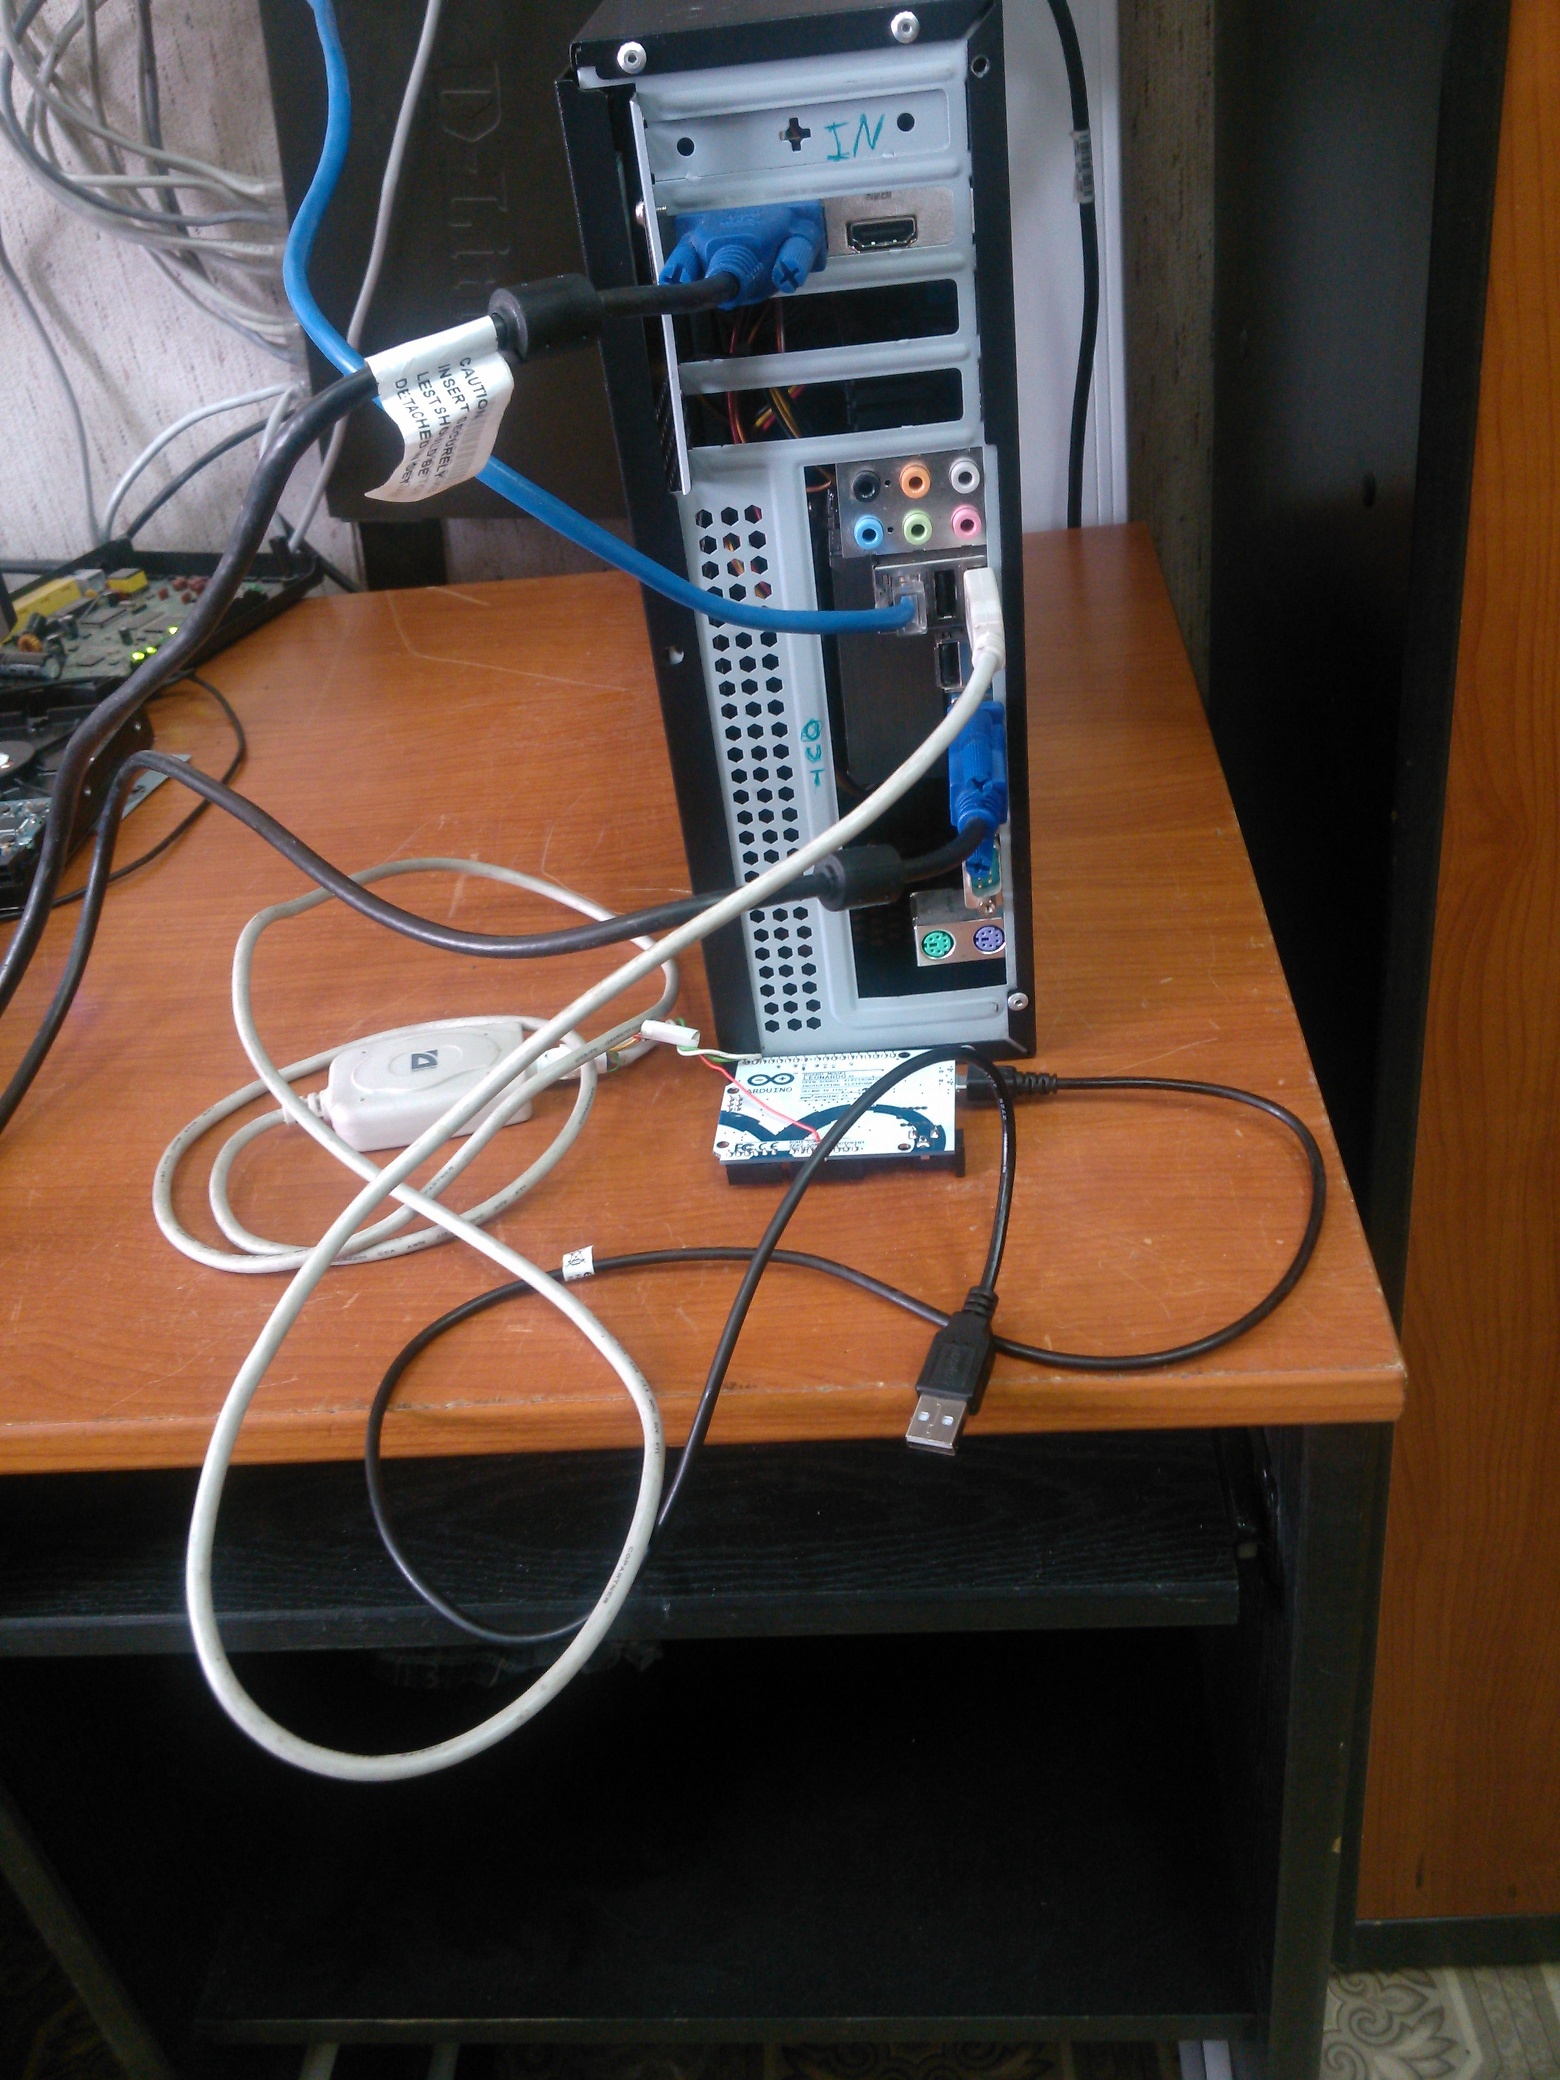
Everything is quite simple: we connect the “unit” instead of the monitor and control the computer using the Arduino Leonardo, pretending to be a keyboard.
The implementation is still damp, but quite functional.
There is a desire to write a program that will interact with the WDM driver, but so far the capture is performed by the standard AVerTV utility. It can adjust the capture resolution, unlike VLC and other players, which also receive a picture, but at a minimum resolution.
Unfortunately, cross-platform rests on the lack of drivers for Linux. There are some drivers , but after sending the letter it turned out that they are sold only for corporate clients.
The code for sending keystrokes is written in Java, uses the JSSC cross-platform library and it is an almost transparent form that opens on top of the utility that receives the video stream.
The entire MyKVM.java file .
The code for Arduino is still quite simple. We need to think of something about handling the Shift key, but for now, I have enough lower case, although there may be a situation when you need to enter a password and can not do without upper case.
I used a USB -> Serial adapter, because wrote code for Arduino on a laptop (which is why COM4 opens in the code). In the final version, nothing prevents you from connecting to the port soldered to the motherboard or to the pins on it.
A very interesting effect is observed if you connect RX and TX contacts without ground. Apparently, the tips on USB turn into false packets and it turns out something in the style of Halt and catch fire (by the way, a very cool series). The computer processes an avalanche-like stream of keystrokes, and you can only get it out of this state by rebooting. Of course, the effect is not observed when the USB and serial port (adapter) are part of the same computer, because "Land" they have in common.
I soldered the USB -> Serial adapter directly to the Arduino. Do not pay attention to the color of the wires, they are extended. I was lucky, the Chinese did not mix the colors, and in my adapter the “earth” was yellow. TX red, RX brown. Do not forget that the RX and TX boards are connected in reverse. In modern motherboards, the serial port is rarely soldered, although there are usually conclusions on the board itself. While experimenting, it's better to use an adapter.
The piece of iron was going just for fun. Do not judge strictly. Most likely you don’t need to build such a bike if you are not 100% sure that you need it.
There are many ways to solve the problem: the same KVM over IP (relatively expensive), partitioning partitions with the system and data, followed by erasing the system partition in the event of a failure, bootable media with Live distribution kit for temporary work, PXE server, etc.
I propose another way - to assemble a device like KVM over IP (transmitting keystrokes and images over the network) with your own hands.
Purchase
We will need:
- Video capture card. In my case, AVerTV Game Broadcaster HD. It supports D-SUB, HDMI, DVI (via HDMI adapter)
- Arduino compatible board with keyboard emulation capability. I use the Arduino Leonardo clone, but this is not the only board with this feature.
The video capture card turned out to be low profile and I managed to fit it into the corresponding Exegate MI-213 package. Then I cheapened. After a couple of months of operation in the power supply, the fan broke, which turned out to be non-standard (8x8, but narrow), and its order from China is comparable to the price of the entire case. On the other hand, I liked the case because it got into the ATX motherboard (with 4 slots). In general, decide for yourself. For my purposes, the case is quite suitable. And after a bit of work as a grinder, I managed to shove a standard 8x8 fan with a slight loss of presentation of the case.
Software part
Everything is quite simple: we connect the “unit” instead of the monitor and control the computer using the Arduino Leonardo, pretending to be a keyboard.
The implementation is still damp, but quite functional.
There is a desire to write a program that will interact with the WDM driver, but so far the capture is performed by the standard AVerTV utility. It can adjust the capture resolution, unlike VLC and other players, which also receive a picture, but at a minimum resolution.
Unfortunately, cross-platform rests on the lack of drivers for Linux. There are some drivers , but after sending the letter it turned out that they are sold only for corporate clients.
The code for sending keystrokes is written in Java, uses the JSSC cross-platform library and it is an almost transparent form that opens on top of the utility that receives the video stream.
public class MyKVM extends JFrame {
 private static SerialPort serialPort;
 private static int c = 0;
 public static void createGUI() {
  JFrame frame = new JFrame("Test frame");
  frame.setDefaultCloseOperation(JFrame.EXIT_ON_CLOSE);
  JTextArea inputText;
  JTextArea feedbackText;
  inputText = new JTextArea();
  feedbackText = new JTextArea();
  inputText.addKeyListener(new KeyListener()
        {
              @Override
              public void keyPressed(KeyEvent e)
              {
                  feedbackText.append("Key Pressed: " + e.getKeyCode() + "\n");
                  try {
                      switch (e.getKeyCode())
                      {
                        case 65: c = 61; break;
...
 << много разных варианотов >>>
...
           	    };
                    serialPort.writeByte((byte)c);
                  }
                  catch (SerialPortException ex) {
                    System.out.println(ex);
                  };
              }
          JScrollPane scrollText = new JScrollPane(feedbackText);
          frame.getContentPane().add(inputText);
          frame.getContentPane().add(feedbackText);
          frame.add(inputText, BorderLayout.NORTH);
          frame.add(scrollText, BorderLayout.CENTER);
          frame.setPreferredSize(new Dimension(250, 230));
          frame.pack();
          frame.setLocationRelativeTo(null);
          frame.setVisible(true);
          AWTUtilities.setWindowOpacity(frame, 0.2f);
     }
     public static void main(String[] args) {
              String[] portNames = SerialPortList.getPortNames();
               for(int i = 0; i < portNames.length; i++){
                   System.out.println(portNames[i]);
               }
               serialPort = new SerialPort("COM4");
               try {
                   //Открываем порт
                   serialPort.openPort();
                   //Выставляем параметры
                   serialPort.setParams(SerialPort.BAUDRATE_57600,
                                        SerialPort.DATABITS_8,
                                        SerialPort.STOPBITS_1,
                                        SerialPort.PARITY_NONE);
                   serialPort.writeString("1");
               }
               catch (SerialPortException ex) {
                   System.out.println(ex);
               }
              EventQueue.invokeLater(new Runnable() {
               public void run() {
                    JFrame.setDefaultLookAndFeelDecorated(true);
                    createGUI();
               }
          });
     }
}
The entire MyKVM.java file .
The code for Arduino is still quite simple. We need to think of something about handling the Shift key, but for now, I have enough lower case, although there may be a situation when you need to enter a password and can not do without upper case.
int incomingByte = 0;
void setup(){
  Serial1.begin(57600);
  Serial.begin(57600);
  Keyboard.begin();
}
void loop()
{
    while (Serial1.available()) {
      if (Serial1.available() > 0) {
              // read the incoming byte:
              incomingByte = Serial1.read();
              switch (incomingByte){
                case 37: Keyboard.write(216); break;
                case 39: Keyboard.write(215); break;
                case 38: Keyboard.write(218); break;
                case 40: Keyboard.write(217); break;
                case 27: Keyboard.write(177); break;
                case 18: Keyboard.write(18); break;
                case 112: Keyboard.write(194); break;
                case 113: Keyboard.write(195); break;
                case 114: Keyboard.write(196); break;
                case 115: Keyboard.write(197); break;
                case 116: Keyboard.write(198); break;
                case 117: Keyboard.write(199); break;
                case 118: Keyboard.write(200); break;
                case 119: Keyboard.write(201); break;
                case 120: Keyboard.write(202); break;
                case 121: Keyboard.write(203); break;
                case 122: Keyboard.write(204); break;
                case 123: Keyboard.write(205); break;
                default: Keyboard.write(incomingByte);
              }
      }
    }
}
Piece of iron
I used a USB -> Serial adapter, because wrote code for Arduino on a laptop (which is why COM4 opens in the code). In the final version, nothing prevents you from connecting to the port soldered to the motherboard or to the pins on it.
A very interesting effect is observed if you connect RX and TX contacts without ground. Apparently, the tips on USB turn into false packets and it turns out something in the style of Halt and catch fire (by the way, a very cool series). The computer processes an avalanche-like stream of keystrokes, and you can only get it out of this state by rebooting. Of course, the effect is not observed when the USB and serial port (adapter) are part of the same computer, because "Land" they have in common.
I soldered the USB -> Serial adapter directly to the Arduino. Do not pay attention to the color of the wires, they are extended. I was lucky, the Chinese did not mix the colors, and in my adapter the “earth” was yellow. TX red, RX brown. Do not forget that the RX and TX boards are connected in reverse. In modern motherboards, the serial port is rarely soldered, although there are usually conclusions on the board itself. While experimenting, it's better to use an adapter.
conclusions
The piece of iron was going just for fun. Do not judge strictly. Most likely you don’t need to build such a bike if you are not 100% sure that you need it.