Using UIViewPropertyAnimator to Create Custom Animations
- Transfer
- Tutorial
Creating animations is great. They are an important part of the iOS Human Interface Guidelines . Animations help draw the user's attention to important things or simply make the application less boring.
There are several ways to implement animation in iOS. Probably the most popular way is to use UIView.animate (withDuration: animations :) . You can animate an image layer using CABasicAnimation . Furthermore, UIKit to configure a custom animation to display controller via UIViewControllerTransitioningDelegate .
In this article I want to discuss another exciting way to animate views - UIViewPropertyAnimator. This class provides many more management functions than its predecessor, UIView.animat e. Use it to create temporary, interactive, and interrupted animations. In addition, it is possible to quickly change the animator.
UIViewPropertyAnimator was introduced in iOS 10 . It allows you to create animations in an object-oriented manner. Let's look at an example of an animation created using the UIViewPropertyAnimator .

This is how it was when using UIView.
And here's how to do it with the UIViewPropertyAnimator :
If you need to check the animation, just create a Playground and run the code as shown below. Both code fragments will lead to the same result.

You might think that in this example there is not much difference. So, what's the point of adding a new way to create animations? UIViewPropertyAnimator becomes more useful when you need to create interactive animations.
Do you remember the classic “Finger Swipe to Unlock Device” gesture? Or the gesture "Move your finger on the screen from bottom to top" to open the Control Center? These are great examples of interactive animation. You can start moving the image with your finger, then release it and the image will return to its original position. In addition, you can catch the image during the animation and continue moving it with your finger.
UIView animations do not provide an easy way to control the percentage of animation completion. You cannot pause the animation in the middle of a loop and continue its execution after interruption.
In this case, it will be about UIViewPropertyAnimator. Next, we will look at how you can easily create fully interactive, interrupted animation, and reverse animation in a few steps.
First you need to download the starter project . Once you open the archive, you will find the CityGuide application that helps users plan their holidays. The user can scroll through the list of cities, and then open a detailed description with detailed information about the city that he liked.
Consider the source code of the project before we start creating beautiful animations. Here's what you can find in a project by opening it in Xcode :
Let's try to build and run the sample application. As a result of this, we obtain the following.
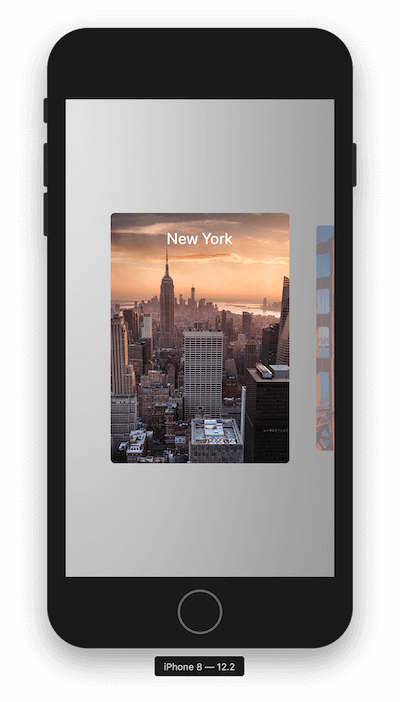
After starting the application, a list of cities is displayed. But the user cannot interact with objects in the form of cells. Now you need to display information for each city when the user clicks on one of the cells. Take a look at the final version of the application. Here's what actually needed to be developed:

The animation looks good, doesn't it? But there is nothing special here, it's just the basic logic of the UIViewPropertyAnimator . Let's see how to implement this type of animation. Create a collectionView method (_: didSelectItemAt) , add the following code fragment to the end of the ViewController file :
Now we need to implement the toggle method . Let's switch to CityCollectionViewCell.swift and implement this method.
First, add the State enumeration to the top of the file, right before the declaration of the CityCollectionViewCell class . This listing allows you to track the state of a cell:
Add some properties to control the animation in the CityCollectionViewCell class :
The initialFrame variable is used to store the cell frame until the animation runs . state is used to track if the cell is expanded or collapsed. And the animator variable is used to control the animation.
Now add the toggle method and call it from the close method , for example:
Then we add two more methods: expand () and collapse () . We will continue their implementation. First we start with the method expansiond () :
How much code. Let me explain what is happening step by step:
Now add a convolution animation. In short, it's just that we restore the cell to its previous state:
Now it's time to compile and run the application. Try clicking on the cell and you will see the animation. To close the image, click on the cross icon in the upper right corner.
You can claim to achieve the same result using UIView.animate . What is the point of using a UIViewPropertyAnimator ?
Well, it's time to make the animation interactive. Add UIPanGestureRecognizer and a new property named popupOffset , to keep track of how much you can move the cell. Let's declare these variables in the CityCollectionViewCell class :
Then add the following method to register the swipe definition:
Now you need to add the popupViewPanned method to track the swipe gesture. Paste the following code into the CityCollectionViewCell :
There are three states. At the beginning of the gesture, we initialize the animator using the toggle method and immediately pause it. While the user drags the cell, we update the animation by setting the properties of the fractionComplete multiplier . This is the main magic of the animator, which allows them to control. Finally, when the user releases his finger, the continueAnimation animator method is called to continue the animation. Then the cell will move to the target position.
After starting the application, you can drag the cell up to expand it. Then drag the expanded cell down to collapse it.
The animation now looks pretty good, but interrupting the animation in the middle is not possible. Therefore, to make the animation fully interactive, you need to add another function - interruption. The user can start the expand / collapse animation as usual, but the animation should be paused immediately after the user clicks on the cell during the animation cycle.
To do this, you need to save the progress of the animation and then take this value into account in order to calculate the percentage of completion of the animation.
First, declare a new property in CityCollectionViewCell :
Then update .began block method popupViewPanned with the next line of code, to store progress:
In the .changed block, you need to update the following line of code in order to correctly calculate the percentage of completion:
Now the application is ready for testing. Run the project and see what happens. If all the actions are performed correctly following my instructions, the animation should look like this:

You can find a flaw for the current implementation. If you drag the cell a bit and then return it to its original position, the cell will continue to expand when you release your finger. Let's fix this problem to make the interactive animation even better.
Perform block update .end method popupViewPanned , as described below:
Now we take into account the speed of the gesture to determine if the animation should be reversed.
And finally, insert another line of code into the .changed block . Put this code to the right of the animator.fractionComplete calculation .
Let's run the application again. Now everything should work without fail.

So, we have completed the implementation of the animation using the UIViewPropertyAnimator . However, there is one unpleasant mistake. You may have met her while testing the application. The problem is that scrolling the cell horizontally is not possible. Let's try to swipe left / right through the cells, and we are confronted with the problem.
The main reason is related to the UIPanGestureRecognizer we created . It also catches a swipe gesture, and conflicts with the built-in gesture recognizer UICollectionView .
Although the user can still scroll through the top / bottom of the cells or the space between cells to scroll through cities, I still don't like such a bad user interface. Let's fix it.
To resolve conflicts, we need to implement a delegate method called gestRecognizerShouldBegin (_ :) . This method controls whether the gesture recognizer should continue to interpret touches. If you return false in the method, the gesture recognizer will ignore touches. So what we're going to do is give our own panorama recognition tool the ability to ignore horizontal movements.
To do this, let's set the delegate of our pan recognizer. Insert the following line of code into the panRecognizer initialization (you can put the code right before the return recognizer :
Then, we implement the gestRecognizerShouldBegin (_ :) method as follows:
We will open / close if its vertical speed is greater than the horizontal speed.
Wow! Let's test the application again. Now you can move around the list of cities by swiping left / right across the cells.

Before we finish this tutorial, let's talk about timing functions. Do you still remember the case when the developer asked you to implement a custom synchronization function for the animation that you create?
Usually, you should change the UIView.animation to CABasicAnimation or wrap it in CATransaction . Through UIViewPropertyAnimator you can easily implement a custom timing functions.
Under timing functions (or easing functions) refers animation speed functions which influence the rate of change of a particular property being animated. Four types are currently supported: easeInOut, easeIn, easeOut, linear.
Replace the animator initialization with this timing functions (try drawing your own Bezier cubic curve) as follows:
Alternatively, instead of using cubic synchronization parameters, you can also use spring synchronization, for example:
Try to start the project again and see what happens.
Through UIViewPropertyAnimator, you can enhance static screens and user interaction through interactive animations.
I know that you cannot wait to realize what you have learned in your own project. If you apply this approach in your project, it will be very cool, let me know about this by leaving a comment below.
As a reference, here you can download the final draft .
Professional animations using UIKit - https://developer.apple.com/videos/play/wwdc2017/230/
UIViewPropertyAnimator Apple Developer Documentation - https://developer.apple.com/documentation/uikit/uiviewpropertyanimator
There are several ways to implement animation in iOS. Probably the most popular way is to use UIView.animate (withDuration: animations :) . You can animate an image layer using CABasicAnimation . Furthermore, UIKit to configure a custom animation to display controller via UIViewControllerTransitioningDelegate .
In this article I want to discuss another exciting way to animate views - UIViewPropertyAnimator. This class provides many more management functions than its predecessor, UIView.animat e. Use it to create temporary, interactive, and interrupted animations. In addition, it is possible to quickly change the animator.
Introducing UIViewPropertyAnimator
UIViewPropertyAnimator was introduced in iOS 10 . It allows you to create animations in an object-oriented manner. Let's look at an example of an animation created using the UIViewPropertyAnimator .
This is how it was when using UIView.
UIView.animate(withDuration: 0.3) {
    view.frame = view.frame.offsetBy(dx: 100, dy: 0)
}
And here's how to do it with the UIViewPropertyAnimator :
let animator = UIViewPropertyAnimator(duration:0.3, curve: .linear) {
     view.frame = view.frame.offsetBy(dx:100, dy:0)
 }
 animator.startAnimation()
If you need to check the animation, just create a Playground and run the code as shown below. Both code fragments will lead to the same result.
You might think that in this example there is not much difference. So, what's the point of adding a new way to create animations? UIViewPropertyAnimator becomes more useful when you need to create interactive animations.
Interactive and interrupted animation
Do you remember the classic “Finger Swipe to Unlock Device” gesture? Or the gesture "Move your finger on the screen from bottom to top" to open the Control Center? These are great examples of interactive animation. You can start moving the image with your finger, then release it and the image will return to its original position. In addition, you can catch the image during the animation and continue moving it with your finger.
UIView animations do not provide an easy way to control the percentage of animation completion. You cannot pause the animation in the middle of a loop and continue its execution after interruption.
In this case, it will be about UIViewPropertyAnimator. Next, we will look at how you can easily create fully interactive, interrupted animation, and reverse animation in a few steps.
Preparation of the launch project
First you need to download the starter project . Once you open the archive, you will find the CityGuide application that helps users plan their holidays. The user can scroll through the list of cities, and then open a detailed description with detailed information about the city that he liked.
Consider the source code of the project before we start creating beautiful animations. Here's what you can find in a project by opening it in Xcode :
- ViewController.swift : The main application controller with a UICollectionView that displays an array of City objects .
- CityCollectionViewCell.swift: Cell to display City . In fact, in this article most of the changes will apply to this class. You may notice that descriptionLabel and closeButton are already defined in the class. However, after starting the application, these objects will be hidden. Do not worry, they will be visible a little later. This class also has collectionView and index properties . Later they will be used for animation.
- CityCollectionViewFlowLayout.swift: This class is responsible for horizontal scrolling. We will not change it yet.
- City.swift : The main application model has a method that was used in ViewController.
- Main.storyboard: You can find the user interface for the ViewController and CityCollectionViewCell .
Let's try to build and run the sample application. As a result of this, we obtain the following.
Implementation of deployment and collapse animation
After starting the application, a list of cities is displayed. But the user cannot interact with objects in the form of cells. Now you need to display information for each city when the user clicks on one of the cells. Take a look at the final version of the application. Here's what actually needed to be developed:
The animation looks good, doesn't it? But there is nothing special here, it's just the basic logic of the UIViewPropertyAnimator . Let's see how to implement this type of animation. Create a collectionView method (_: didSelectItemAt) , add the following code fragment to the end of the ViewController file :
func collectionView(_ collectionView: UICollectionView, didSelectItemAt indexPath: IndexPath) {
    let selectedCell = collectionView.cellForItem(at: indexPath)! as! CityCollectionViewCell
    selectedCell.toggle()
}
Now we need to implement the toggle method . Let's switch to CityCollectionViewCell.swift and implement this method.
First, add the State enumeration to the top of the file, right before the declaration of the CityCollectionViewCell class . This listing allows you to track the state of a cell:
private enum State {
    case expanded
    case collapsed
    var change: State {
        switch self {
        case .expanded: return .collapsed
        case .collapsed: return .expanded
        }
    }
}
Add some properties to control the animation in the CityCollectionViewCell class :
private var initialFrame: CGRect?
private var state: State = .collapsed
private lazy var animator: UIViewPropertyAnimator = {
    return UIViewPropertyAnimator(duration: 0.3, curve: .easeInOut)
}()
The initialFrame variable is used to store the cell frame until the animation runs . state is used to track if the cell is expanded or collapsed. And the animator variable is used to control the animation.
Now add the toggle method and call it from the close method , for example:
@IBAction func close(_ sender: Any) {
    toggle()
}
func toggle() {
    switch state {
    case .expanded:
        collapse()
    case .collapsed:
        expand()
    }
}
Then we add two more methods: expand () and collapse () . We will continue their implementation. First we start with the method expansiond () :
private func expand() {
    guard let collectionView = self.collectionView, let index = self.index else { return }
    animator.addAnimations {
        self.initialFrame = self.frame
        self.descriptionLabel.alpha = 1
        self.closeButton.alpha = 1
        self.layer.cornerRadius = 0
        self.frame = CGRect(x: collectionView.contentOffset.x, y:0, width: collectionView.frame.width, height: collectionView.frame.height)
        if let leftCell = collectionView.cellForItem(at: IndexPath(row: index - 1, section: 0)) {
            leftCell.center.x -= 50
        }
        if let rightCell = collectionView.cellForItem(at: IndexPath(row: index + 1, section: 0)) {
            rightCell.center.x += 50
        }
        self.layoutIfNeeded()
    }
    animator.addCompletion { position in
        switch position {
        case .end:
            self.state = self.state.change
            collectionView.isScrollEnabled = false
            collectionView.allowsSelection = false
        default:
            ()
        }
    }
    animator.startAnimation()
}
How much code. Let me explain what is happening step by step:
- First check if not equal collectionView and index zero. Otherwise, we will not be able to start the animation.
- Next, start creating the animation by calling animator.addAnimations .
- Next, save the current frame, which is used to restore it in the convolution animation.
- Then we set the alpha value for descriptionLabel and closeButton to make them visible.
- Next, remove the rounded corner and set a new frame for the cell. The cell will be shown in full screen.
- Next we move the neighboring cells.
- Now call the animator.addComplete () method to disable the interaction of the collection image. This prevents users from scrolling it during cell expansion. Also change the current state of the cell. It is important to change the state of the cell, and only after that the animation ends.
Now add a convolution animation. In short, it's just that we restore the cell to its previous state:
private func collapse() {
    guard let collectionView = self.collectionView, let index = self.index else { return }
    animator.addAnimations {
        self.descriptionLabel.alpha = 0
        self.closeButton.alpha = 0
        self.layer.cornerRadius = self.cornerRadius
        self.frame = self.initialFrame!
        if let leftCell = collectionView.cellForItem(at: IndexPath(row: index - 1, section: 0)) {
            leftCell.center.x += 50
        }
        if let rightCell = collectionView.cellForItem(at: IndexPath(row: index + 1, section: 0)) {
            rightCell.center.x -= 50
        }
        self.layoutIfNeeded()
    }
    animator.addCompletion { position in
        switch position {
        case .end:
            self.state = self.state.change
            collectionView.isScrollEnabled = true
            collectionView.allowsSelection = true
        default:
            ()
        }
    }
    animator.startAnimation()
}
Now it's time to compile and run the application. Try clicking on the cell and you will see the animation. To close the image, click on the cross icon in the upper right corner.
Adding gesture processing
You can claim to achieve the same result using UIView.animate . What is the point of using a UIViewPropertyAnimator ?
Well, it's time to make the animation interactive. Add UIPanGestureRecognizer and a new property named popupOffset , to keep track of how much you can move the cell. Let's declare these variables in the CityCollectionViewCell class :
private let popupOffset: CGFloat = (UIScreen.main.bounds.height - cellSize.height)/2.0
private lazy var panRecognizer: UIPanGestureRecognizer = {
    let recognizer = UIPanGestureRecognizer()
    recognizer.addTarget(self, action: #selector(popupViewPanned(recognizer:)))
    return recognizer
}()
Then add the following method to register the swipe definition:
override func awakeFromNib() {
    self.addGestureRecognizer(panRecognizer)
}
Now you need to add the popupViewPanned method to track the swipe gesture. Paste the following code into the CityCollectionViewCell :
@objc func popupViewPanned(recognizer: UIPanGestureRecognizer) {
    switch recognizer.state {
    case .began:
        toggle()
        animator.pauseAnimation()
    case .changed:
        let translation = recognizer.translation(in: collectionView)
        var fraction = -translation.y / popupOffset
        if state == .expanded { fraction *= -1 }
        animator.fractionComplete = fraction
    case .ended:
        animator.continueAnimation(withTimingParameters: nil, durationFactor: 0)
    default:
        ()
    }
}
There are three states. At the beginning of the gesture, we initialize the animator using the toggle method and immediately pause it. While the user drags the cell, we update the animation by setting the properties of the fractionComplete multiplier . This is the main magic of the animator, which allows them to control. Finally, when the user releases his finger, the continueAnimation animator method is called to continue the animation. Then the cell will move to the target position.
After starting the application, you can drag the cell up to expand it. Then drag the expanded cell down to collapse it.
The animation now looks pretty good, but interrupting the animation in the middle is not possible. Therefore, to make the animation fully interactive, you need to add another function - interruption. The user can start the expand / collapse animation as usual, but the animation should be paused immediately after the user clicks on the cell during the animation cycle.
To do this, you need to save the progress of the animation and then take this value into account in order to calculate the percentage of completion of the animation.
First, declare a new property in CityCollectionViewCell :
private var animationProgress: CGFloat = 0
Then update .began block method popupViewPanned with the next line of code, to store progress:
animationProgress = animator.fractionComplete
In the .changed block, you need to update the following line of code in order to correctly calculate the percentage of completion:
animator.fractionComplete = fraction + animationProgress
Now the application is ready for testing. Run the project and see what happens. If all the actions are performed correctly following my instructions, the animation should look like this:
Animation reverse
You can find a flaw for the current implementation. If you drag the cell a bit and then return it to its original position, the cell will continue to expand when you release your finger. Let's fix this problem to make the interactive animation even better.
Perform block update .end method popupViewPanned , as described below:
let velocity = recognizer.velocity(in: self)
let shouldComplete = velocity.y > 0
if velocity.y == 0 {
    animator.continueAnimation(withTimingParameters: nil, durationFactor: 0)
    break
}
switch state {
case .expanded:
    if !shouldComplete && !animator.isReversed { animator.isReversed = !animator.isReversed }
    if shouldComplete && animator.isReversed { animator.isReversed = !animator.isReversed }
case .collapsed:
    if shouldComplete && !animator.isReversed { animator.isReversed = !animator.isReversed }
    if !shouldComplete && animator.isReversed { animator.isReversed = !animator.isReversed }
}
animator.continueAnimation(withTimingParameters: nil, durationFactor: 0)
Now we take into account the speed of the gesture to determine if the animation should be reversed.
And finally, insert another line of code into the .changed block . Put this code to the right of the animator.fractionComplete calculation .
if animator.isReversed { fraction *= -1 }
Let's run the application again. Now everything should work without fail.
Fix pan gesture
So, we have completed the implementation of the animation using the UIViewPropertyAnimator . However, there is one unpleasant mistake. You may have met her while testing the application. The problem is that scrolling the cell horizontally is not possible. Let's try to swipe left / right through the cells, and we are confronted with the problem.
The main reason is related to the UIPanGestureRecognizer we created . It also catches a swipe gesture, and conflicts with the built-in gesture recognizer UICollectionView .
Although the user can still scroll through the top / bottom of the cells or the space between cells to scroll through cities, I still don't like such a bad user interface. Let's fix it.
To resolve conflicts, we need to implement a delegate method called gestRecognizerShouldBegin (_ :) . This method controls whether the gesture recognizer should continue to interpret touches. If you return false in the method, the gesture recognizer will ignore touches. So what we're going to do is give our own panorama recognition tool the ability to ignore horizontal movements.
To do this, let's set the delegate of our pan recognizer. Insert the following line of code into the panRecognizer initialization (you can put the code right before the return recognizer :
recognizer.delegate = self
Then, we implement the gestRecognizerShouldBegin (_ :) method as follows:
override func gestureRecognizerShouldBegin(_ gestureRecognizer: UIGestureRecognizer) -> Bool {
    return abs((panRecognizer.velocity(in: panRecognizer.view)).y) > abs((panRecognizer.velocity(in: panRecognizer.view)).x)
}
We will open / close if its vertical speed is greater than the horizontal speed.
Wow! Let's test the application again. Now you can move around the list of cities by swiping left / right across the cells.
Bonus: Custom Sync Features
Before we finish this tutorial, let's talk about timing functions. Do you still remember the case when the developer asked you to implement a custom synchronization function for the animation that you create?
Usually, you should change the UIView.animation to CABasicAnimation or wrap it in CATransaction . Through UIViewPropertyAnimator you can easily implement a custom timing functions.
Under timing functions (or easing functions) refers animation speed functions which influence the rate of change of a particular property being animated. Four types are currently supported: easeInOut, easeIn, easeOut, linear.
Replace the animator initialization with this timing functions (try drawing your own Bezier cubic curve) as follows:
private lazy var animator: UIViewPropertyAnimator = {
    let cubicTiming = UICubicTimingParameters(controlPoint1: CGPoint(x: 0.17, y: 0.67), controlPoint2: CGPoint(x: 0.76, y: 1.0))
    return UIViewPropertyAnimator(duration: 0.3, timingParameters: cubicTiming)
}()
Alternatively, instead of using cubic synchronization parameters, you can also use spring synchronization, for example:
    let springTiming = UISpringTimingParameters(mass: 1.0,
                                                stiffness: 2.0,
                                                damping: 0.2,
                                                initialVelocity: .zero)
Try to start the project again and see what happens.
Conclusion
Through UIViewPropertyAnimator, you can enhance static screens and user interaction through interactive animations.
I know that you cannot wait to realize what you have learned in your own project. If you apply this approach in your project, it will be very cool, let me know about this by leaving a comment below.
As a reference, here you can download the final draft .
Further links
Professional animations using UIKit - https://developer.apple.com/videos/play/wwdc2017/230/
UIViewPropertyAnimator Apple Developer Documentation - https://developer.apple.com/documentation/uikit/uiviewpropertyanimator