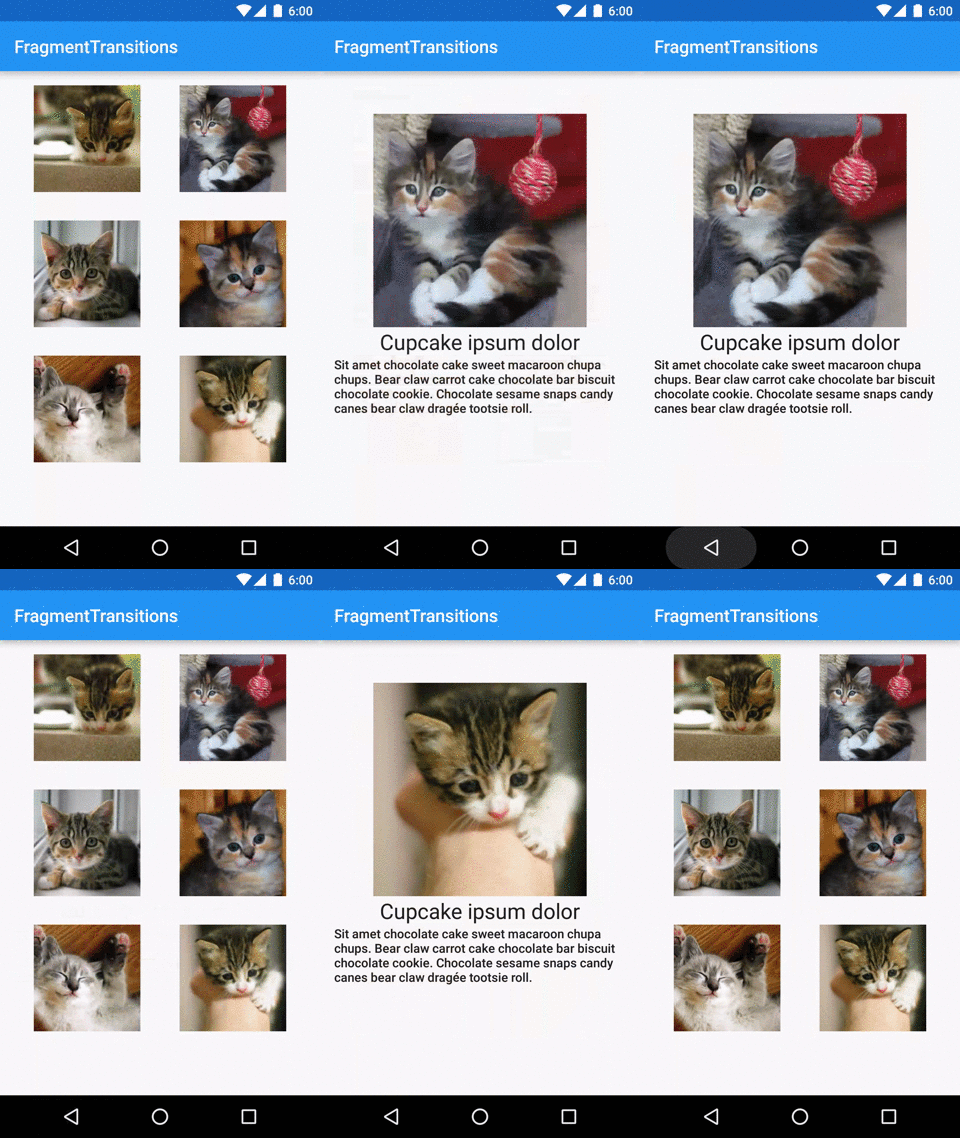
Animation of transitions between two fragments
- Transfer
 One of the cornerstones in Material design is the meaningful movement between the screens. Lollipop provides support for these animations in the form of a transition framework between Activity and Fragment. Since there are not many articles on this topic, I decided to write my own!
 Our final product will be quite simple. We will make a gallery application with cats. Clicking on the image will open a screen with details. Thanks to the framework, the transition from the image grid to the details window will be accompanied by animation.
If you want to see what happened - the finished application is on GitHub .
Support for previous versions of Android?
I have two news for you: good and bad. The bad news is that before Lollipop this framework does not work. Despite this, the problem is solved by the methods of the support library with which you can implement the animated transitions available in API 21+.
This article will use features from the support library to enable content movement.
Transition Names
For the association View on the first screen and its double on the second, you need a connection. Lollipop suggests using the “ transition name ” property to communicate with
Vieweach other. There are two ways to add a transition name for your View:
- In the code you can use
ViewCompat.setTransitionName(). Of course, you can also just callsetTransitionName()if support starts with Lollipop. - To add to XML, use the attribute
android:transitionName.
It is important to note that within a single layout ( layout ), transitions names must be unique. Keep this in mind when organizing transitions. Specifying a transition name for
ListViewor RecyclerViewwill set the same name for all other elements.Setting up FragmentTransaction
The setting
FragmentTransactionsshould be very familiar to you:getSupportFragmentManager()
.beginTransaction()
.addSharedElement(sharedElement, transitionName)
.replace(R.id.container, newFragment)
.addToBackStack(null)
.commit();
To indicate which View we will pass between fragments, we use the method
addSharedElement(). The View passed to
addSharedElement()this View from the first fragment that you want to share with the second fragment. The transition name here is the name of the transition in the shared View in the second fragment.Customize transition animations
Finally, the moment has come when we will set the transition animation between fragments.
For
shareditems:- To go from the first fragment to the second, we use the method
setSharedElementEnterTransition(). - To go back, use the method
setSharedElementReturnTransition(). Animation will happen when you press the back button.
Note that you need to call these methods in the second fragment, because if you do this in the first, nothing will happen.
You can also animate transitions for all non-shared View. For this View, use the
setEnterTransition(), setExitTransition(), setReturnTransition(), and setReenterTransition()in the corresponding fragments. Each of these methods takes one parameter
Transitiondesigned to perform the animation. Creating animations will be very simple. We use our custom transition to move the image (more on that later), and disappear (
Fade) upon exit.Transition Animation Classes
Android provides some pre-made transition animations that suit most cases.
FadePerforms a fade animation. Slideanimates the appearance / disappearance transition by sliding from the corner of the screen. Explodean explosion-like animation, the image moves from the edges of the screen. And finally, AutoTransitionmake the image fade, move and resize. These are just some examples from the move package, there are actually a lot more! I mentioned that we need a custom transition for our image. There he is:
public class DetailsTransition extends TransitionSet {
    public DetailsTransition() {
        setOrdering(ORDERING_TOGETHER);
        addTransition(new ChangeBounds()).
                addTransition(new ChangeTransform()).
                addTransition(new ChangeImageTransform()));
    }
}
Our custom transition is nothing more than a set of three ready-made transitions assembled together:
ChangeBoundsanimates the borders (position and size) of our view.ChangeTransformanimates the view scale, including the parent.ChangeImageTransformallows us to resize (and / or scale type) our image
If you are interested in learning how the three of them interact, try playing with the application, alternately removing one or the other animation, watching how everything breaks down.
You can also create more complex animations using XML. If you prefer XML, then you will be interested to see the documentation on the android website .
Transition
Together
The code that we ended up with turned out to be quite simple:
DetailsFragment details = DetailsFragment.newInstance();
// Note that we need the API version check here because the actual transition classes (e.g. Fade)
// are not in the support library and are only available in API 21+. The methods we are calling on the Fragment
// ARE available in the support library (though they don't do anything on API < 21)
if (Build.VERSION.SDK_INT >= Build.VERSION_CODES.LOLLIPOP) {
    details.setSharedElementEnterTransition(new DetailsTransition());
    details.setEnterTransition(new Fade());
    setExitTransition(new Fade());
    details.setSharedElementReturnTransition(new DetailsTransition());
}
getActivity().getSupportFragmentManager()
        .beginTransaction()
        .addSharedElement(holder.image, "sharedImage")
        .replace(R.id.container, details)
        .addToBackStack(null)
        .commit();
That's all! An easy way to implement transition animations between two fragments is ready!
