Lazarus - write component for sprite animation
- Tutorial
Instead of the preface
In the Odessa school, students of the 8th grade at computer science lessons use the free Lazarus cross-platform development environment ( official website ), which outwardly and internally resembles the favorite by many Delphi, using the version of Object Pascal called Free Pascal and in fact greatly simplifies the process of entering programming.
But children are not interested in writing a program for calculating the force of gravity using the formula F = mg, which is not yet understood by them. Almost all the children I tried to teach programming, from the first lesson they want to write a game. Fortunately, Lazarus is also great for writing simple games.
However, to create animated sprites, I needed a component that represents an arbitrary image fragment (which shows several different projections of the same character in different phases of the movement), but there is no such component in the standard package. It turned out to be quite easy to write it myself, and I want to tell about this technology in this article.
To display fun graphic content instead of a dry business set of standard components in Lazarus (as in Delphi) there are 3 components on the Additional tab:
- TImage (displaying a picture from an arbitrary file);
- TShape (display of one of several predefined graphics primitives);
- TPaintBox (display canvas, on which you can draw programmatically).
The most spectacular for the student is to load a small sprite into a TImage and write a program to move it around the screen - on mouse / keyboard events, automatically in a loop, or automatically on an event from the timer.
As soon as it starts to work, the student has the following legitimate question: is it possible to make the character move? And is it possible to make it so that he does not constantly look at us, but turn in the direction coinciding with the direction of movement?
On the Web, you can find a large number of ready-made images for use in game development. And many characters are pre-designed in several projections and several animation frames (as, for example, here on this site ).
Here is an example of an image where the sprites are arranged in a table, in which each row corresponds to a certain projection, and each column corresponds to a certain phase of the animation:
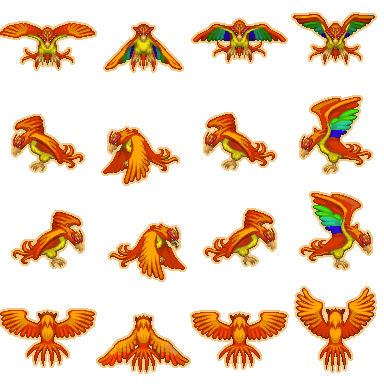
Why so many pictures?
Для отображения такого спрайта достаточно поместить на экран простой компонент, отображающий не все изображение целиком, а только один его фрагмент; и затем, меняя смещение выделенного фрагмента по горизонтали и вертикали, можно заставить персонаж поворачиваться в разные стороны и совершать циклические движения (например, махи крыльями или шаги ногами). Такой прием часто используется при веб-разработке: даже простые наборы иконок для деловой графики часто размещают в одном файле и отображают в разных местах страницы с разным смещением, создавая впечатление разных изображений.
Unfortunately, the TImage component included in the standard delivery of Lazarus (and Delphi) does not allow to show an arbitrary fragment of the image: by changing its properties, we can make it show only the entire image, the upper left corner or its central part. To display an arbitrary fragment of the image, given the displacement and dimensions along both axes, some other component is needed. But as it turned out, making it yourself in Lazarus is a snap!
Create a new component
As an instruction for creating components, I used the official manual .
Everything is written there in sufficient detail, duplicating does not make sense. I will only dwell on some points.
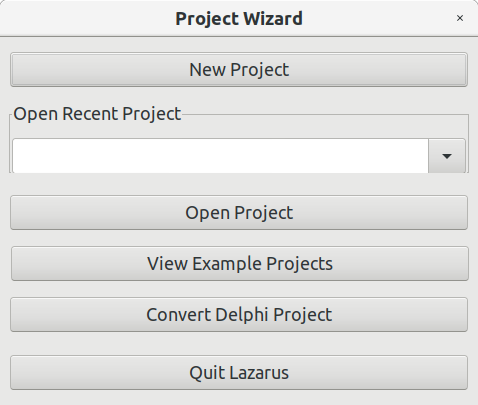
1. Standard Project Wizard does not offer us to create a package, and in order to somehow get access to the editor, select “New Project” (in the Russian version - “New Project”)
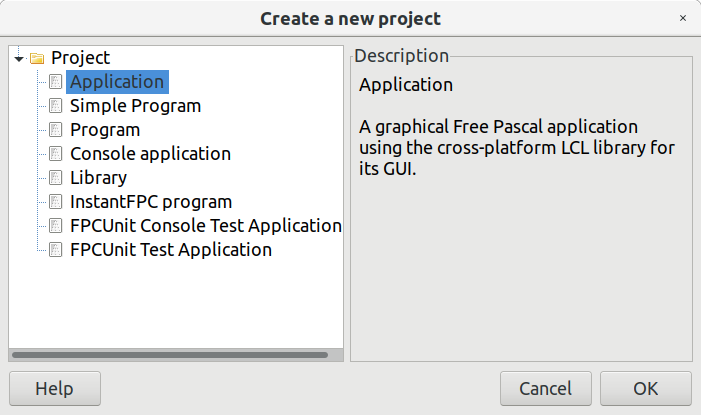
and then "Application" (in the Russian version - "Application"):
2. Acting further on the instructions, in the “Package” menu (in the Russian version - “Package”), select the top item “New Package ...” (in the Russian version - “New Package ...”), select the file name and path to save. I called my new package “Game” and placed it in a separate folder with the same name:
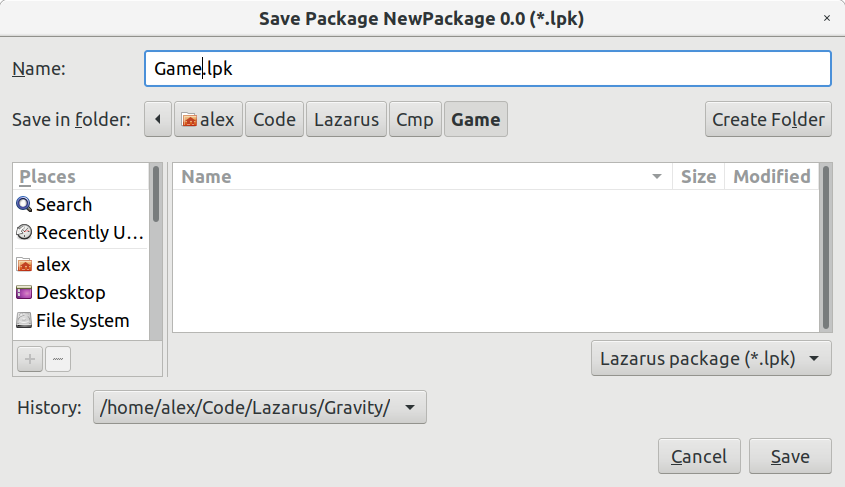
I created a separate Lazarus / Cmp folder with the expectation that I may have several different packages with components, and already in this folder I created the “Game” folder.
If everything is done correctly, a new (still empty) package window should appear on the screen.
3. Acting further again according to the instructions, to create a new component in the package window, click the “Add” button (in the Russian version - “Add”) and in the drop-down list select “New Component” (in the Russian version - “New Component”):
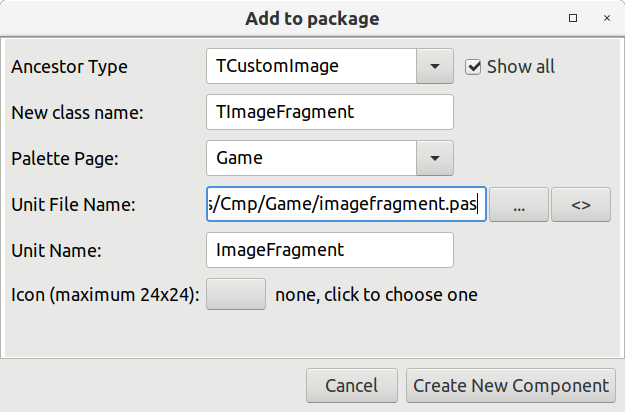
We specify TCustomImage as an ancestor class - this class is actually used to implement the TImage component, but differs from it in that it does not contain published properties and allows us to determine the set of properties that will be available in the designer for our component.
What is published properties?
Для тех, кто этого не знает, уточню, что published — это раздел класса (наподобие public), в котором описываются новые или просто указываются унаследованные свойства, которые должны быть доступны в визуальном редакторе свойств на этапе разработки программы. Промежуточные классы не объявляют ничего в этой секции, оставляя возможность программисту самому вынести туда то, что он сочтет нужным. Так, класс TImage не добавляет никакой функциональности, а только помещает в раздел published ряд свойств, унаследованных от родителя TCustomImage. Часть из этих свойств нам нужно спрятать, поэтому мы также унаследуем наш новый компонент от TCustomImage и выведем в published только то, что не противоречит логике нашего компонента.
Icon for component
Хорошим стилем было бы рисовать персональную иконку для каждого нового компонента, но так как наша задача — показать, как это все просто, мы оставим это поле пустым, что приведет к отображению на панели инструментов стандартной иконки, используемой в Lazarus/Delphi для всех самодельных компонентов.
Кстати, упомянутая выше инструкция содержит отдельный раздел, посвященный созданию иконок для компонентов — это для тех, кого не устраивает «дефолтная» иконка.
Кстати, упомянутая выше инструкция содержит отдельный раздел, посвященный созданию иконок для компонентов — это для тех, кого не устраивает «дефолтная» иконка.
Having filled in all the fields, we press the button “Create New Component” (in the Russian version - “Create a new component”).
Add code to new component
Immediately after creating a new component, its source code is approximately as follows:
unit ImageFragment;
{$mode objfpc}{$H+}interfaceuses
  Classes, SysUtils, LResources, Forms, Controls, Graphics, Dialogs;
typeTImageFragment = class(TCustomImage)
  privateprotectedpublicpublishedend;
procedureRegister;implementationprocedureRegister;begin
  RegisterComponents('Game', [TImageFragment]);
end;
end.
As expected, the class declaration is completely empty, and there is no implementation at all. All that is - the registration function of the component on the tab "Game".
We need to add several inherited published properties, create two of our own and override one virtual function. Let's get started!
0. In the import section, we will need two additional modules: ExtCtrls and LCLProc - we add them to the uses section:
uses
  Classes, SysUtils, LResources, Forms, Controls, Graphics, Dialogs, ExtCtrls, LCLProc;
1. Add the list of published properties, completely similar to the TImage component, with the exception of several properties that allow you to change the scale and position of the image:
publishedproperty AntialiasingMode;
    property Align;
    property Anchors;
    //property AutoSize;property BorderSpacing;
    //property Center;//property KeepOriginXWhenClipped;//property KeepOriginYWhenClipped;property Constraints;
    property DragCursor;
    property DragMode;
    property Enabled;
    property OnChangeBounds;
    property OnClick;
    property OnDblClick;
    property OnDragDrop;
    property OnDragOver;
    property OnEndDrag;
    property OnMouseDown;
    property OnMouseEnter;
    property OnMouseLeave;
    property OnMouseMove;
    property OnMouseUp;
    property OnMouseWheel;
    property OnMouseWheelDown;
    property OnMouseWheelUp;
    property OnPaint;
    property OnPictureChanged;
    property OnPaintBackground;
    property OnResize;
    property OnStartDrag;
    property ParentShowHint;
    property Picture;
    property PopupMenu;
    //property Proportional;property ShowHint;
    //property Stretch;//property StretchOutEnabled;//property StretchInEnabled;property Transparent;
    property Visible;
  end;
For greater certainty, I did not delete, but commented out the properties that are in the TImage component, but will interfere in our new TImageFragment component.
2. Add two new properties to the class declaration to set the image displacement horizontally and vertically:
private
    FOffsetX: Integer;
    FOffsetY: Integer;
    procedureSetOffsetX(AValue: Integer);procedureSetOffsetY(AValue: Integer);publishedproperty OffsetX: Integer read FOffsetX write SetOffsetX default0;
    property OffsetY: Integer read FOffsetY write SetOffsetY default0;
and do not forget to add two declared procedures to the implementation of the class:
implementationprocedureTImageFragment.SetOffsetX(AValue: Integer);beginif FOffsetX = AValue thenexit;
  FOffsetX := AValue;
  PictureChanged(Self);
end;
procedureTImageFragment.SetOffsetY(AValue: Integer);beginif FOffsetY = AValue thenexit;
  FOffsetY := AValue;
  PictureChanged(Self);
end;
3. Override the DestRect virtual function:
publicfunctionDestRect: TRect; override;
and add its implementation to the class implementation:
functionTImageFragment.DestRect: TRect;
begin
  Result := inherited DestRect();
  if (FOffsetX <> 0) or (FOffsetY <> 0) then
    LCLProc.OffsetRect(Result, -FOffsetX, -FOffsetY);
end;
Compile the package and reassemble Lazarus
1. In the package window, click the “Compile” button (in the Russian version - “Compile”). If everything is done correctly, a green inscription on successful compilation will appear in the message window; if not, the inscription will be yellow or red.
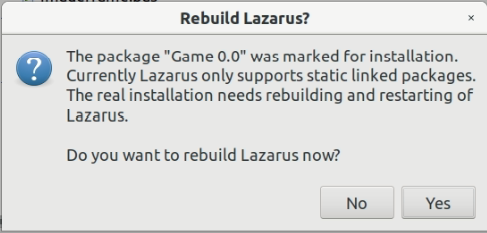
2. In the same window, click on the “Use” button (in the Russian version - “Use”) and select the second “Install” item in the drop-down menu (in the Russian version - “Install”). The program will offer to rebuild and restart IDE - we agree:
3. After the restart, a new tab “Game” will appear on the toolbar, and on it - an icon for our new component.
Instead of an afterword
In the following Lazarus article - simple animation using the TImageFragment component, I described how such a component can be used - in 5 minutes to create a window in which the animated character moves in different directions and turns in the direction of the movement.
If the topic turns out to be interesting to readers, I can supplement this cycle with an article about how, having spent a little more time, you can do, for example, a football field with a pair of players, controlled from the keyboard.
And if there is enough time and desire - I will try to write different algorithms for controlling characters (for example, football players) and arrange competitions between them!
