How to Screen Record on Windows 11 Without Software: The Complete Guide
You don't need to download a third-party screen recorder—Windows 11 ships with three distinct built-in capture tools, each designed for different tasks. Whether you need a quick video clip for IT support, a narrated software tutorial, or a high-quality recording of an app window, this guide walks you through every native method, their limitations, and exactly when to use each one.
Table of Contents
- Method 1: Xbox Game Bar – Best for App & Game Recording
- Method 2: Snipping Tool – Best for Region Recording with Audio
- Method 3: Steps Recorder (psr.exe) – Best for IT Support Documentation
- Comparison Table: Which Built-In Tool Should You Use?
- Key Takeaways
- Frequently Asked Questions
Method 1: Xbox Game Bar – Best for App & Game Recording
The Xbox Game Bar is Windows 11's primary built-in screen recorder. Despite its gaming-focused name, it captures any application window—browsers, software demos, video calls, and games alike .
What It Can and Cannot Record
| ✅ Can Record | ❌ Cannot Record |
|---|---|
| Any open application or game window | File Explorer windows |
| Specific program interfaces | The desktop background or taskbar |
| System audio + microphone simultaneously | Multiple monitors at once (only the active window) |
| Background recording ("record what happened") | UAC prompt elevation screens |
Critical limitation documented on Microsoft Q&A: The Game Bar cannot record the desktop, File Explorer, or system-level activities—it only captures individual apps or games .
Step-by-Step Instructions
Step 1: Enable Game Bar (if not already on)
- Open Settings (
Windows + I) → Gaming → Xbox Game Bar - Toggle "Enable Xbox Game Bar" to On
Step 2: Open Game Bar
- Press
Windows + Gon your keyboard - If prompted, check "Yes, this is a game"—this works for non-game apps as well
Step 3: Start Recording
- Click the Record button (circle icon) in the Capture widget, OR
- Use the keyboard shortcut:
Windows + Alt + R
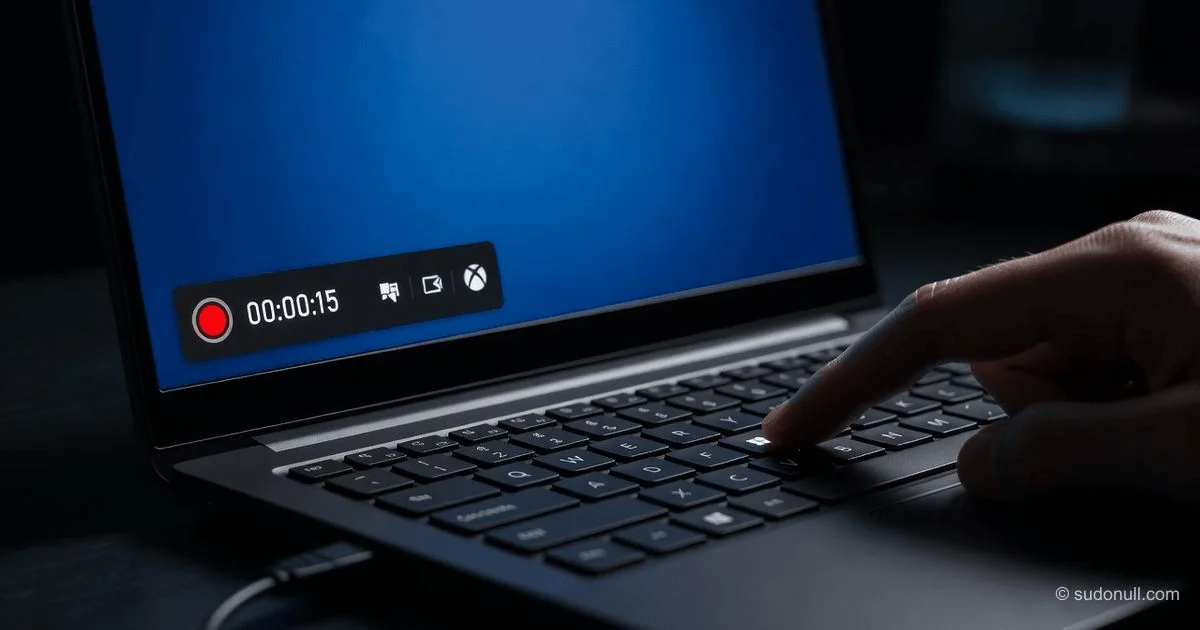
A small recording timer bar appears on screen while recording runs.
Step 4: Stop Recording
- Press
Windows + Alt + Ragain, OR - Click the Stop button on the recording bar
Step 5: Find Your Recording
- Navigate to
C:\Users\[YourUsername]\Videos\Captures - Files save as MP4 format
Advanced Game Bar Features
Record the last 30 seconds (background recording):
Press Windows + Alt + G to save the previous 30 seconds of screen activity. This requires enabling "Record what happened" in Settings → Gaming → Captures .
Configure audio before recording:
- In Game Bar, click the Audio widget
- Toggle microphone on/off independently from system audio
- Adjust volume sliders for each source
Change recording quality: Navigate to Settings → Gaming → Captures to adjust:
- Video frame rate: 30 fps (default) or 60 fps
- Video quality: Standard or High
- Audio quality: Bitrate settings for microphone and system audio
⚠️ Performance Warning
For users with lower-end PCs or when recording demanding games/applications: The Game Bar can cause lag, stuttering, or frame drops in both the recording and the application itself. Recorded videos may appear choppy or have missing segments . If you experience performance issues, close background applications before recording or use the Snipping Tool method below for lighter-weight capture.
Method 2: Snipping Tool – Best for Region Recording with Audio
This method works only on Windows 11 builds 22621.1344 or higher. To check your version: Settings → System → About → Windows specifications .
The Snipping Tool evolved from a simple screenshot utility into a full video screen recorder that captures selected regions of your screen—perfect for highlighting a specific browser tab, settings panel, or application area without recording your entire display.
Step-by-Step Instructions
Step 1: Open Snipping Tool
- Press
Windows + S, type "Snipping Tool", and open it - Alternatively, press
Windows + Shift + Rto open the video capture overlay directly
Step 2: Switch to Video Mode
- Click the Video icon (camera icon with a dot) on the toolbar
Step 3: Select Recording Area
- Click New
- Drag the crosshair cursor to draw a rectangle around the area you want to record
Step 4: Configure Audio (Optional)
- Click the three dots (…) in the top-right → Settings
- Scroll to Screen recording
- Toggle "Include microphone input" for voice narration
- Toggle "Include system audio" to capture computer sounds
Step 5: Start Recording
- Click Start (a 3-second countdown begins)
- Perform your on-screen activity
Step 6: Stop and Save
- Click the Stop button (red square) in the floating toolbar
- The recording opens in a preview window
- Click Save (floppy disk icon) to save as MP4, or
- Click Edit in Clipchamp for trimming and enhancements
Known Audio Limitation
Based on user reports in Microsoft Q&A forums: When using wireless headphones, the Snipping Tool may fail to capture both system audio and microphone simultaneously. Some users report that only their voice records while the trainer's voice (system audio) drops out. If you encounter this, try disconnecting wireless headphones or using wired audio devices .
Method 3: Steps Recorder (psr.exe) – Best for IT Support Documentation
The Steps Recorder (formerly Problem Steps Recorder) is Windows' oldest and most specialized capture tool. Unlike video recorders, it creates a click-by-click HTML report with screenshots and annotations—the industry standard for documenting reproducible bugs for IT support teams .
What Steps Recorder Captures
| ✅ Captures | ❌ Does NOT Capture |
|---|---|
| Every mouse click | Full-motion video |
| Window titles and UI elements | Mouse movement trails |
| Screenshot of each step | Password or secure field input |
| Timestamps per action | Audio of any kind |
| Custom comments you add | Animated transitions |
Step-by-Step Instructions
Step 1: Launch Steps Recorder
- Press
Windows + Rto open Run - Type
psrand press Enter
Note: On some Windows 11 builds, Steps Recorder may not appear in Start Menu search. The
psrRun command always works .
Step 2: Configure Settings (Critical)
- Click the down arrow (or Help ▼) to expand options
- Click Settings
- Enable screen capture: Yes (required for screenshots)
- Number of recent screen captures: Increase from 25 to 50 or 100 for longer workflows
- Output location: Leave blank to be prompted at save time
Step 3: Start Recording
- Click Start Record
- Reproduce the problem exactly as it happens—pause briefly after each click so screenshots clearly show results
Step 4: Add Comments (Highly Recommended)
- When something important occurs that a screenshot won't fully explain, click Add Comment
- Drag the highlight box over the relevant screen area
- Type a note (e.g., "The window freezes for 30 seconds after this click")
- Click OK
Step 5: Stop and Save
- Click Stop Record
- Review the preview window for sensitive information
- Click Save → name your file (e.g.,
Outlook_Search_Error_Jan2026.zip)
Step 6: Send to IT Support
- Attach the
.zipfile to your support ticket or email - In your message, include: Windows version/build, app name/version, whether the issue is intermittent, and any recent system changes
⚠️ Privacy Warning
Steps Recorder may capture sensitive information displayed on your screen—email content, customer data, internal URLs, or personal information. Always review the preview before sending the report. Do not record password managers, MFA prompts, HR/payroll pages, or patient/customer data unless explicitly authorized .
Comparison Table: Which Built-In Tool Should You Use?
| Feature | Xbox Game Bar | Snipping Tool | Steps Recorder (psr) |
|---|---|---|---|
| Best for | App demos, gameplay, tutorials | Specific screen regions, narrated clips | IT bug reports, documentation |
| Output format | MP4 video | MP4 video | ZIP with HTML + screenshots |
| Audio recording | ✅ System + mic | ✅ System + mic (build dependent) | ❌ No audio |
| Full desktop recording | ❌ Apps only | ✅ Any region | ✅ Screenshots only |
| File size | Large (video) | Large (video) | Very small (HTML + images) |
| Editing built-in | ❌ | ✅ Clipchamp integration | ❌ |
| Keyboard shortcuts | Win+Alt+R (start/stop) |
Win+Shift+R |
None (Run command only) |
| Performance impact | Moderate to High | Low | Negligible |
| Watermark | None | None | None |
Key Takeaways
Three built-in recorders exist for different jobs: Xbox Game Bar records app windows as video, Snipping Tool records screen regions with audio, and Steps Recorder documents clicks for IT support.
Xbox Game Bar cannot record the desktop or File Explorer—it captures only individual application windows. This is an intentional design limitation .
Snipping Tool requires Windows 11 build 22621.1344 or higher for video recording. Check your version in Settings → System → About .
Steps Recorder is the lightest-weight option with zero performance impact, but produces HTML reports, not video files. Use it for bug reports, not tutorials .
All three tools produce watermark-free output and are completely free—they come pre-installed with Windows 11.
Frequently Asked Questions
1. Can I record my entire desktop including the taskbar?
No, not with built-in tools. The Xbox Game Bar only records individual application windows. The Snipping Tool can record any screen region you select—if you draw the rectangle to include the taskbar, it will capture that area. However, neither tool records multiple monitors simultaneously. For full desktop recording, third-party software like OBS Studio (free) is required .
2. Why is my Game Bar recording laggy or stuttering?
Based on user reports in Microsoft forums, this typically occurs on lower-end PCs or when recording resource-intensive applications (especially games like Minecraft). Solutions: Close background apps before recording, reduce video quality in Settings → Gaming → Captures (use 30 fps instead of 60 fps), or switch to the Snipping Tool for lighter-weight capture. You can also try repairing the Xbox Game Bar via Settings → Apps → Installed apps → Xbox Game Bar → Advanced options → Repair/Reset .
3. Can I record system audio and my microphone at the same time?
Yes, with both Xbox Game Bar and Snipping Tool. In Game Bar, use the Audio widget to enable both sources. In Snipping Tool, go to Settings (three dots) → Screen recording and toggle both "Include microphone input" and "Include system audio." Note: Wireless headphones may cause issues with simultaneous audio capture—try wired audio devices if you encounter problems .
4. Where are my screen recordings saved by default?
- Xbox Game Bar:
C:\Users\[YourUsername]\Videos\Captures - Snipping Tool: Prompts you to choose a save location; defaults to Videos folder
- Steps Recorder: Prompts for save location; outputs a
.zipfile
5. How do I fix "Snipping Tool doesn't have the video option"?
Your Windows 11 build is likely older than 22621.1344. Solution: Go to Settings → Windows Update → Check for updates, then install all pending updates. Also open the Microsoft Store, go to Library, and update the Snipping Tool app. The video recording feature was added in a 2023 update .
6. Does Steps Recorder work on Windows 11?
Yes. Launch it by pressing Windows + R, typing psr, and pressing Enter. On some Windows 11 builds, it may not appear in Search results, but the Run command always works .
— Editorial Team






No comments yet.